Riding a Harley Davidson is an unmatched experience. But what if something goes wrong?
Understanding Harley Davidson troubleshooting codes can save time and stress. These codes help identify specific issues with your bike. Knowing them means you can fix problems quickly or tell a mechanic exactly what’s wrong. This guide will explain these codes, making it easier for you to maintain your Harley.
No more guessing what’s wrong with your bike. Stay tuned to learn how to decode and address these issues effectively. Your Harley deserves the best care, and understanding these codes is the first step.

Credit: www.hdforums.com
Introduction To Troubleshooting Codes
Harley Davidson troubleshooting codes help identify issues in your bike’s system. These codes make repairs easier and quicker. Knowing these codes saves time and keeps your ride smooth.
Harley Davidson motorcycles come with advanced diagnostic systems. These systems help identify potential issues. Troubleshooting codes are crucial for every Harley owner. They provide a simple way to pinpoint problems. Understanding these codes can save time and money. It also ensures your bike runs smoothly.Importance Of Codes
Troubleshooting codes are vital for maintaining your Harley. They alert you to problems early. Early detection prevents bigger issues. Regular checks can extend your bike’s lifespan. Knowing these codes helps you communicate with mechanics. It makes repairs faster and more accurate.Common Issues Detected
Several common issues can be detected through these codes. Faulty sensors often trigger codes. Problems with the fuel system are another common issue. Electrical malfunctions are frequently reported. Engine misfires can also be identified. These codes help spot issues before they escalate. “`Accessing Harley Davidson Codes
Accessing Harley Davidson codes can seem challenging. Yet, it’s essential for every rider. These codes help you understand the health of your bike. They can signal minor issues before they become big problems. Knowing how to access these codes can save you time and money. Let’s dive into the process.
Tools Needed
Before you start, gather the right tools. You’ll need a few simple items. A code reader is essential. Ensure it’s compatible with your Harley model. A pen and paper can help too. They let you jot down any codes you find. A good light source is useful. It helps you see the bike’s parts clearly.
Step-by-step Guide
First, turn on your bike. Do not start the engine. Just switch the ignition to the “On” position. Next, locate the diagnostic port. It’s usually under the seat or near the battery. Plug in your code reader. Follow the reader’s instructions. It will scan your bike for any codes.
Once the scan is complete, the reader will display the codes. Write them down. Each code corresponds to a specific issue. Refer to your bike’s manual to decode these numbers. The manual will explain what each code means. Address the issues as suggested in the manual. This step ensures your bike runs smoothly.
Interpreting The Codes
Harley Davidson motorcycles are known for their rugged reliability. Yet, they too encounter issues. That’s where troubleshooting codes come in. These codes help identify problems quickly. Interpreting these codes can seem daunting, but it doesn’t have to be.
Code Categories
Troubleshooting codes are split into categories. Each category targets a specific area of the bike. Understanding these categories helps in pinpointing issues faster.
- P-Codes: Powertrain issues, including engine and transmission.
- B-Codes: Body-related problems, like lighting and controls.
- C-Codes: Chassis issues, including brakes and suspension.
- U-Codes: Network communication problems.
Key Code Meanings
Each code has a specific meaning. Knowing these meanings can save time and effort. Below is a table of some common codes:
| Code | Meaning |
|---|---|
| P0107 | Manifold Absolute Pressure/Barometric Pressure Circuit Low |
| B1121 | Left Turn Output Fault |
| C0561 | System Disabled Information Stored |
| U1300 | Class 2 Data Link Low |
Understanding these codes helps in diagnosing issues accurately. For example, code P0107 indicates a problem with the pressure circuit. This points to a potential issue with the engine’s air intake system.
Similarly, code B1121 alerts you to a fault in the left turn signal. This makes it easier to fix electrical issues.
By learning these codes, you can maintain your Harley better. It also helps in communicating with mechanics. This ensures your bike runs smoothly and safely.
Engine Troubleshooting
Understanding your Harley Davidson’s engine codes is crucial. It helps you maintain your bike’s performance. Here, we will discuss common engine codes and ways to fix engine issues.
Common Engine Codes
Harley Davidson bikes have a range of engine codes. These codes indicate specific issues. Below is a table of common engine codes and their meanings.
| Code | Meaning |
|---|---|
| P0107 | Manifold Absolute Pressure (MAP) Sensor Low |
| P0131 | Oxygen Sensor Low Voltage |
| P0261 | Front Injector Open/Low |
| P0374 | Crank Position Sensor (CKP) Signal Erratic |
Fixing Engine Issues
Fixing engine issues starts with identifying the code. Once you know the code, you can take action. Here are steps to fix some common issues:
- P0107 – MAP Sensor Low: Check the MAP sensor connection. Ensure it is clean and secure. If the issue persists, replace the sensor.
- P0131 – Oxygen Sensor Low Voltage: Inspect the oxygen sensor wiring. Replace the sensor if damaged or faulty.
- P0261 – Front Injector Open/Low: Test the injector circuit. Ensure there are no open circuits or low voltage. Replace the injector if necessary.
- P0374 – CKP Signal Erratic: Check the crank position sensor wiring. Ensure the sensor is properly aligned. Replace the sensor if the problem continues.
Regular maintenance helps prevent engine issues. Always keep an eye on your bike’s performance. Address any engine codes promptly to ensure smooth rides.
Electrical System Diagnostics
The electrical system in a Harley Davidson motorcycle is complex. Understanding its diagnostic codes is crucial for smooth rides. This guide helps you navigate common electrical issues. It ensures you can keep your bike running efficiently.
Frequent Electrical Codes
Several electrical codes can appear on your Harley Davidson. Here are some common ones:
- B1004: Indicates a problem with the security system.
- B1154: Reflects an issue with the fuel pump relay.
- B1121/B1122: Signals a problem with the right or left turn signal.
- B2161: Points to a fault in the accessory line.
Recognizing these codes helps you identify the problem quickly.
Resolving Electrical Problems
Once you identify the code, follow these steps to resolve the issue:
- Check the Battery: Ensure it’s fully charged and connections are clean.
- Inspect Fuses: Replace any blown fuses with the correct type.
- Examine Wiring: Look for loose or damaged wires. Repair or replace as needed.
- Test Components: Use a multimeter to test the components associated with the error code.
- Clear the Code: After fixing the issue, clear the code using your bike’s diagnostic tool.
Addressing each step ensures your motorcycle operates smoothly. Regular maintenance and checks help prevent future issues.
Transmission And Drivetrain
Harley Davidson motorcycles are known for their power and style. But like any machine, they can experience issues. Understanding transmission and drivetrain troubleshooting codes can help you fix these problems. This section covers common transmission codes and tips for repairing the drivetrain.
Transmission Codes
Transmission issues can disrupt your ride. Knowing the codes helps in diagnosing the problem. Here are some common transmission codes:
| Code | Issue |
|---|---|
| B1121 | Gear position sensor |
| B1122 | Neutral switch |
| B1123 | Transmission speed sensor |
| B1124 | Transmission oil temperature sensor |
These codes can appear on your bike’s display. Refer to your manual for more details.
Drivetrain Repair Tips
Maintaining your drivetrain is crucial for a smooth ride. Here are some tips:
- Inspect the drive belt: Look for cracks or wear.
- Check the sprockets: Ensure they are not worn out.
- Lubricate moving parts: Use the right lubricant for your bike.
- Adjust belt tension: Follow your manual’s instructions.
- Replace worn parts: Do not delay replacing damaged components.
Regular checks can prevent major issues. Always keep your drivetrain in top shape.
Brake System Issues
Harley Davidson motorcycles are renowned for their performance and durability. Yet, brake system issues can arise, affecting your ride’s safety. Troubleshooting brake problems involves understanding brake codes and maintaining your brake system.
Brake Code Indicators
Brake code indicators help identify specific issues in your Harley Davidson’s brake system. These codes display on your bike’s dashboard or diagnostic tool. Common brake codes include:
- ABS Code 11: Indicates a problem with the ABS module.
- Code 22: Points to a faulty brake switch.
- Code 34: Suggests a low brake fluid level.
Understanding these codes is crucial. They guide you in pinpointing the exact issue, ensuring a more efficient troubleshooting process.
Brake Maintenance Solutions
Maintaining your Harley Davidson’s brake system can prevent many issues. Here are some practical solutions:
- Regular Inspections: Check your brake pads and rotors for wear.
- Fluid Checks: Ensure brake fluid levels are adequate. Use the recommended type.
- Clean Components: Keep brake calipers and discs clean. Remove debris and dirt.
- Replace Worn Parts: Don’t wait. Replace worn brake pads and rotors promptly.
By following these steps, you can maintain the efficiency of your brake system. This ensures a safer and smoother ride.
Preventative Measures
Preventative measures can help keep your Harley Davidson running smoothly. Regular check-ups and being aware of common issues can save you time and money. By following these steps, you can avoid many troubleshooting codes.
Regular Maintenance
Perform regular maintenance on your Harley Davidson. Change the oil every 3,000 to 5,000 miles. Check the tire pressure often. Inspect the brake pads and fluid levels. Look for any leaks or unusual noises. Regular maintenance can prevent many issues before they start. It keeps your bike in top shape and reduces the chance of error codes.
Avoiding Common Pitfalls
Many common pitfalls can lead to troubleshooting codes. Avoid these to keep your Harley Davidson running well. Do not ignore warning lights. They indicate issues that need immediate attention. Use the correct fuel type. Using the wrong fuel can cause engine problems. Do not overload your bike. Excess weight can strain the engine and other parts. Keep the battery clean and charged. A weak battery can cause many electrical issues. Following these tips can help you avoid common problems and keep your bike running smoothly.
When To Seek Professional Help
Harley Davidson motorcycles are known for their reliability and performance. Yet, even the best machines sometimes need expert attention. Knowing when to call in a professional can save you time and money. Below are some clear signs and tips to help you decide when to seek professional help for your Harley Davidson troubleshooting codes.
Signs You Need A Pro
- Persistent Error Codes: If the same error code keeps appearing, it’s time to seek help. Some issues are not easy to fix at home.
- Unusual Noises: Strange sounds can indicate deeper problems. A mechanic can diagnose and fix these issues.
- Performance Drops: A noticeable drop in your bike’s performance is a warning sign. A professional can identify the root cause.
- Electrical Issues: Electrical problems are tricky. They require specialized tools and knowledge.
- Engine Trouble: Engine issues are complex. Immediate professional help can prevent further damage.
Finding A Trusted Mechanic
Choosing the right mechanic is crucial. Here are some steps to ensure your Harley gets the best care:
- Research: Look for mechanics with good reviews. Check online forums and Harley Davidson communities.
- Certifications: Ensure the mechanic has the necessary certifications. Certified professionals have the right training and skills.
- Experience: Experience matters. Find a mechanic who has worked on Harley Davidson bikes for several years.
- Ask Questions: Don’t hesitate to ask questions. A good mechanic will explain the issues and the repair process clearly.
- Get Estimates: Request estimates from multiple mechanics. Compare their rates and services before making a decision.
By following these guidelines, you can ensure your Harley Davidson gets the expert care it deserves. Regular maintenance and timely professional help can keep your bike running smoothly for years.

Credit: www.scribd.com
Credit: www.youtube.com
Frequently Asked Questions
What Are Harley Davidson Error Codes?
Harley Davidson error codes indicate specific problems. They help in diagnosing and troubleshooting bike issues.
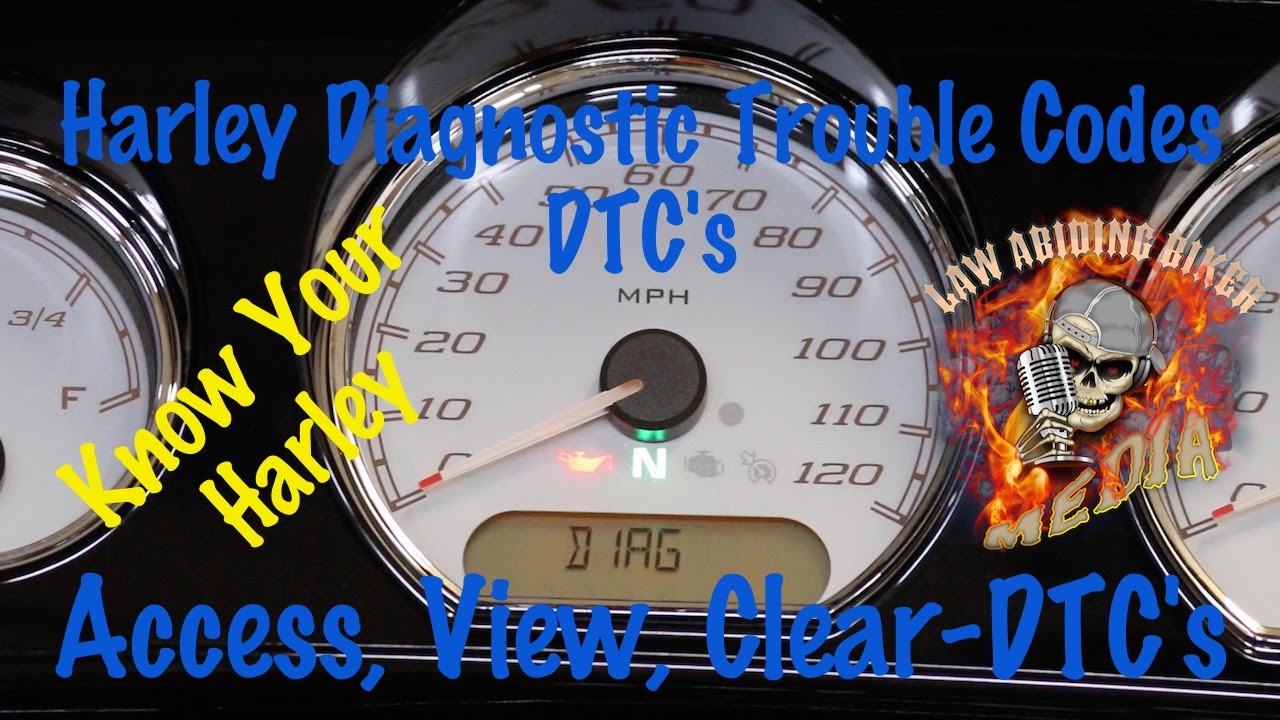
How Can I Read Harley Davidson Codes?
Use the odometer button to enter diagnostic mode. Scroll through to view each error code.
What Does The Code P0131 Mean?
Code P0131 means the oxygen sensor voltage is low. It affects the fuel mixture.
How To Clear Harley Davidson Trouble Codes?
Turn the ignition on and off three times. This resets and clears the codes.
Can I Ride With Active Error Codes?
Riding with active error codes is risky. It can cause more damage or unsafe conditions.
Conclusion
Understanding Harley Davidson troubleshooting codes helps keep your bike running smoothly. Regular checks ensure minor issues don’t become major problems. Always refer to your manual for accurate information. A well-maintained Harley means more enjoyable rides. Keep your bike in top shape for safety and performance.
Troubleshooting codes provide valuable insight. Don’t ignore the warning signs. Your Harley will thank you with better performance. Happy and safe riding!
")