To fix most issues with your freeze dryer, you should perform standard harvest right troubleshooting by checking your vacuum pump oil and door seal integrity first. The most common cause for failed cycles is a lack of a proper vacuum seal, which often stems from contaminated oil or a dirty gasket. If your machine isn’t reaching the required vacuum pressure, it can’t freeze dry your food effectively.
Troubleshoot your Harvest Right performance
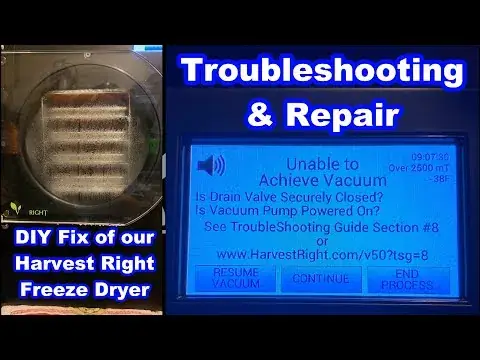
When your machine fails to complete a cycle or shows an error, it’s usually because the internal environment isn’t stable. The system relies on a very low pressure to turn ice into vapor without melting it. If this pressure is too high, the food will spoil or stay wet. Most errors occur because the vacuum pump can’t pull enough air out of the chamber.
You should first inspect the vacuum pump oil level and color. If the oil looks like chocolate milk, it has moisture in it and must be changed. Moisture in the oil prevents the pump from reaching the deep vacuum needed for the process. If the oil is clear but low, the pump will run hot and eventually shut down to protect itself.
Another cause is a damaged or dirty door seal. Even a tiny piece of debris, like a crumb or a hair, can break the airtight seal. If the door doesn’t close perfectly, air leaks back into the chamber. This forces the pump to work harder than it should.
You can check the Harvest Right support documentation for specific error code meanings and recommended maintenance schedules for your model. If you hear a loud hissing sound while the pump runs, you have a leak that needs immediate attention.
Safety: Inside a mains-powered machine, the parts behind the outer cover can hold a dangerous electrical charge even after it has been unplugged — that’s why they sit behind a cover. Opening the housing, or testing or replacing anything behind it, is a job for a qualified technician, never a home repair.
Clean and inspect the door gasket
The door seal is the most important part of your machine. If it isn’t clean, the vacuum will never hold. You should wipe the gasket with a damp cloth after every single cycle. Remove any food particles or sugar that might be stuck to the rubber.
Once the gasket is clean, inspect it for cracks or flat spots. If the rubber feels hard or shows visible tears, it won’t seal against the stainless steel chamber. You can apply a very light coat of food-grade silicone grease to the seal to help it stay flexible. Don’t use too much, as this can actually trap debris.
If the door still feels loose, check the latch tension. The handle should feel firm when you close it. If it feels too easy to move, the latch might need adjustment. Use a small wrench to tighten the nut on the latch assembly until the door requires firm pressure to lock.
If you have tried cleaning and lubricating the gasket and the vacuum still fails to hold, the rubber may be permanently deformed. In this case, you should order a replacement gasket from the manufacturer to ensure a proper fit.
If you see frost forming on the outside of the door during a cycle, the seal is already failing. Replace the gasket immediately to prevent the vacuum pump from overworking and burning out prematurely.
Change the vacuum pump oil
The vacuum pump is the heart of your Harvest Right freeze dryer. It needs clean oil to pull the air out of the chamber effectively. If you don’t change the oil when it becomes cloudy, the pump will struggle. You should change the oil after every batch of food, especially if you’re processing items with high water content.
To change the oil, place a catch pan under the drain valve on the side of the pump. Open the valve and let the old, dirty oil flow out completely. Close the valve once the flow stops. Pour in new, clean vacuum pump oil until the level reaches the middle of the sight glass. Don’t overfill the pump, as this can cause it to spray oil out of the exhaust filter.
Check the oil color before every run. If the oil looks like chocolate milk, it has been contaminated by water vapor. Running the pump with milky oil forces the internal vanes to grind against the housing, which permanently ruins the vacuum seal. If you notice this color change, change the oil immediately regardless of how many batches you have run.
If the pump is making a loud knocking noise, turn it off immediately. This is a sign of internal damage or a major blockage. If you aren’t comfortable performing a full oil change or if the pump remains noisy after a fresh change, you should contact a professional service technician. Running a damaged pump can lead to a total motor failure that’s much more expensive to fix.
Check for frozen drain lines
Sometimes the machine finishes a cycle, but you find water left in the bottom of the chamber. This often happens because the drain line is clogged or frozen. The drain line carries moisture away from the chamber as it melts. If this path is blocked, the water has nowhere to go.
Check the drain hose at the back of the unit. Ensure it isn’t kinked, pinched, or sitting in a puddle of water. If you notice ice inside the hose, it means the drain wasn’t fully thawed before the pump shut off. You can use a hair dryer on a low, cool setting to gently warm the hose if it’s blocked by ice.
Never use sharp tools to poke into the drain line. You could puncture the hose or damage the internal plumbing. If the line is clear but water still pools in the chamber, the drain valve itself might be stuck.
If the drain hose sits lower than the drain port, gravity will trap water inside the line, causing it to freeze solid during the next cycle. Ensure the hose maintains a constant downward slope away from the machine. If you see water backing up into the moisture trap, the drain valve is likely obstructed by food debris. Clear the valve by flushing it with warm water.
If you can’t clear the blockage by hand, stop using the machine and contact support. A blocked drain can cause water to back up into the vacuum pump, which will ruin it quickly.
Common mistakes that cause errors
Adding too much food to the trays prevents proper airflow and causes the machine to struggle to remove all the moisture. Limit your load to no more than 1.5 pounds of food per tray. If you exceed this weight, the Harvest Right unit will likely fail to complete the drying cycle within the standard 24-hour window.
Starting the machine with warm food forces the cooling system to work overtime. Always pre-freeze your items for at least 12 hours before starting a cycle. This simple step reduces the initial strain on your compressor and prevents ice buildup on the chamber walls.
Monitor your vacuum pump oil color closely. Dark or milky oil indicates the pump is struggling against trapped moisture, which leads to premature motor failure. If the oil appears cloudy, change it immediately to avoid a costly pump replacement.
Finally, ensure the drain valve is fully closed. An open valve prevents the machine from building any vacuum, causing an immediate error.
Preventing future performance issues
Proper care is the best way to keep your Harvest Right freeze dryer running for a long time. You should treat the machine as a precision instrument that requires regular cleaning and maintenance. If you follow a consistent routine, you’ll avoid most common errors and extend the life of your pump.
| If you’re doing this | Do this instead | Why |
|---|---|---|
| Leaving food in the trays | Clean trays after every batch | Prevents mold and sticky residues |
| Using tap water to clean | Use a damp cloth only | Excess water can damage sensors |
| Ignoring the oil level | Check oil before every cycle | Low oil causes the pump to overheat |
| Forcing the door shut | Clean the gasket and latch | Forcing it can bend the door frame |
| Storing in a hot room | Keep in a cool, dry area | Heat makes the cooling system work harder |
If the oil looks cloudy or smells like burnt food, change it immediately. Ignoring this schedule causes internal corrosion that ruins the pump seals.
If your machine sits idle for more than two weeks, run a dry cycle to clear moisture from the lines. This prevents mold growth inside the vacuum hose. Always ensure the machine sits at least six inches away from walls to allow for proper airflow. If the unit struggles to reach a vacuum, check for debris on the seal before calling support.
Related guides
- Harvest Right Troubleshooting Guide: To Fix Freeze Dryer Issues
- Whirlpool Cabrio Dryer Not Heating: Fix It Fast!
Frequently asked questions
Why does my freeze dryer show a vacuum error?
A vacuum error happens because the machine can’t pull the air out of the chamber fast enough to reach the target pressure. This is almost always caused by a leak in the door seal, a loose drain valve, or contaminated pump oil. Check your gasket for debris first, then inspect the oil. If both are fine, check that the drain valve is fully closed and the hose is secure.
Can I run the machine in my garage?
You can run the machine in a garage only if the temperature stays between 50°F and 80°F. The freeze dryer relies on air cooling to function; if the room is too hot, the internal compressor can’t remove enough heat. This will cause the machine to struggle, lead to longer cycle times, and potentially trigger a high-pressure error. Always ensure there’s at least 6 inches of space around all vents.
How long does a typical batch take?
A typical batch takes between 24 and 36 hours to complete, depending on the water content of the food. Items with high water content, like berries or soups, take much longer than dry goods like herbs or cooked grains. If your cycle is taking significantly longer than 40 hours, you should check your vacuum seal and ensure your pump oil is clean and fresh.
Is it safe to leave the machine running overnight?
It’s safe to leave the machine running overnight if you have performed all routine maintenance and the unit is in a well-ventilated area. The system is designed to run for long periods without human intervention. However, you should still check the oil levels and the door seal before starting any long cycle. Ensure the unit is on a stable, level surface where it won’t be disturbed.
Conclusion
If you’re still having trouble after these checks, don’t hesitate to reach out to the support team for extra guidance. They’ve seen it all and can help you get back to preserving your favorite foods. You’ll be running smooth cycles again in no time once you’ve got the right fix.