Is your microphone not working right when you need it most? Whether you’re on a call, recording a podcast, or streaming, a faulty mic can be incredibly frustrating.
But don’t worry—fixing your microphone might be easier than you think. In this guide, you’ll discover simple, effective steps to troubleshoot your microphone problems quickly. Keep reading to regain crystal-clear sound and never miss a word again. Your voice deserves to be heard perfectly every time.
Common Microphone Issues
Microphones often face common issues that affect sound quality. These problems can disrupt calls, recordings, or broadcasts. Understanding these issues helps fix them quickly. Below are some frequent microphone problems and their signs.
No Sound Output
This issue means the microphone does not pick up any sound. Check if the microphone is connected properly. Also, verify the device settings to ensure the microphone is selected. Sometimes, the mute button might be on. Faulty cables or broken hardware can also cause no sound.
Distorted Audio
Distorted audio sounds unclear or scratchy. It happens when the microphone receives too much sound. Adjust the input volume to a lower level. Dirty or damaged microphone grills can also cause distortion. Try cleaning or replacing the microphone if needed.
Intermittent Cutting
The sound cuts in and out during use. This problem may come from loose connections. Wireless microphones might lose signal from distance or obstacles. Check the cables and connectors for damage. Moving closer to the receiver can improve signal strength.
Background Noise Problems
Background noise makes it hard to hear the main sound. It can come from fans, traffic, or electronic devices. Use a noise-canceling microphone or move to a quieter area. Adjusting microphone sensitivity can reduce unwanted noise. Shielding the microphone from noise sources also helps.
Basic Hardware Checks
Basic hardware checks are the first step in fixing microphone problems. These checks help find simple issues that stop the microphone from working. Most problems come from loose cables, dirty ports, or low power. Checking these parts is easy and saves time.
Cable And Connection Inspection
Check the microphone cable for cuts or damage. A broken cable can stop sound from reaching your device. Make sure the cable is firmly plugged into the microphone and the computer or mixer. Loose connections cause sound to cut out or not work at all. Try a different cable if the problem stays.
Port And Jack Cleanliness
Dust and dirt can block the microphone port or jack. Use a soft brush or a can of compressed air to clean the connection points. Dirty ports stop the microphone from connecting well. Cleaning keeps the sound clear and the connection strong. Avoid using liquids that can damage the hardware.
Battery And Power Status
Some microphones need batteries or an external power supply. Check if the battery is dead or low. Replace old batteries with fresh ones. For microphones with power adapters, make sure the power source is working. No power means no sound. Always carry spare batteries for wireless microphones.
Software Settings To Adjust
Adjusting software settings is key to fixing microphone problems. Many issues arise from wrong settings, not hardware faults. Checking and changing these settings can improve sound quality and performance. It helps ensure the mic works properly on your device.
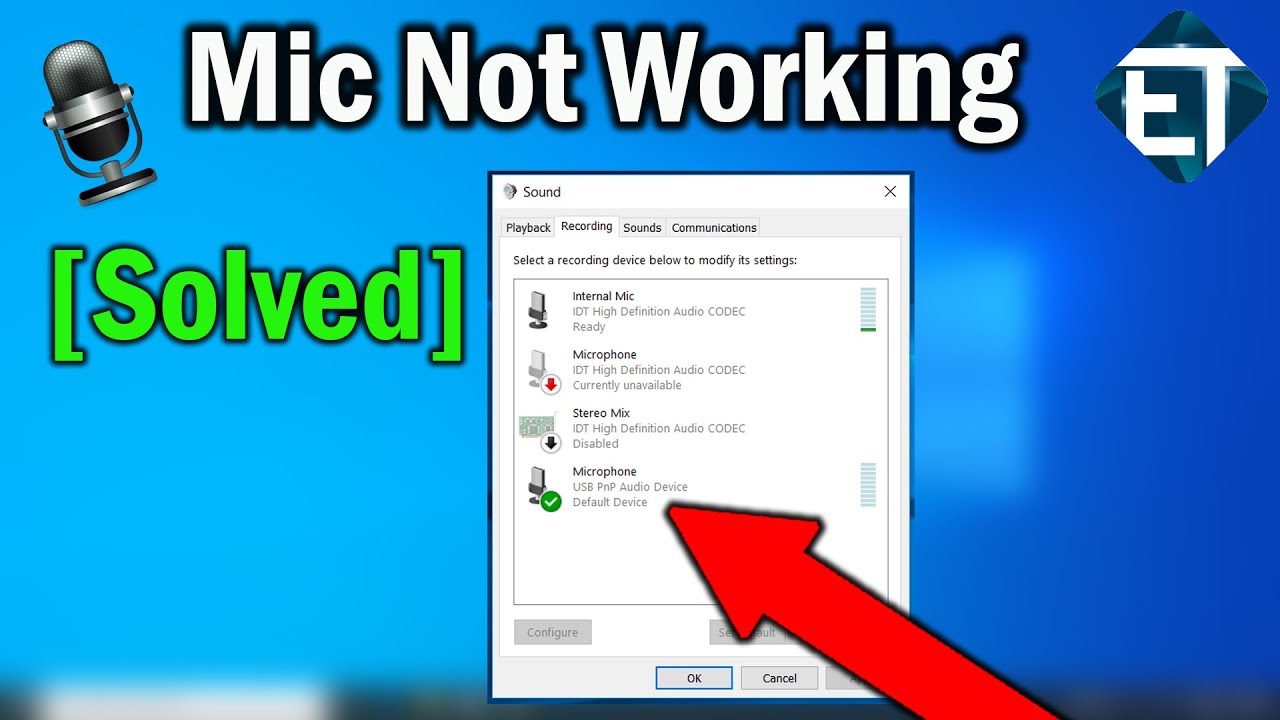
Input Device Selection
Choose the correct microphone in your device settings. Often, the system defaults to a built-in mic or another device. Open your sound settings and pick the mic you want to use. This simple step avoids confusion and ensures your voice is captured clearly.
Volume And Gain Controls
Set the mic volume and gain to proper levels. Too low means your voice is quiet. Too high causes distortion or background noise. Adjust the sliders carefully. Test your voice after each change to find the best balance.
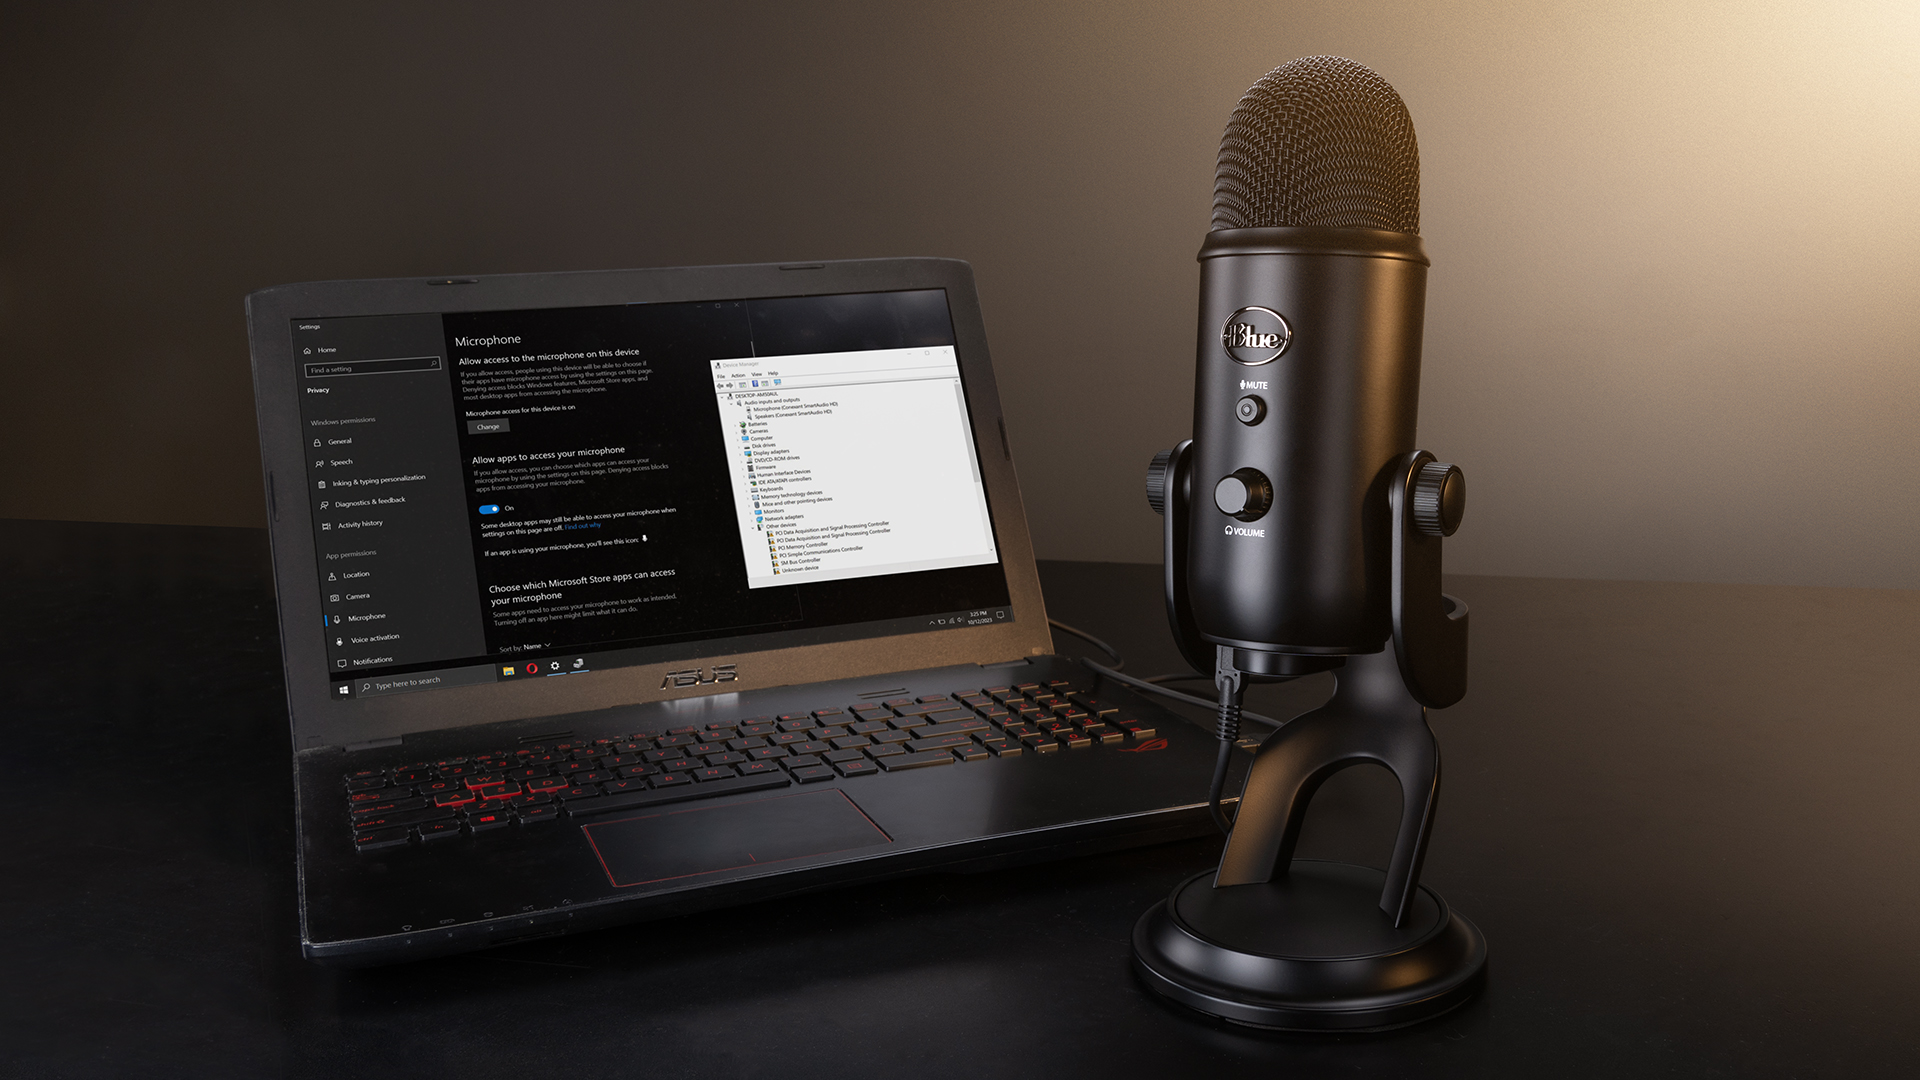
Privacy And Permissions
Check app permissions for microphone access. Some programs need explicit permission to use the mic. Go to privacy settings and allow the apps you trust. Without permission, your mic won’t work with those apps. This step protects your privacy and fixes access issues.
Driver And Firmware Updates
Driver and firmware updates play a key role in fixing microphone issues. Outdated software can cause your microphone to stop working or produce poor sound quality. Keeping these components updated ensures smooth performance and better compatibility with your system.
Drivers are small programs that help your computer communicate with the microphone. Firmware is the internal software built into the microphone itself. Both need regular updates to fix bugs and improve features.
Checking For Updates
Start by visiting the microphone manufacturer’s website. Look for the support or downloads section. Enter your microphone model to find the latest drivers and firmware versions. Compare these with what is installed on your device.
Windows users can also check for driver updates through Device Manager. Right-click your microphone and select “Update driver.” This scans for available updates online.
Reinstalling Drivers
Sometimes, updating is not enough. Reinstalling drivers can fix corrupted files and reset settings. Open Device Manager, find your microphone, and uninstall the driver. Then restart your computer.
After reboot, Windows should reinstall the driver automatically. If not, manually install the latest driver from the manufacturer’s site. This process often resolves hidden driver problems.
Firmware Upgrade Tips
Firmware updates must be done carefully. Read the instructions from the manufacturer fully before starting. Connect your microphone directly to the computer, avoiding hubs or adapters.
Ensure your device has enough power to avoid interruptions during the upgrade. Interrupting firmware updates can damage the microphone permanently. Back up any important settings if possible.
Environmental Factors
Environmental factors affect microphone performance a lot. Sound quality depends on the space where you record. Small changes in the room or setup can cause noise or echo. Knowing these factors helps fix microphone problems fast. Below are key points to check in your recording area.
Room Acoustics
Room acoustics change how sound reaches your microphone. Hard surfaces reflect sound, causing echoes and reverb. Soft materials like curtains or carpets absorb sound. They reduce echo and improve clarity. Small rooms often create more echo. Try adding cushions or foam panels to the walls. These simple changes help your voice sound clear and natural.
Background Noise Reduction
Background noise lowers your audio quality. Common sounds include fans, air conditioners, and street noise. Turn off noisy devices near your microphone. Close windows to block outside sounds. Use noise-canceling tools or software if needed. Quiet surroundings make your voice the main focus. This helps listeners understand you easily.
Microphone Placement
Microphone placement affects sound capture. Keep the microphone close to your mouth, about 6-12 inches away. Avoid pointing it at noisy objects or reflective surfaces. Position the mic slightly to the side to reduce breath sounds. Adjust the angle to find the best sound. Proper placement reduces noise and improves voice clarity.
Advanced Troubleshooting Steps
Advanced troubleshooting helps solve complex microphone problems. Basic checks might miss hidden issues. These steps dig deeper into device and software settings.
Following these methods can pinpoint the exact cause of failure. This approach saves time and avoids unnecessary repairs or replacements.
Using Diagnostic Tools
Diagnostic tools analyze microphone hardware and software. They test input levels and detect errors. Some tools come built into your computer or phone. Others require downloading simple apps. Run these tools to check for muted input or driver faults.
Testing With Different Devices
Try connecting your microphone to other devices. This shows if the problem lies with the microphone or the original device. Use a different computer, phone, or audio interface. If the mic works elsewhere, focus on fixing the original system.
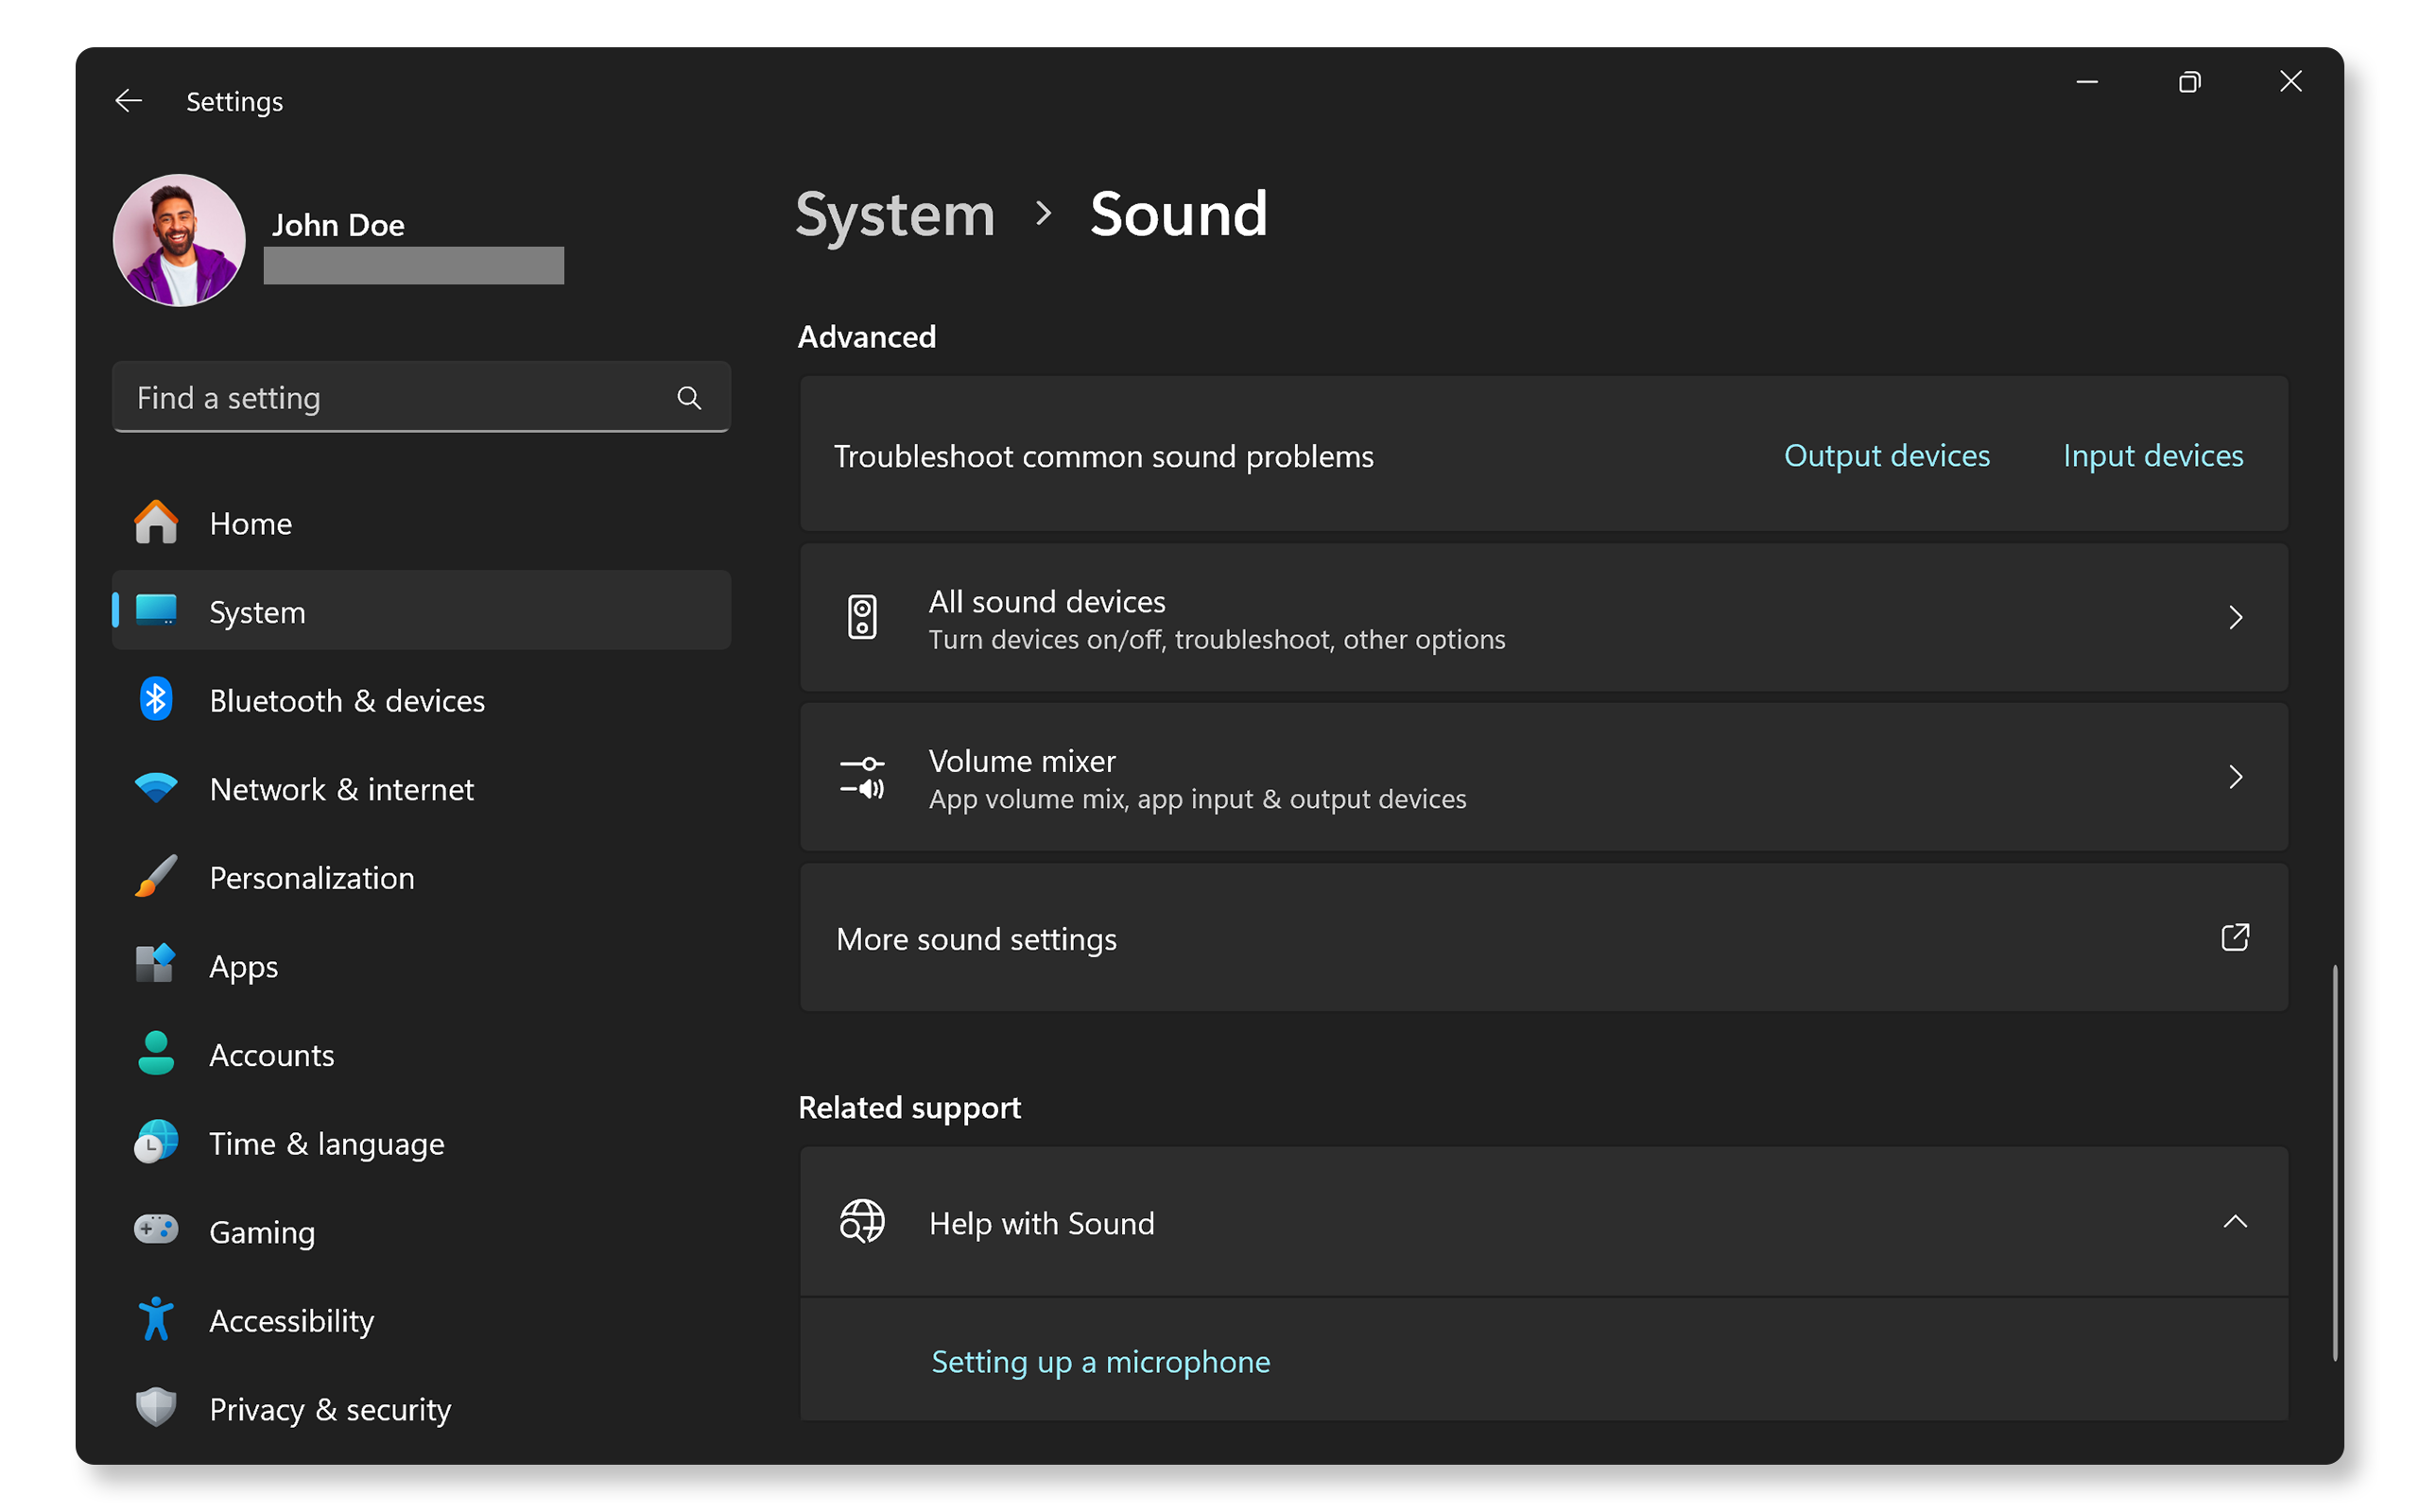
Resetting Audio Settings
Resetting audio settings restores default sound controls. This clears any incorrect configurations blocking the mic. Find the reset option in your device’s sound settings. After resetting, test the microphone again. This step often solves software-related issues quickly.
Preventive Care Tips
Taking care of your microphone helps it work better and last longer. Small daily habits prevent common problems. Simple steps keep your sound clear and your device safe.
Regular Cleaning
Dust and dirt block the microphone’s mesh and reduce sound quality. Clean the microphone gently with a soft brush or cloth. Avoid using water or harsh chemicals. Clean regularly to stop buildup and keep sound clear.
Safe Storage Practices
Store your microphone in a dry place away from direct sunlight. Use a protective case or pouch to avoid dust and damage. Keep it away from moisture and extreme temperatures. Safe storage keeps the microphone working well for years.
Routine Performance Checks
Test your microphone before use to find problems early. Check the cable and connection for wear or looseness. Listen for crackling or low sound during tests. Routine checks help spot issues before they get worse.
Frequently Asked Questions
Why Is My Microphone Not Working On My Computer?
Check if the microphone is properly plugged in or connected. Also, ensure it is selected as the default input device in settings.
How Do I Fix Low Microphone Volume Issues?
Increase the microphone volume in your device’s sound settings. Move closer to the microphone for better sound pickup.
What Causes Microphone Echo Or Feedback Problems?
Echo happens when the microphone picks up sound from speakers. Lower speaker volume or use headphones to reduce feedback.
How Can I Test If My Microphone Is Working?
Use a voice recording app or online microphone test tool. Speak into the mic and check if the sound is recorded.
Why Does My Microphone Sound Distorted Or Crackly?
Distortion can be caused by a damaged cable or wrong settings. Try a different cable or adjust the input volume level.
Conclusion
Fixing microphone issues does not need to be hard. Start by checking connections and settings first. Clean your microphone and test different devices. Restart your computer if sound still has problems. Small steps often solve common audio troubles. Stay patient and try simple fixes one by one.
Good sound makes speaking and recording easier. Keep your microphone in good shape for best results. Troubleshooting helps you avoid frustration and keeps your voice clear.
")


