To troubleshoot Whirlpool refrigerator water filter replacement, ensure the filter is correctly installed and the water supply is on. Check for leaks and flush the system.Replacing a Whirlpool refrigerator water filter can seem daunting, but a few simple steps make the process easy. Proper filter installation ensures clean, fresh-tasting water and ice. Regular maintenance helps maintain optimal performance and prolongs the life of your appliance.
Start by turning off the water supply and locating the filter compartment. Follow the manufacturer’s instructions for replacing the filter. After installation, flush the system to remove air and loose carbon particles. Routine filter replacements are essential for maintaining water quality and appliance efficiency. Always consult your refrigerator’s manual for specific guidance and troubleshooting tips.
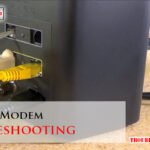
Common Issues
Replacing your Whirlpool refrigerator water filter can sometimes bring up issues. These issues can cause frustration and disrupt your daily routine. Here, we will discuss some common problems and their solutions.
Leaks
Leaks are a frequent issue after replacing a water filter. This can be due to an improperly installed filter or damaged seals.
- Check the filter’s alignment: Ensure the filter is properly aligned before locking it in place.
- Inspect the O-rings: Look for any damage on the O-rings. Replace them if needed.
- Tighten connections: Make sure all connections are snug and secure.
Water Flow Problems
Water flow problems can arise after replacing the filter. These issues might stem from clogs or incorrect filter installation.
| Problem | Solution |
|---|---|
| Low water flow | Check if the filter is fully seated. Remove and reinstall if needed. |
| No water flow | Ensure the filter is compatible with your refrigerator model. Double-check the installation process. |
Identifying The Right Filter
Replacing the water filter in your Whirlpool refrigerator is essential. It ensures clean, fresh-tasting water. Knowing the correct filter for your refrigerator model is crucial. Use this guide to help identify the right filter.
Model Numbers
Whirlpool refrigerators come with unique model numbers. Find your model number on a sticker inside the fridge. It usually starts with letters followed by numbers. Write down this number for reference.
| Model Number | Filter Type |
|---|---|
| WRF535SWHZ | Filter 1 |
| WRF540CWHZ | Filter 2 |
| WRF560SEHZ | Filter 3 |
Compatibility
Not all filters fit every refrigerator model. Check filter packaging or the user manual. Ensure the filter is compatible with your model number. Here’s a quick checklist for compatibility:
- Match the model number
- Check the filter type
- Read user reviews
Using the wrong filter can cause water flow issues. It may also reduce filtration efficiency. Always verify compatibility for the best performance.
Preparation Steps
Replacing the water filter in your Whirlpool refrigerator is crucial. It ensures clean and fresh water. Proper preparation makes the replacement process easy and smooth. Follow these preparation steps to avoid any issues.
Tools Needed
- New Whirlpool water filter
- Small towel or cloth
- Bowl or container
- Owner’s manual
Ensure you have all the tools ready. A new filter is a must. Use a towel to catch any water spills. A bowl helps hold the old filter. The owner’s manual guides you through the steps.
Safety Precautions
- Unplug the refrigerator
- Turn off the water supply
- Wear gloves if needed
- Read the manual
Unplugging the refrigerator prevents electrical shocks. Turning off the water supply stops leaks. Gloves protect your hands. Reading the manual ensures you follow the right steps.
Removing The Old Filter
Removing the old filter from your Whirlpool refrigerator is easy. Follow these steps to ensure a smooth process. This guide will help you locate and detach the filter.
Locating The Filter
The first step is to locate the filter. Whirlpool refrigerators have filters in different locations. Check your user manual if you are unsure.
- Top-Right Corner: Many models have the filter here.
- Base Grille: Some older models place the filter at the bottom.
- Inside the Refrigerator: Look at the back or near the ceiling.
Once you find the filter, you are ready for the next step.
Detaching The Filter
Detaching the filter requires some simple actions. Follow these instructions carefully:
- Turn off the water supply to the refrigerator.
- Twist the filter counterclockwise. Some filters may have a push-button release.
- Gently pull the filter out of its housing.
Make sure to discard the old filter properly. Some filters are recyclable. Check local guidelines for disposal.
Now you are ready to install the new filter. This will ensure clean water and ice for your family.
Installing The New Filter
Installing a new filter in your Whirlpool refrigerator is easy. Follow these steps to ensure a smooth installation. This guide will help you align and secure the filter properly.
Aligning The Filter
First, find the filter slot in your refrigerator. The slot is usually located inside the fridge, near the bottom or top. Make sure to remove the old filter before inserting the new one.
Take the new filter out of its packaging. Hold the filter with the arrow pointing upwards. Insert the filter into the slot, making sure the arrow stays aligned.
If the filter is not aligned correctly, it will not fit. Double-check the arrow direction and try again. Proper alignment ensures the filter will function well.
Securing The Filter
Once the filter is aligned, push it into the slot firmly. You should hear a click sound when the filter is in place. This sound means the filter is secure.
After securing the filter, turn it clockwise to lock it. Some models may require a quarter turn, while others might need a half turn. Refer to your refrigerator manual for specific instructions.
Check if the filter is firmly locked. Gently pull on the filter to make sure it does not come out. A secure filter prevents water leaks and ensures clean drinking water.
Finally, run a few glasses of water through the new filter. This step helps to clear out any air bubbles and activates the filter.
Tip: Always refer to the manufacturer’s instructions for specific details about your refrigerator model.
| Step | Action |
|---|---|
| 1 | Remove old filter |
| 2 | Align new filter with arrow pointing up |
| 3 | Insert and push filter until it clicks |
| 4 | Turn filter to lock it |
| 5 | Run water through filter |

Resetting The Filter Indicator
After replacing the water filter in your Whirlpool refrigerator, the filter indicator light may still be on. This light reminds you to change your filter, but it needs resetting afterward. Resetting the filter indicator is crucial for accurate tracking. Below are the steps to manually and automatically reset your filter indicator.
Manual Reset
Some Whirlpool refrigerators require a manual reset of the filter indicator. Follow these simple steps:
- Locate the filter reset button on your refrigerator. It’s usually near the water filter or inside the fridge.
- Press and hold the reset button for 3-5 seconds.
- Wait for the indicator light to turn off or change color. This confirms the reset.
Manual resetting is quick and easy. It ensures your filter indicator is accurate.
Automatic Reset
Many modern Whirlpool refrigerators have an automatic reset feature. Here’s how to use it:
- Ensure the new water filter is properly installed.
- Close the refrigerator doors completely.
- The filter indicator should reset automatically within a few minutes.
Automatic resets are convenient and save time. They ensure your filter indicator updates itself.
Understanding these steps helps keep your refrigerator in top shape. Enjoy fresh, clean water always.
Testing The New Filter
After installing your new Whirlpool refrigerator water filter, it is crucial to test it. Testing ensures that your filter works correctly and efficiently. This section will guide you through the steps of checking for leaks and ensuring proper water flow.
Checking For Leaks
To check for leaks, follow these simple steps:
- Inspect the area around the filter for any visible water.
- Run water through the dispenser for several minutes.
- Look for any drips or puddles forming around the filter housing.
If you notice any leaks, try tightening the filter. Ensure all connections are secure and free of debris.
Ensuring Proper Water Flow
Ensuring proper water flow is essential for your refrigerator’s performance. Follow these steps to verify:
- Place a glass under the water dispenser.
- Press the dispenser lever and observe the water flow.
- Check if the water flows steadily and consistently.
If the water flow is weak or inconsistent, you may need to recheck the filter installation. Ensure the filter is locked in place and aligned correctly.
Maintaining Your Water Filter
Maintaining your Whirlpool refrigerator water filter ensures clean, fresh water. Proper care and timely replacement can extend the life of your filter. Below are some essential tips for keeping your water filter in top condition.
Regular Replacement Schedule
Changing your water filter regularly is crucial. Whirlpool recommends replacing the filter every six months. This schedule ensures optimal water quality and filter performance.
To keep track, mark your calendar or set a reminder. Some Whirlpool models have a filter indicator light. This light will signal when it’s time to replace the filter.
| Filter Type | Replacement Frequency |
|---|---|
| Standard | Every 6 months |
| Advanced | Every 6-9 months |
Cleaning Tips
Regular cleaning helps maintain your water filter’s performance. Follow these simple steps:
- Remove the filter from the refrigerator.
- Rinse the filter under cold water for a few minutes.
- Use a soft brush to clean any debris.
- Reinstall the filter back into the refrigerator.
Ensure you do not use soap or harsh chemicals. These can damage the filter and affect water quality.
Additionally, clean the filter housing area. Wipe it with a damp cloth to remove any buildup.
By following these steps, you can ensure your Whirlpool refrigerator water filter remains effective and provides clean, safe water.
Frequently Asked Questions
Why Is My Fridge Not Dispensing Water After Replacing The Filter?
Ensure the filter is installed correctly. Check for air trapped in the water line. Verify the water supply is on.
How Do I Reset My Whirlpool Refrigerator After Changing The Filter?
To reset your Whirlpool refrigerator after changing the filter, press and hold the “Filter Reset” button for 3 seconds. Ensure the indicator light turns off.
Why Is Water Not Coming Out Of My Whirlpool Fridge After Replacing The Filter?
The water may not flow if the filter isn’t properly installed. Ensure it clicks into place. Check for air trapped in the water line.
Why Is My Water Not Working After Changing The Water Filter?
Ensure the filter is correctly installed. Check for any obstructions or air trapped in the line. Reset the filter indicator.
How Often To Replace Whirlpool Refrigerator Water Filter?
Replace the Whirlpool refrigerator water filter every six months or after 200 gallons of water usage.
Conclusion
Replacing your Whirlpool refrigerator water filter can be simple with the right steps. Follow the guidelines to ensure clean water. Regular maintenance keeps your fridge running efficiently. Always consult the manual for specific instructions. Enjoy fresh, filtered water and a well-functioning refrigerator year-round.
")