When the auto-feed on the Bandit wood chipper malfunctions, inspect the spark plug for signs of wear or damage. If the porcelain insulator is cracked, an electrode is burned away or damaged, or there is heavy carbon buildup at the electrode, replace the spark plug.
To determine if the spark plug is defective, use a spark plug tester. Additionally, check the fuses on the device and the main power supply, including any extension cables. Ensure that the bolt on the hopper is tightly secured.
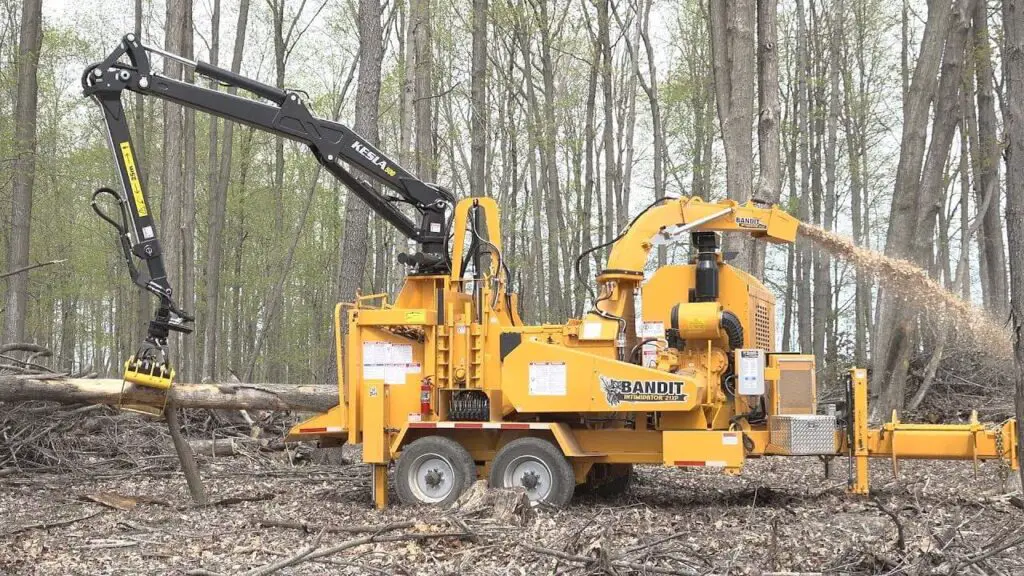
Inspecting The Auto Feed System
The auto-feed system is a crucial component of the Bandit wood chipper, responsible for efficiently feeding and processing wood debris. However, like any mechanical system, it can sometimes encounter issues that affect its performance. In this section, we will discuss how to inspect the auto-feed system and troubleshoot common problems that may arise.
Troubleshooting Common Auto Feed Problems
When the auto-feed system on your Bandit wood chipper is not functioning properly, it can significantly impact productivity and safety. To resolve any issues, you should follow a systematic approach and check for the most common problems. Here are some troubleshooting steps:
- Checking for obstructions in the feed chute: Debris or foreign objects stuck in the feed chute can block the smooth flow of wood material. It is essential to inspect the feed chute thoroughly for any obstructions and remove them carefully, ensuring the machine is turned off and all safety precautions are taken.
- Testing the auto feed sensor: The auto feed sensor is responsible for detecting the presence of wood material and initiating the feeding process. If the sensor is faulty or misaligned, it may cause feeding issues. To test the sensor, you can follow the manufacturer’s guidelines provided in the Bandit wood chipper manual.
Checking For Obstructions In The Feed Chute
One of the most common issues with the auto-feed system is obstructions in the feed chute. These obstructions can prevent the smooth flow of wood material and impede the feeding process. To check for obstructions in the feed chute, follow these steps:
- Ensure the wood chipper is turned off and all power sources are disconnected.
- Inspect the feed chute visually, looking for any debris or foreign objects that may have become lodged in the chute. If you spot any obstructions, remove them carefully using appropriate tools or manual dexterity.
- While removing the obstructions, ensure that you do not damage any internal components of the auto-feed system or the feed chute itself.
- Once all the obstructions have been cleared, reassemble the feed chute components properly and ensure they are securely fastened.
- Finally, test the auto-feed system by feeding some wood material into the chute and observing if it functions smoothly.
By following these steps, you can quickly troubleshoot and resolve issues related to obstructions in the feed chute of your Bandit wood chipper.
Testing The Auto Feed Sensor
The auto-feed sensor plays a critical role in regulating the feeding process of your Bandit wood chipper. If the sensor is not functioning correctly, it can lead to feeding problems or even damage to the machine. To test the auto-feed sensor, you can follow these steps:
- Refer to the Bandit wood chipper manual for specific instructions on locating and testing the auto feed sensor.
- Ensure the wood chipper is turned off and all power sources are disconnected.
- Depending on the type of auto-feed sensor used in your model, perform the necessary tests as described in the manual.
- If the sensor is found to be faulty or misaligned, consult Bandit customer support or a qualified technician to determine the correct course of action.
- After completing any repairs or adjustments, test the auto-feed system by feeding wood material into the chipper and verifying that it functions smoothly.
By testing the auto feed sensor and addressing any issues, you can ensure the optimal performance and safety of your Bandit wood chipper.

Addressing Power And Start-up Issues
When it comes to operating a Bandit chipper, power and start-up issues can sometimes arise. These issues can prevent the chipper from functioning properly, causing delays and frustration. However, with some troubleshooting steps, you can quickly identify and resolve any power-related problems. Here are some steps to take when addressing power and start-up issues with your Bandit chipper:
Checking The Spark Plug For Wear Or Damage
One common cause of power and start-up issues in Bandit chippers is a faulty spark plug. Over time, the spark plug can wear out or become damaged, resulting in a weak or nonexistent spark. To check the spark plug, follow these steps:
- Locate the spark plug on your Bandit chipper.
- Inspect the spark plug for any signs of wear or damage, such as a cracked porcelain insulator, burned electrode, or heavy carbon buildup.
- If you notice any of these issues, it is recommended to replace the spark plug.
- To determine if the spark plug is defective, you can use a spark plug tester.
By regularly checking and replacing the spark plug as needed, you can ensure proper ignition and prevent power and start-up issues in your Bandit chipper.
Ensuring Proper Power Supply To The Chipper
Another common cause of power and start-up issues is a lack of proper power supply to the chipper. To ensure that your Bandit chipper is receiving adequate power, follow these steps:
- Check the fuses on the chipper and the main power supply, including any extension cables.
- If any fuses are blown, replace them with the appropriate size and type of fuse.
- Ensure that the hopper bolt, which secures the chipper’s hopper in place, is tightly secured.
- Inspect the power cord and extension cables for any damage or fraying. Replace them if necessary.
By ensuring a proper power supply, you can eliminate any power-related issues and ensure the smooth operation of your Bandit chipper.
Remember, addressing power and start-up issues in your Bandit chipper is crucial to maintaining optimal performance. By regularly checking the spark plug for wear or damage, ensuring proper power supply, and securing the hopper bolt, you can prevent problems and keep your chipper running smoothly.
Resolving Hydraulic System Malfunctions
In a Bandit chipper, a well-functioning hydraulic system is essential for optimum performance and efficient chipping. However, like any complex machinery, hydraulic system malfunctions can occur, leading to decreased productivity and potential damage to the chipper. In this section, we will discuss three common hydraulic system malfunctions and provide troubleshooting tips to help you resolve them.
Identifying The Correct Hydraulic Fluid For Bandit Chippers
The choice of hydraulic fluid plays a crucial role in the efficient operation of Bandit chippers. Using the correct hydraulic fluid helps maintain the integrity of the hydraulic system, ensuring proper lubrication and preventing premature wear and damage. It is essential to identify the correct hydraulic fluid for your Bandit chipper before troubleshooting other hydraulic system issues.
- Refer to the Bandit Chipper manual or the manufacturer’s website for specific recommendations on the type and grade of hydraulic fluid to use.
Troubleshooting Hydraulic Lift Cylinder Issues
Issues with the hydraulic lift cylinder can cause the chipper’s lifting mechanism to malfunction, hindering the feeding process. Identifying and resolving these issues is crucial for smooth chipper operation. Follow these steps to troubleshoot hydraulic lift cylinder issues:
- Check the hydraulic fluid level in the lift cylinder reservoir. Low fluid levels can lead to decreased lifting capacity. If the fluid is low, refill it to the recommended level.
- Inspect the lift cylinder hydraulic lines for any leaks or damage. Leaks or damage to the lines can cause a loss of hydraulic pressure. If any issues are found, replace or repair the affected lines promptly.
- Check the lift cylinder for any signs of wear or damage. Inspect the cylinder rod, seals, and other components for cracks, dents, or leaks. Replace any damaged parts as necessary.
- Ensure that the lift cylinder is properly lubricated. Apply a suitable lubricant to the cylinder rod and other moving parts to prevent excessive friction.
Checking The Hydraulic Bump Bar For Proper Functioning
The hydraulic bump bar is responsible for stopping the feed roller when encountering large or hard material. A malfunctioning bump bar can pose safety risks and lead to chipper damage. Follow these steps to ensure proper functioning of the hydraulic bump bar:
- Inspect the bump bar hydraulic lines for leaks, cracks, or damage. Replace or repair any defective lines.
- Check the bump bar’s hydraulic pressure by using a pressure gauge. Compare the measured pressure with the recommended operating pressure specified in the Bandit Chipper manual.
- Test the bump bar’s activation and responsiveness by manually triggering it. Observe if it stops the feed roller as intended. If it does not, there may be an issue with the hydraulic valve or other components. Consult the Bandit Chipper manual or contact a qualified technician for further assistance.
By following these troubleshooting steps, you can effectively resolve hydraulic system malfunctions in Bandit chippers. Remember to always prioritize safety, and consult the Bandit Chipper manual or contact a professional for more complex issues. Maintaining a well-functioning hydraulic system will ensure optimal chipper performance and prolong the lifespan of your equipment.
Understanding Maintenance And Machine Shutdown
Maintaining and properly shutting down your Bandit chipper is crucial to ensuring optimal performance and preventing damage to the machine. By following the correct procedures for maintenance and shutdown, you can extend the lifespan of your chipper and avoid costly repairs.
Properly Shutting Down The Chipper To Avoid Damage
When it comes to shutting down your Bandit chipper, there are a few important steps to follow to avoid any potential damage:
- First, make sure that the parking brake is engaged to prevent any unexpected movement of the chipper.
- Next, lower the feed wheels and engage the feed mechanism release lever to stop the feeding process.
- Once the feeding process has stopped, wait for all the material to clear the chipper before proceeding.
- After ensuring that the chipper is clear of any material, turn off the engine using the ignition switch.
- Finally, remove the key from the ignition to prevent any accidental startup.
By following these steps and properly shutting down your chipper, you can avoid any potential damage to the machine and ensure its longevity.
Torque Specifications For Bandit Chippers
Torque specifications are important to ensure that all components of your Bandit chipper are securely fastened. Here are some key torque specifications for common areas of your chipper:
| Component | Torque Specification (in lb-ft) |
|---|---|
| Knife bolts | 150 – 200 |
| Anvil bolts | 250 – 300 |
| Rotor bolts | 300 – 350 |
| Feed wheel bolts | 150 – 200 |
By adhering to these torque specifications, you can ensure that all components are properly secured, reducing the risk of any loose parts or potential malfunctions.
Tension Adjustment For Optimal Performance
Another important aspect of chipper maintenance is tension adjustment. Proper tension ensures optimal performance and efficient feeding. To make the necessary tension adjustments:
- Start by referring to the user manual provided by Bandit Industries for the specific tension adjustment instructions for your chipper model.
- Locate the tension adjustment mechanism, typically found near the feed wheels.
- Use the appropriate tools to adjust the tension according to the recommended specifications.
- Regularly monitor and adjust the tension to ensure consistent and efficient feeding.
By regularly adjusting the tension and following the manufacturer’s recommendations, you can maximize the performance of your Bandit chipper and prolong its lifespan.
Utilizing Bandit Chipper Support And Warranty
When it comes to troubleshooting your Bandit chipper, it’s important to utilize the support and warranty resources provided by Bandit Industries. Understanding the support options available to you and the warranty coverage for your chipper can help you resolve any issues efficiently and effectively. In this section, we will explore Bandit Industries’ support resources, delve into the warranty coverage for Bandit chippers, and learn how to access the Bandit chipper user manual for troubleshooting assistance.
Exploring Bandit Industries’ Support Resources
Bandit Industries offers comprehensive support resources to assist chipper owners with any troubleshooting needs they may have. Whether you’re experiencing auto-feed problems or require assistance with other chipper-related issues, Bandit’s support team is available to help. Their website provides a dedicated support page where you can find helpful information and resources.
To access Bandit Industries’ support page, simply visit their website at https://banditchippers.com/support. Here, you’ll find a variety of support options, such as FAQs, video tutorials, user manuals, and more. If you’re unable to find the information you need on their website, Bandit’s knowledgeable support team is just a phone call away.
Understanding The Warranty Coverage For Bandit Chippers
Before diving into troubleshooting your Bandit chipper, it’s crucial to have a clear understanding of the warranty coverage provided by Bandit Industries. Bandit offers industry-leading warranties to ensure you have peace of mind when it comes to your chipper’s performance and longevity.
To learn about the specific warranty coverage for your Bandit chipper model, visit Bandit’s website at https://banditchippers.com/why-bandit. Here, you’ll find detailed information about their warranties, including the duration and coverage provided. It’s essential to familiarize yourself with the warranty terms and conditions to make the most of your chipper’s warranty coverage.
Accessing The Bandit Chipper User Manual For Troubleshooting Assistance
When troubleshooting your Bandit chipper, the user manual can be a valuable resource. It provides detailed instructions and guidelines on chipper operation, maintenance, and troubleshooting procedures. Accessing the user manual is straightforward and can help you resolve any issues you may encounter.
To access the Bandit chipper user manual, visit https://www.arboristsite.com/manuals and search for your specific chipper model. The user manual will provide step-by-step instructions for troubleshooting various chipper issues, along with helpful tips and recommendations.
By utilizing Bandit Industries’ support resources and understanding the warranty coverage for your chipper, you can confidently troubleshoot any issues that arise. With the user manual as a valuable reference, you’ll have the necessary information to address common chipper problems effectively. Remember, Bandit’s support team is always available to provide additional assistance if needed.

Frequently Asked Questions
Why won’t my chipper start?
If your chipper won’t start, check the spark plug for wear or damage. If it’s cracked or has heavy carbon buildup, replace it. Use a spark plug tester to confirm if it’s defective. Also, check the power supply, fuses, and extension cables.
Make sure the hopper bolt is tightly secured.
Why Is my wood chipper not turning on?
To troubleshoot why your wood chipper is not turning on, check the spark plug for wear or damage. Replace it if necessary. Make sure the device and main power supply fuses are intact. Tighten the bolt on the hopper. Check for any power issues with extension cables.
What Hydraulic Fluid For Bandit Chipper?
The hydraulic fluid recommended for a Bandit chipper is typically specified in the owner’s manual. Refer to the manual for the correct type and viscosity of hydraulic fluid to use.
What Is The Warranty On Bandit Chippers?
The warranty on Bandit chippers varies depending on the specific model and terms set by the manufacturer. It is recommended to check with Bandit Industries, Inc. or their official website for detailed information on the warranty for each chipper model.
How Do I Troubleshoot My Bandit Chipper If It Won’t Start?
Inspect the spark plug for signs of wear or damage. If the porcelain insulator is cracked, replace the spark plug. Use a spark plug tester to check for defects.
Conclusion
To troubleshoot your Bandit wood chipper’s auto-feed problems, start by inspecting the spark plug for wear or damage. If necessary, replace it to ensure proper functioning. Additionally, check the power supply, including fuses and extension cables, to make sure the chipper is receiving power.
Finally, ensure that the bolt on the hopper is tightly secured. For more detailed troubleshooting, refer to the Bandit chipper manual or seek assistance from Bandit Industries’ support team. By following these steps, you can get your chipper up and running smoothly again.
")


