The best way to address delta shower cartridge troubleshooting is to identify if the issue is a simple debris blockage or a worn seal that requires a replacement part. Most leaks or temperature problems start when mineral buildup clogs the internal pressure balance or when the rubber O-rings inside the valve body become brittle over time. If you notice a steady drip or fluctuating water temperature, you should first check the water supply pressure and the state of your home’s main shut-off valves.
Troubleshooting your Delta shower cartridge issues
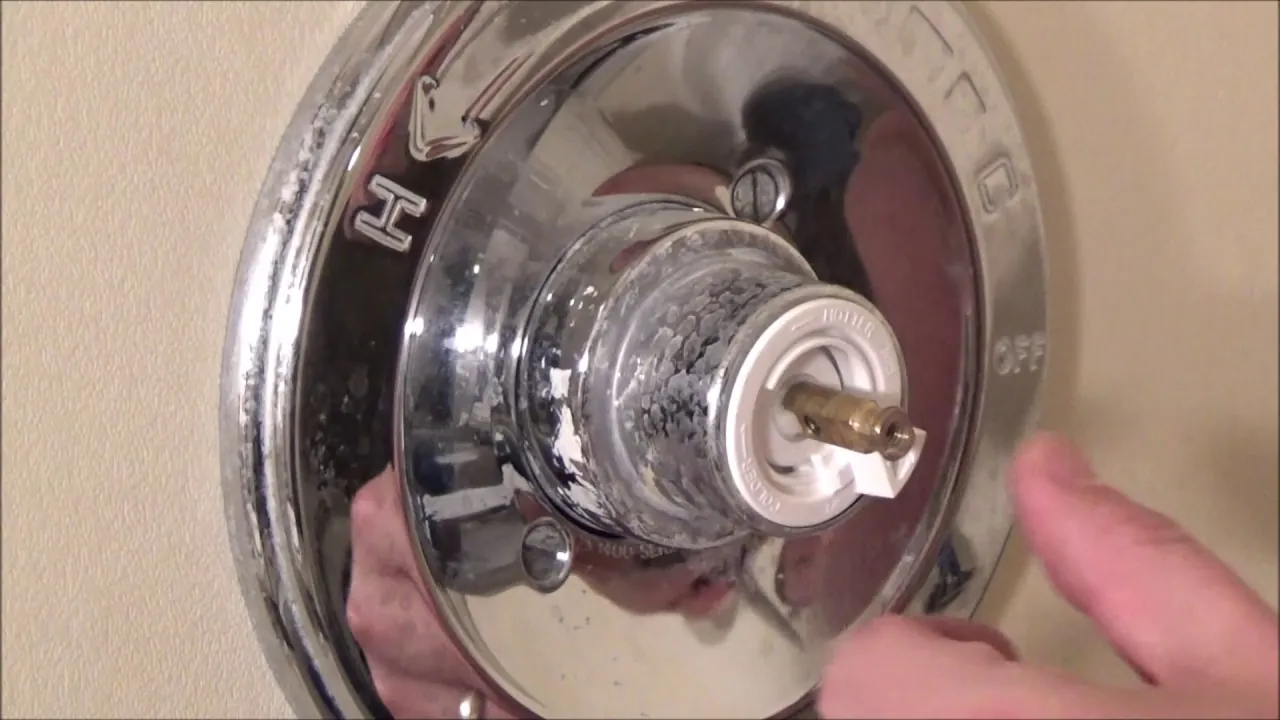
The primary reason your shower valve fails is due to mineral deposits from hard water or the natural wear of internal rubber components. When these deposits build up inside the valve housing, they prevent the cartridge from moving smoothly, leading to temperature spikes or a persistent drip.
You can often tell if this is your problem by observing if the handle feels stiff when you turn it or if the water flow slows down noticeably compared to other faucets in your house.
Another common cause involves the pressure balance spool. This small internal part is designed to keep your shower temperature steady if someone flushes a toilet or uses a sink elsewhere. If this spool gets stuck, you may experience a total loss of hot or cold water. Before assuming the cartridge is broken, verify that your home’s water pressure is consistent by checking other fixtures.
If other faucets have strong pressure but the shower is weak, the issue is almost certainly trapped debris inside the valve body. A common mistake is replacing the entire cartridge when only the O-rings have failed. If you see water leaking from behind the handle plate, replace the O-rings first. If the water continues to drip from the showerhead itself, the seats and springs are likely worn or the seat is pitted and should be replaced.
Replacing the internal cartridge
This fix is for users who have confirmed that their handle is stiff or leaking and have already verified that the water supply is fully open. You’ll need a replacement cartridge that matches your specific valve model, which you can identify by looking at the official Delta Faucet parts documentation. This process requires you to shut off the water at the main supply, remove the handle, and pull out the old cartridge to inspect the seals for damage.
Before you begin, verify your valve type. If your faucet has integrated screwdriver stops, you can shut off water to just that fixture. If it lacks these stops, you must shut off the entire house. Failing to drain the remaining pressure from the lines before pulling the cartridge will result in a sudden, high-pressure spray that can damage your vanity or drywall.
If you aren’t comfortable turning off your home’s main water supply or working with plumbing tools, call a licensed plumber to avoid accidental pipe damage. This fix isn’t for those who lack the basic tools, such as a hex key and a strap wrench, or for anyone whose valve is soldered directly into the wall without access stops.
If you see signs of heavy corrosion on the valve body, don’t force the cartridge out, as you may crack the copper pipes inside the wall.
Cleaning the valve housing
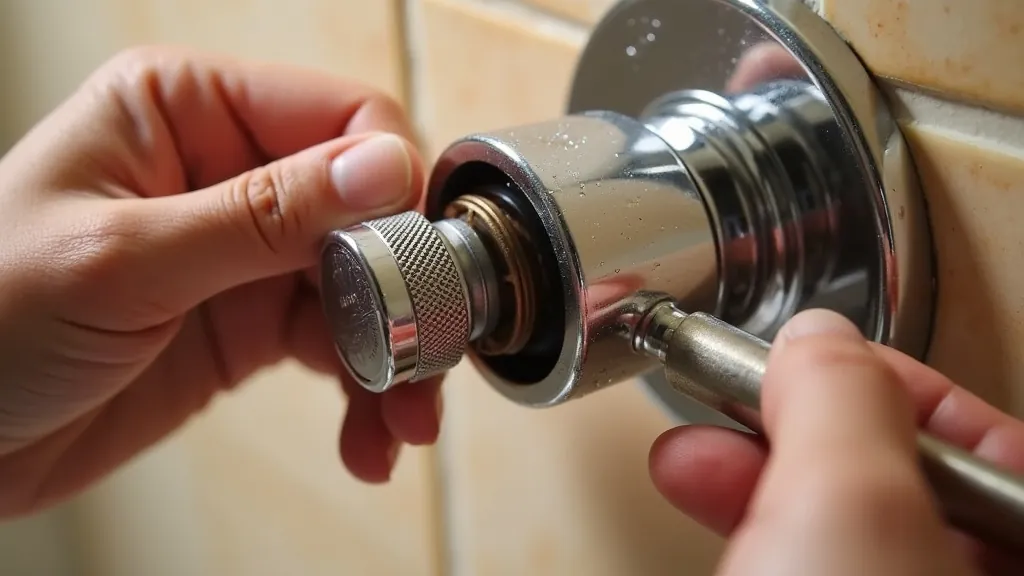
Sometimes the cartridge itself is fine, but the valve housing behind it’s coated in scale. This fix involves removing the cartridge and using a soft brush to clear out mineral deposits from the brass or plastic interior.
This is a great choice if you have hard water and notice that your shower flow is weaker than it was when the unit was new. It saves you the cost of a new part if the existing one is still in good condition.
You must be careful not to scratch the smooth interior surface of the valve body while cleaning. Use only a soft nylon brush and white vinegar to dissolve the mineral scale; avoid steel wool or abrasive cleaners that will ruin the seal surface.
If you see deep gouges or pitting in the metal housing after cleaning, the housing is likely damaged beyond repair. In that case, cleaning won’t stop the leak, and you’ll need to contact a plumbing professional to replace the entire valve assembly.
Adjusting the temperature limit
When your shower feels too cold even when the handle is at the maximum hot position, you may need to adjust the temperature limit stop. This is a small plastic ring on the front of the cartridge that prevents the handle from turning far enough to reach a dangerous, scalding temperature. It’s a simple adjustment that doesn’t require you to remove the entire cartridge from the wall.
This fix is worth the effort if your water heater is set correctly but the shower water is lukewarm. You can usually identify the limit stop by its bright color, often red or white, located just behind the handle assembly. Simply pull the ring toward you, rotate it counter-clockwise to allow more hot water, and slide it back into the locking teeth.
However, be aware that this adjustment changes the maximum output temperature of your shower. If you have children or elderly residents in your home, keep the limit stop at a safe setting to prevent accidental burns. Most experts recommend a maximum setting of 120 degrees Fahrenheit.
If you adjust this and still don’t get hot water, the problem is likely a failing hot water heater or a blocked supply line, rather than the shower valve itself. Check the temperature at your kitchen sink; if it’s also lukewarm, the issue is your heater, not your shower.
Mistakes to avoid during repairs
Using pliers on the plastic stem will cause the cartridge to crack, making it impossible to remove without specialized tools. If the stem snaps, you must use a dedicated cartridge puller to extract the remaining plastic shards from the valve body.
Always plug the drain with a thick rag before starting. Losing a single screw or O-ring down the pipe creates a much larger repair bill, as these parts are rarely sold individually at hardware stores.
Turning the water back on before the cartridge is fully seated will cause a high-pressure spray. This burst can ruin drywall and warp bathroom flooring in seconds. Always test the seal by turning the main supply on slowly while watching for leaks.
Applying plumber’s grease to the wrong parts causes the valve to slip or fail to shut off properly. Only apply a thin layer to the O-rings as specified by the manufacturer. If you over-lubricate the internal housing, the valve may drift from its intended position.
Preventing future valve failures

| If you’re doing this | Do this instead | Why |
|---|---|---|
| Forcing a stiff handle | Apply silicone grease | Prevents O-ring friction |
| Ignoring a minor drip | Replace the seat/spring | Stops valve body erosion |
| Using harsh chemicals | Use white vinegar | Protects plastic components |
| Tightening nuts too hard | Hand-tighten then quarter-turn | Avoids cracking the valve |
If you’re doing this for the first time, keep in mind that every model has slightly different dimensions; always match your replacement part against the old one before installing it. For the best results, use only genuine parts to ensure the seals fit the valve body perfectly.
A common mistake is assuming that universal kits fit every brand. Using a generic washer often leads to a slow, persistent leak that ruins the valve seat within six months. If your valve continues to weep after a repair, the seat is likely pitted and should be replaced.
Follow this rule: if the valve handle feels gritty, clean the stem threads with a soft brush before applying lubricant. If the handle remains stiff after lubrication, the internal cartridge is likely mineral-clogged and requires immediate replacement. Ignoring this resistance will eventually snap the stem, turning a simple maintenance task into a complex plumbing emergency.
Frequently asked questions
Can I fix a leaking delta shower without replacing the cartridge?
You can often stop a leak by replacing only the rubber seats and springs inside the valve body. These small parts are usually what fail first, making them a cost-effective alternative to a full cartridge. If the valve body is cracked or corroded, however, the seats and springs won’t seal, and you must replace the entire unit.
How long does a delta shower cartridge last?
Most cartridges last between 5 and 10 years, depending on water hardness and usage frequency. Hard water mineral buildup can degrade rubber seals in as little as 3 years. You can extend this lifespan by keeping water temperatures moderate and avoiding excessive force when turning the handle, though you should check for stiffness annually.
Why is my shower handle loose?
A loose handle is usually caused by a stripped set screw or a worn-out handle adapter that no longer grips the cartridge stem. You can often fix this by tightening the screw with a hex key. If the handle still wobbles after tightening, the internal plastic splines have likely worn down, requiring a new handle kit.
Is it safe to repair the valve myself?
Yes, it’s generally safe for a homeowner to perform this repair if you have access to a main water shut-off valve and basic hand tools. You must ensure the water is turned off completely before you start, or you risk flooding the bathroom. If you can’t find the shut-off valve, or if the valve is stuck in the open position, stop immediately and call a professional plumber to avoid property damage.
How much does a replacement cartridge cost?
A replacement cartridge is inexpensive relative to replacing the entire shower valve assembly, depending on the specific model and whether you buy a generic or original equipment manufacturer part. The cost varies based on the age of your shower and the complexity of the internal pressure balance technology. Always check your model number to ensure you buy the correct part.
What happens if I use the wrong cartridge model?
Using the wrong cartridge will result in a shower that either doesn’t fit the housing or leaks immediately when you turn the water back on. Because Delta has many different valve designs, even a cartridge that looks similar may have different seal placements or stem lengths. If the part doesn’t slide in smoothly with light pressure, don’t force it, as you could damage the valve body inside the wall.
Conclusion
Once you’ve finished the repair, turn the water back on slowly to check for any lingering leaks around the handle. If the flow still doesn’t feel right, it’s a good idea to soak your showerhead in vinegar to clear out any remaining mineral deposits. You’ll be enjoying a perfect shower again soon.
Related guides