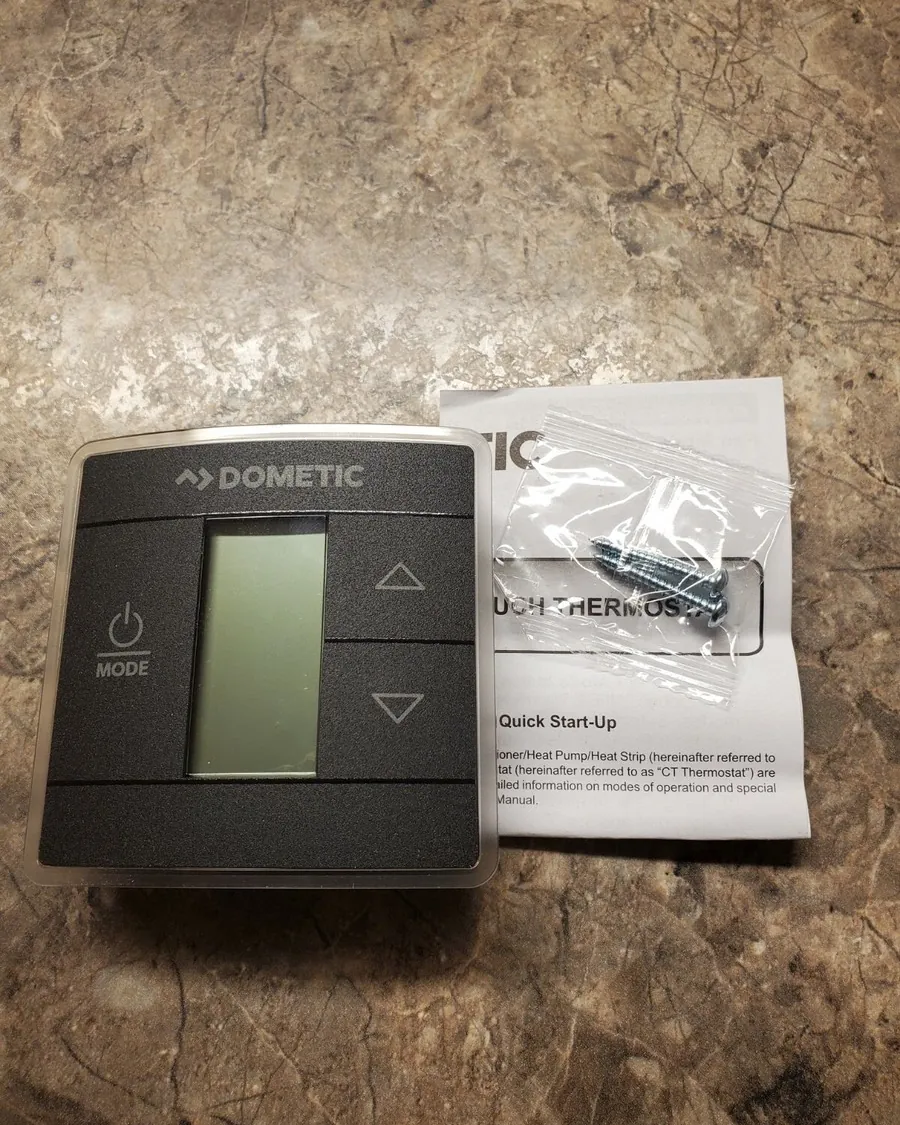
An unresponsive climate control interface is frustrating, so learning how to fix a Dometic capacitive touch thermostat is a vital skill for any RV owner. These digital controls use sensitive sensors instead of mechanical buttons, which makes them prone to environmental interference, power fluctuations, or calibration errors. Knowing how to reset these units can prevent unnecessary service calls and keep you comfortable while traveling. Whether you face a blank screen, unresponsive touch, or communication errors, these steps will help you resolve the issue.
Key Takeaways
- Clean the glass interface with a dry, microfiber cloth to remove oils that disrupt capacitive sensors.
- Check for loose wire connections behind the wall plate, specifically the RJ11 communication cables.
- Verify the system mode is set to “Auto” or “Cool” before assuming a hardware failure.
Why Is the Screen Unresponsive?
The capacitive touch technology used in these units detects the electrical conductivity of your fingertip to register an input. If the surface is coated in grease, dust, or moisture, the sensors may fail to register your touch. Furthermore, because these units operate on a low-voltage DC system, any fluctuation in your coach’s battery level can cause the internal processor to lock up.
When the screen appears frozen, it’s often a software glitch rather than a broken component. Start by ensuring your fingers are dry and clean, then perform a quick wipe of the faceplate. If the interface remains unresponsive, the issue likely resides in the control logic board or the power delivery system.
How to Perform a System Reset
| Troubleshooting Step | Expected Outcome | Time Required |
|---|---|---|
| Soft Clean | Touch input restored | 1 Minute |
| 12V Power Cycle | System reboots | 5-10 Minutes |
| Cable Inspection | Connection confirmed | 10 Minutes |
| Factory Reset | Settings to default | 2 Minutes |
Inspecting the Communication Cables
The connection between your thermostat and the rooftop unit is facilitated by an RJ11 cable, similar to an old-fashioned telephone line. These cables are prone to oxidation at the contact points or physical damage if they were pinched during installation. To troubleshoot, remove the thermostat from the wall bracket by gently depressing the release tabs.
Inspect the connector for signs of corrosion or a loose locking clip. If the cable appears intact, unplug it, clean the contacts with a specialized electrical contact cleaner, and reseat it firmly until you hear a click. A faulty data link is one of the most common causes of the “E1” error code, which indicates the thermostat can’t communicate with the air conditioner control box.
Checking the Power Supply Voltage
What Do the Error Codes Mean?
Error codes are the system’s way of telling you exactly where the breakdown is occurring. A “Communication Error” typically manifests as an “E1” or “E2” code, signifying that the wall-mounted controller isn’t receiving a heartbeat signal from the roof unit’s control board. An “E3” or “E4” usually points to a temperature sensor failure, either at the wall or at the evaporator coil. When you encounter these codes, don’t rush to replace the unit.
Troubleshooting Dometic Capacitive Touch Thermostat Errors
- E1: Communication loss between thermostat and roof unit.
- E2: Open circuit or out-of-range sensor.
- E3: Shorted temperature sensor.
- E4: Communication error in the auxiliary heat circuit.
- E5: Open circuit in the freeze sensor.
Is the Thermostat Compatible?
If you’re replacing an older analog thermostat with a new capacitive touch model, you must ensure compatibility with your existing control board. Many newer digital units require specific “CCC2” communication boards to function correctly. If you have an older system, simply plugging in a new capacitive thermostat will result in a blank screen or an immediate “E1” error code because the communication protocols are incompatible.
Always check the model number on your rooftop air conditioner shroud to verify it matches the list of compatible hardware. Using an incompatible control unit can lead to permanent damage to the control board’s logic circuits.
Can I Clean the Sensors Safely?
Cleaning the interface is a delicate process because the capacitive layer is sensitive to chemicals. Avoid using harsh household cleaners, bleach, or ammonia-based glass sprays, as these can strip the protective coating or seep into the electronics. Instead, use a soft, lint-free cloth lightly dampened with distilled water or a dedicated electronics screen cleaner.
Gently wipe the surface in a circular motion and immediately follow with a dry cloth. Never spray liquid directly onto the thermostat; always apply the cleaner to the cloth first to prevent moisture ingress into the internal housing.
How to Calibrate the Temperature
Sometimes, the thermostat may read the temperature incorrectly, leading to a climate that’s either too cold or too hot. While most of these units are calibrated at the factory, they do allow for a temperature offset adjustment. To access this, hold the mode and fan buttons simultaneously for several seconds until the display enters the service menu.
Use the up and down arrows to adjust the temperature offset, usually within a range of -3 to +3 degrees. This isn’t a hardware repair but a software adjustment to align the thermostat’s reading with a secondary thermometer placed in the center of the room.
Tips for Preventing Future Issues

Environmental factors are the primary cause of premature failure in capacitive touch units. Extreme heat can cause the internal plastic housing to expand, putting pressure on the sensors, while high humidity can lead to condensation on the circuit board. To prevent these issues, ensure your RV is well-ventilated when stored.
If you’re parking the RV for an extended period, consider covering the thermostat or placing a small desiccant pack near the control area if you live in a high-humidity climate. Keeping the unit away from direct sunlight also prevents thermal fatigue of the screen components.
| Component | Maintenance Action | Frequency |
|---|---|---|
| Faceplate | Wipe with dry microfiber | Monthly |
| Wiring | Inspect for corrosion | Yearly |
| Contacts | Clean with contact spray | Every 2 Years |
| System | Full power cycle | As needed |
Related guides
Frequently Asked Questions
Why is my thermostat screen totally blank?
How do I fix an E1 error code?
An E1 error code indicates a communication failure between the thermostat and the rooftop unit. This is often caused by a loose RJ11 cable or a dip switch mismatch. Unplug the cable from both the thermostat and the air conditioner, inspect the pins for corrosion, and plug them back in securely. If the error persists, verify that the dip switches on the rooftop control board are set correctly.
Can I replace the thermostat myself?
Yes, replacing a Dometic thermostat is a manageable DIY task. Ensure you remove the 12V power source before disconnecting any wires to prevent short-circuiting the control board. Take a photograph of the existing wiring configuration before removal to ensure the new unit is wired identically. Once installed, the new unit will likely require a hard reset to synchronize with the existing rooftop air conditioner control module.
How do I know if my thermostat is broken?
If you have performed a hard reset, verified that you have 12V power at the harness, and confirmed that the RJ11 cable is securely connected, yet the unit remains unresponsive or displays persistent error codes, the hardware is likely faulty. Capacitive touch units can suffer from internal sensor degradation over time, which can’t be repaired and necessitates a complete replacement of the wall-mounted control unit.
Does the thermostat need a special battery?
Most Dometic capacitive touch thermostats for RVs are powered directly by the coach’s 12V DC system and don’t require internal batteries. If your specific model does use a backup battery to maintain settings during power outages, it will typically be a small coin-cell battery located behind the faceplate. Check your specific owner’s manual, as using the wrong voltage battery can damage the sensitive internal logic board.
Conclusion
If you have completed these troubleshooting steps and the thermostat remains unresponsive, your next step is to inspect the rooftop unit’s control board. Access the air conditioner shroud to verify that the status LED on the control board is flashing, which confirms it’s receiving power and attempting to communicate. If you see no lights on the rooftop board, you may need to replace the control module rather than the thermostat itself.