When your air conditioner stops cooling or fails to respond to thermostat inputs, the culprit is often a faulty control module. If you’re currently performing dometic ac control board troubleshooting, you’re likely dealing with a communication error, a blown fuse, or a failed relay. Replacing these units typically costs between $180 and $450 depending on the specific model and whether you perform the labor yourself. Understanding the electrical architecture of your system is the most effective way to restore comfort to your recreational vehicle without incurring unnecessary service shop fees.
Key Takeaways
- Always disconnect both shore power and the battery bank before touching any electrical components.
- Verify that your thermostat is compatible with the specific revision of the control box installed on your roof unit.
- Look for physical signs of damage on the circuit board, such as burnt traces or swollen capacitors.
- Ensure that the DIP switch settings on the control board match the configuration required for your specific zone and thermostat type.
How the Control Board Functions
The control board acts as the central brain of your Dometic air conditioning system. It receives low-voltage signals from your wall-mounted thermostat and translates them into high-voltage commands for the compressor, fan motor, and furnace.
Most modern units utilize a communication cable to send digital signals between the wall unit and the roof assembly. If this cable becomes damaged or oxidized, the control board will fail to receive instructions, leading to a system that appears unresponsive or displays an E1 error code.
Troubleshooting Dometic Control Board Failure
- No power to the thermostat display.
- Compressor short-cycling or refusing to engage.
- Fan running continuously despite thermostat settings.
- Inability to switch between heat and cool modes.
- Unexplained error codes that persist after a hard reset.
Safety and Preparation Steps
| Step | Action | Safety Level |
|---|---|---|
| 1 | Kill AC Shore Power | Essential |
| 2 | Disconnect DC Battery | Essential |
| 3 | Discharge Capacitors | Recommended |
| 4 | Wear Safety Glasses | Recommended |
| 5 | Use Insulated Tools | Essential |
Troubleshooting Communication Errors
If your thermostat displays a communication error, the issue often resides in the RJ11 cable connecting the thermostat to the control board. Use a contact cleaner to wipe the pins on both ends of the cable. If the connection remains unstable, inspect the cable for any pinching or signs of rodent damage. Dometic provides specific guidance on troubleshooting Dometic air conditioner communication errors to ensure you’re identifying the correct fault before replacing parts.
Testing the RJ11 Cable
You can test the continuity of the cable using a standard phone line tester. If the internal wires have broken due to vibration or thermal expansion, the control board will be unable to receive the “on” signal, effectively rendering the entire system useless until the cable is replaced or re-terminated.
Is the Control Board Actually Dead?
Inspecting the Circuitry
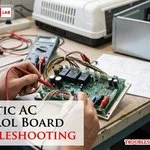
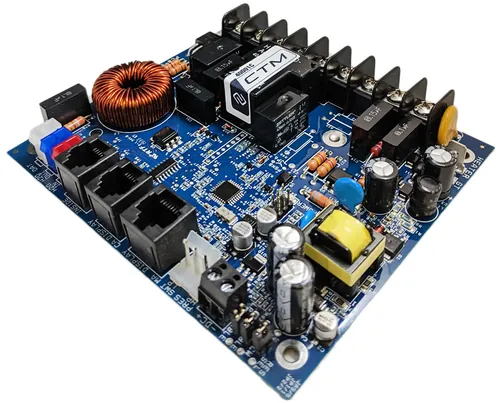
Remove the plastic cover from the control box to reveal the printed circuit board. Use a flashlight to examine the components for signs of thermal stress. If you see black char marks around the relays or the transformer, the board has suffered a catastrophic failure and must be replaced. Ensure that all wire spade connectors are pushed firmly onto their respective terminals; loose connections are a primary cause of intermittent cooling performance in mobile environments.
Identifying Your Part Number
Dometic has manufactured dozens of variations of control boards over the last two decades. You must match the exact part number printed on the original board to ensure compatibility with your specific model of air conditioner. Common series include the CCC2 and the older Comfort Control Center units. If you install a board intended for a different generation of thermostat, the DIP switch configuration won’t translate correctly, leading to non-functional zones or incorrect sensor readings.
| Component | Function | Failure Symptom |
|---|---|---|
| Relay | Switches High Voltage | Compressor Won’t Start |
| Transformer | Lowers AC Voltage | No Thermostat Power |
| Microchip | Processes Signals | Erratic Operation |
| DIP Switches | Configures Options | Wrong Zone Behavior |
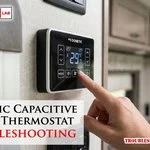
Verifying Thermostat Compatibility
Not all Dometic thermostats work with all control boards. If you recently upgraded your wall unit to a digital display, you must ensure the control board supports that communication protocol. If you’re mixing legacy hardware with modern digital controls, the system will never successfully hand-shake. Compatibility verification is the most overlooked step in the repair process and often leads to the mistaken conclusion that a new control board is defective when it’s simply incompatible with the existing hardware.
Replacing the Control Board
If you have confirmed that the board is faulty, order the exact replacement part. When installing the new board, take a photograph of the existing wiring configuration before removing any cables. This prevents confusion during reassembly. Ensure that the ground wire is securely fastened to the chassis, as a poor ground connection can cause the sensitive electronics on the board to fail prematurely due to electrical noise or static buildup.
When to Call a Professional
If you have verified that the control board is receiving 12V DC power but isn’t sending the signal to the compressor or fan, the internal logic is likely compromised.
If you’re uncomfortable working with high-voltage AC wiring or if the unit is still under a manufacturer’s warranty, it’s safer to contact a certified RV technician. Attempting to solder or repair the board components yourself is generally not recommended, as the conformal coating used on these boards makes precise repair difficult and often unreliable.
Frequently Asked Questions
Why does my thermostat show an E1 error code?
Can I repair a burnt relay on the board?
While it’s physically possible to desolder and replace a relay, it’s rarely cost-effective or safe. The heat that caused the relay to fail often damages the surrounding traces and the fiberglass substrate of the board. Replacing the entire control module ensures that you aren’t dealing with hidden damage that could lead to a future electrical fire or further component failure.
Do I need to reset the DIP switches?
Yes, the DIP switches on your new control board must be set to match the configuration of your old board. These switches tell the system how many zones are present, whether you have a heat pump, and if you’re using an external temperature sensor. If the DIP switches aren’t configured correctly, your system may fail to start or operate in the wrong mode.
What causes a control board to fail?
Most board failures are caused by voltage spikes, moisture intrusion, or physical vibration. In an RV, the constant movement can cause spade connectors to loosen, creating high-resistance connections that generate heat. Additionally, lightning strikes or power surges at campgrounds can fry the sensitive microprocessors on the board. Keeping your connections tight and using a surge protector can significantly extend the lifespan of these units.
Is the board for a heat pump different?
Yes, control boards designed for heat pump models include extra relays to control the reversing valve. If you install a standard air conditioner board into a heat pump system, you’ll lose the ability to switch into heating mode. Always verify that the replacement part number specifically lists support for your model’s heating capabilities to ensure all system features remain operational after the repair.
Conclusion
If you have successfully identified that your control board is the source of the issue, the next step is to order a replacement part from a reputable RV supply retailer. Ensure you have your air conditioner’s model and serial number handy to guarantee you receive the correct revision for your specific unit. Once the new board arrives, follow your wiring diagram carefully to restore your system to full operation.