When troubleshooting a Honeywell S8610U, check for sparking issues and proper connections. Ensure gas flow is adequate.
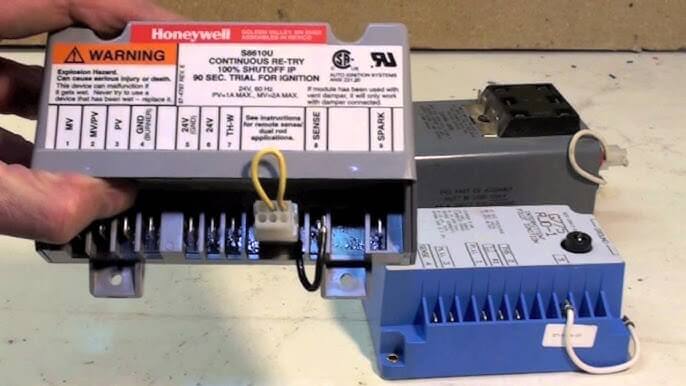
Honeywell S8610U troubleshooting is essential to maintain the efficiency and functionality of your heating system. The S8610U ignition control module plays a crucial role in the proper functioning of gas-fired systems, ensuring safe and reliable operation. By identifying and addressing any issues promptly, you can prevent breakdowns and ensure optimal performance.
In this guide, we will explore common troubleshooting steps for the Honeywell S8610U to help you resolve any problems effectively.
Common Issues With Honeywell S8610u
When troubleshooting the Honeywell S8610U, it’s essential to be aware of common issues that may arise. Addressing these issues promptly can help ensure the proper functioning of your system and prevent larger problems down the line.
Pilot Light Failure
One common issue with the Honeywell S8610U is pilot light failure, where the pilot light may not ignite or stay lit. This can be caused by a dirty pilot orifice, thermocouple issues, or gas supply problems.
Ignition Failure
Ignition failure is another prevalent issue encountered with the Honeywell S8610U. This problem can occur due to a faulty ignition control module, improper wiring, or gas valve issues.
Intermittent Ignition
Intermittent ignition can disrupt the smooth operation of the Honeywell S8610U. This issue may indicate problems with the flame sensor, wiring connections, or sensor alignment.
Diagnostic Tools And Techniques
In troubleshooting the Honeywell S8610U, effective diagnostic tools and techniques play a crucial role. To ensure a systematic approach, it is essential to utilize specific methods for pinpointing issues accurately. Here are the steps to test the flame sensor and check the ignition control module:
Testing the Flame Sensor:
1. Disconnect the sensor wire and clean the sensor with sandpaper.
2. Measure the sensor’s electrical continuity with a multimeter.
3. Ensure the sensor is properly aligned and positioned in the flame path.
Checking the Ignition Control Module:
1. Inspect the module for any visible signs of damage or corrosion.
2. Test the module’s output voltage with a voltmeter to verify functionality.
3. Verify proper electrical connections and secure mounting of the module.
By following these diagnostic steps with precision, identifying and resolving issues with the Honeywell S8610U becomes more manageable.
Fixing Pilot Light Failure
Fixing Pilot Light Failure is crucial in ensuring the proper functioning of the Honeywell S8610U ignition module. When the pilot light fails to ignite, it can lead to heating system malfunctions and discomfort. In this section, we will explore essential troubleshooting steps to address pilot light failure.
Cleaning The Pilot Orifice
One common cause of pilot light failure is a clogged pilot orifice. Over time, dirt, dust, or debris can accumulate, obstructing the flow of gas. To address this issue:
- Turn off the gas supply to the furnace.
- Locate the pilot orifice and carefully remove any obstructions using a soft brush or compressed air.
- Inspect the orifice to ensure it is clear of any buildup.
- Restore the gas supply and attempt to reignite the pilot light.
Inspecting The Thermocouple
The thermocouple plays a vital role in sensing the presence of a pilot flame. A malfunctioning or faulty thermocouple can lead to pilot light failure. Here’s how you can inspect the thermocouple:
- Locate the thermocouple near the pilot flame assembly.
- Check for any signs of corrosion or damage on the thermocouple.
- If necessary, gently clean the thermocouple with a fine sandpaper to remove any buildup or oxidation.
- Ensure the thermocouple is properly positioned and making good contact with the pilot flame.
- Test the pilot light after inspecting and potentially cleaning the thermocouple.
Resolving Ignition Failure
When it comes to troubleshooting the Honeywell S8610U ignition control module, one of the most common issues that may arise is ignition failure. This can be a frustrating problem, but fortunately, there are steps you can take to resolve it and get your system up and running again. In this section, we will discuss two key methods to address ignition failure: replacing the ignition control module and adjusting the spark ignition.
Replacing The Ignition Control Module
If you are experiencing ignition failure with your Honeywell S8610U, a faulty ignition control module could be to blame. Replacing this component may be necessary to resolve the issue. Here’s how you can go about it:
- Turn off the power: Before beginning any work on your HVAC system, it is crucial to turn off the power. Locate the circuit breaker or switch that supplies power to the system and switch it off.
- Remove the existing ignition control module: Locate the module, which is typically located near the burner assembly. Carefully disconnect any wires or connectors attached to the module, and then remove it from its mounting bracket.
- Install the new ignition control module: Take the new ignition control module and securely mount it in the same location as the old one. Make sure to reconnect any wires or connectors according to the manufacturer’s instructions.
- Restore power and test: After installing the new ignition control module, restore power to the system. Test the igniter to ensure it is functioning correctly and verify that the ignition failure issue is resolved.
Adjusting Spark Ignition
If replacing the ignition control module does not resolve the ignition failure, the spark ignition may need adjustment. To do this:
- Turn off the power: As a safety precaution, switch off the power to your HVAC system by locating the circuit breaker or switch that controls it.
- Locate the spark ignition: Identify the spark ignition system, which is typically located near the burner assembly. It usually consists of an electrode and a ground.
- Check the electrode position: Inspect the position of the electrode, ensuring it is properly aligned with the burner. If necessary, use a wrench or screwdriver to adjust the position, ensuring it is close enough to create a spark but not so close as to cause interference.
- Inspect the electrode and ground: Examine the electrode and ground for any signs of damage or buildup. If there is dirt or debris present, carefully clean the components using a soft brush or cloth.
- Restore power and test: Once you have made any necessary adjustments and cleaned the electrode and ground, restore power to the system. Test the igniter to see if the ignition failure issue is resolved.
Dealing With Intermittent Ignition
If you’re experiencing intermittent ignition issues with your Honeywell S8610U, troubleshooting the problem can help restore consistent functioning. Check the wiring connections, ensure the flame sensor is clean, and inspect the gas supply for any restrictions. Addressing these factors can often resolve intermittent ignition troubles, ensuring your system operates smoothly.
Intermittent ignition issues can be frustrating when trying to keep your Honeywell S8610U furnace running smoothly. Fortunately, resolving these problems doesn’t have to be a complex task. By following the troubleshooting steps below, you can get your furnace back up and running in no time.
Checking The Gas Supply
When faced with intermittent ignition, the first thing to check is the gas supply. Ensure that the gas valve feeding the furnace is fully opened and that there are no blockages in the gas lines. To perform this check, follow these simple steps:
- Locate the gas valve near your furnace.
- Make sure the valve is in the “on” position.
- If the valve is closed, turn it to the “on” position.
- If the valve is already open, close it fully and then reopen it.
By checking and adjusting the gas supply, you can eliminate any potential issues caused by insufficient gas flow to the ignition system.
Examining The Wiring Connections
If the gas supply is not the problem, the next step is to inspect the wiring connections. Over time, wiring connections can become loose or damaged, causing intermittent ignition issues. To examine the wiring connections, follow these steps:
- Turn off the power to your furnace.
- Locate the control panel where the wiring connections are housed.
- Carefully inspect each connection for signs of looseness or damage.
- If any connections appear loose, tighten them using a screwdriver or pliers.
- If any wires are damaged or frayed, they will need to be replaced.
By ensuring that all wiring connections are secure and intact, you can eliminate any electrical issues that may be causing intermittent ignition problems.
Dealing with intermittent ignition on your Honeywell S8610U furnace doesn’t have to be a hassle. By checking the gas supply and examining the wiring connections, you can quickly identify and resolve the issue, ensuring your furnace runs smoothly and efficiently.
Frequently Asked Questions Of Honeywell S8610u Troubleshooting
How Do I Troubleshoot A Honeywell S8610u?
To troubleshoot a Honeywell S8610U, start by checking the power supply, ensuring the connections are secure, and inspecting for any damaged wiring.
Why Is My Honeywell S8610u Not Working?
If your Honeywell S8610U is not working, it could be due to a faulty ignitor, gas valve, control board, or flame sensor. Check these components for any issues.
How Can I Test The Ignitor On My Honeywell S8610u?
To test the ignitor on your Honeywell S8610U, you can use a multimeter to check for continuity. If there is no continuity, the ignitor needs to be replaced.
What Causes A Honeywell S8610u To Short Cycle?
A Honeywell S8610U may short cycle due to issues like a dirty flame sensor, improper flame signal, or a faulty high limit switch. Check and clean these components.
How Do I Replace The Flame Sensor On A Honeywell S8610u?
To replace the flame sensor on a Honeywell S8610U, start by removing the burner assembly, disconnecting the old sensor, and installing the new one in its place.
Conclusion
Troubleshooting the Honeywell S8610U can resolve common issues and ensure proper functionality. Utilizing the troubleshooting techniques discussed can help identify and address potential problems, leading to improved performance and safety. By following the guidelines and insights provided, users can effectively troubleshoot their Honeywell S8610U and enhance their overall experience.
")