To troubleshoot a Liftmaster logic board, first, check for loose wiring or burnt components. Then, inspect for any visible damage or corrosion.
Garage door openers are essential for convenient access to your garage. However, when the logic board malfunctions, it can disrupt the entire system. Troubleshooting the Liftmaster logic board is crucial to identify and address any underlying issues. By following specific steps and inspecting for common problems, you can effectively diagnose and resolve logic board issues.
Understanding how to reset the board and recognizing signs of a faulty receiver are also key aspects of troubleshooting. With the right knowledge and guidance, you can successfully troubleshoot and maintain your Liftmaster logic board, ensuring smooth and reliable operation of your garage door opener.
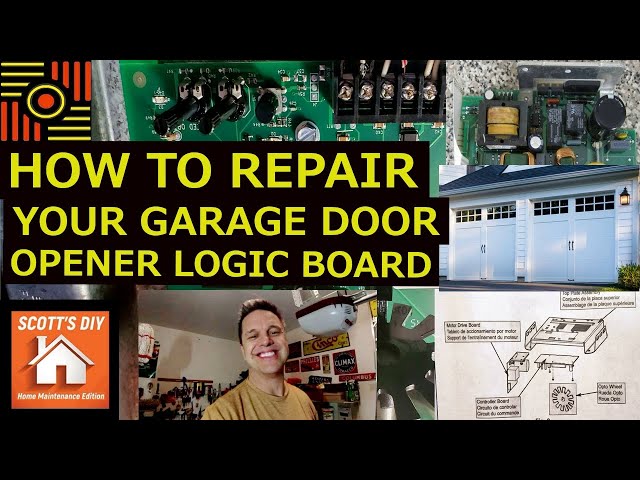
Credit: m.youtube.com
Introduction To Liftmaster Logic Board Issues
Discover common Liftmaster Logic Board issues with troubleshooting tips to resolve problems efficiently. Learn how to repair and reset your Liftmaster board with cost-effective solutions for garage door opener circuit board replacements. Explore expert guidance on identifying and fixing faulty garage door receivers and logic boards for seamless functionality.
Common Symptoms Of Logic Board Problems
If you notice that your Liftmaster garage door opener is not functioning properly, it could be due to a problem with the logic board. Some common symptoms of logic board issues include the door not responding to the remote, the door only opening or closing partially, or the door reversing direction unexpectedly. Additionally, you may hear unusual noises or see flashing lights on the opener.Impact On Garage Door Functionality
When the logic board of your Liftmaster garage door opener is not working correctly, it can significantly impact the functionality of your garage door. If left unaddressed, the issue can worsen and eventually lead to a complete breakdown of the opener. This can be not only inconvenient but also potentially dangerous. It is important to diagnose and fix any logic board issues as soon as possible to ensure that your garage door is functioning safely and efficiently.If you suspect that you have a problem with your Liftmaster logic board, it is recommended that you consult with a professional garage door technician. They can help diagnose the issue and provide guidance on the best course of action. In some cases, a simple repair or replacement of the logic board may be all that is needed to get your garage door opener back to working order.Initial Diagnostic Steps
Safety Precautions Before Troubleshooting
- Disconnect power to the garage door opener.
- Avoid touching any exposed wires.
- Wear insulated gloves for safety.
Basic Checks Before Logic Board Diagnosis
- Ensure the garage door is closed properly.
- Check for any obstructions in the door’s path.
- Inspect the remote control batteries.
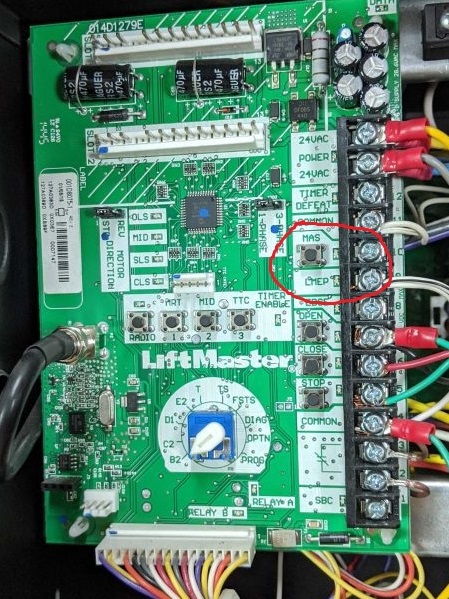
Identifying Logic Board Malfunctions
When troubleshooting issues with your Liftmaster garage door opener, it’s important to first identify potential malfunctions within the logic board. The logic board is a crucial component that controls the operation of the garage door opener, and identifying malfunctions early on can prevent further damage and costly repairs.
Visual Inspection For Signs Of Damage
One of the initial steps in identifying logic board malfunctions is to conduct a visual inspection for any signs of damage. Inspect the logic board for visible signs of burnt components, corrosion, or loose connections. Additionally, examine the solder joints and wiring for any abnormalities.
Intermittent Operation And Error Codes
Another indicator of logic board malfunctions is intermittent operation and error codes displayed by the garage door opener. Pay attention to any error codes or unusual behavior exhibited by the opener, as these can provide valuable clues about potential logic board issues. Keep a record of any error codes displayed on the opener’s display panel, as they can assist in diagnosing the problem.
Credit: ddmgaragedoors.com
Common Logic Board Problems And Solutions
When it comes to troubleshooting Liftmaster logic board issues, it’s important to be aware of some common problems and their solutions. Here are some key areas to focus on when dealing with logic board problems:
Power Surge Damage Repair
If your Liftmaster logic board has been affected by a power surge, it can cause various issues such as erratic behavior or complete failure. To address this, you can consider repairing the damage caused by the power surge. This involves inspecting the board for visible signs of damage, such as burnt components or blown fuses. If any components are found to be damaged, they should be carefully replaced to restore the functionality of the board.
Reflowing Solder On Connections
Another common issue with logic boards is poor solder connections, which can lead to intermittent operation or malfunctioning. Reflowing the solder on connections can help address this problem. By carefully reheating the solder joints, any cracked or cold solder joints can be repaired, ensuring proper electrical connections and reliable operation of the logic board.
Replacing The Logic Board
When troubleshooting issues with a Liftmaster garage door opener, it may become necessary to replace the logic board. The logic board is a crucial component responsible for the operation of the opener, and if it malfunctions, it can lead to various problems. Here’s a step-by-step guide on how to replace the logic board and test the new one to ensure the smooth functioning of your garage door opener.
Step-by-step Replacement Process
- Before starting the replacement process, ensure to disconnect the power supply to the garage door opener to avoid any electrical hazards.
- Remove the cover of the garage door opener to access the logic board. It’s typically located near the motor unit.
- Unplug the wires connected to the logic board. Take a picture or make note of the wire connections to facilitate the reconnection process later.
- Unscrew and carefully remove the existing logic board from the opener.
- Place the new logic board in position and reconnect the wires according to the notes or pictures taken earlier.
- Secure the new logic board in place and put the cover back on the garage door opener.
- Reconnect the power supply and test the garage door opener to ensure the successful replacement of the logic board.
Testing The New Logic Board
After replacing the logic board, it’s crucial to perform thorough testing to ensure its proper functioning. Here’s how to test the new logic board:
- Power on the garage door opener and check if it responds to the remote or wall-mounted control panel.
- Operate the garage door in both the open and close directions to verify smooth and consistent functionality.
- Observe the indicator lights on the garage door opener to ensure they are displaying the appropriate signals as per the manufacturer’s guidelines.
- If available, test any additional features or functionalities of the garage door opener to confirm that the new logic board is working as intended.
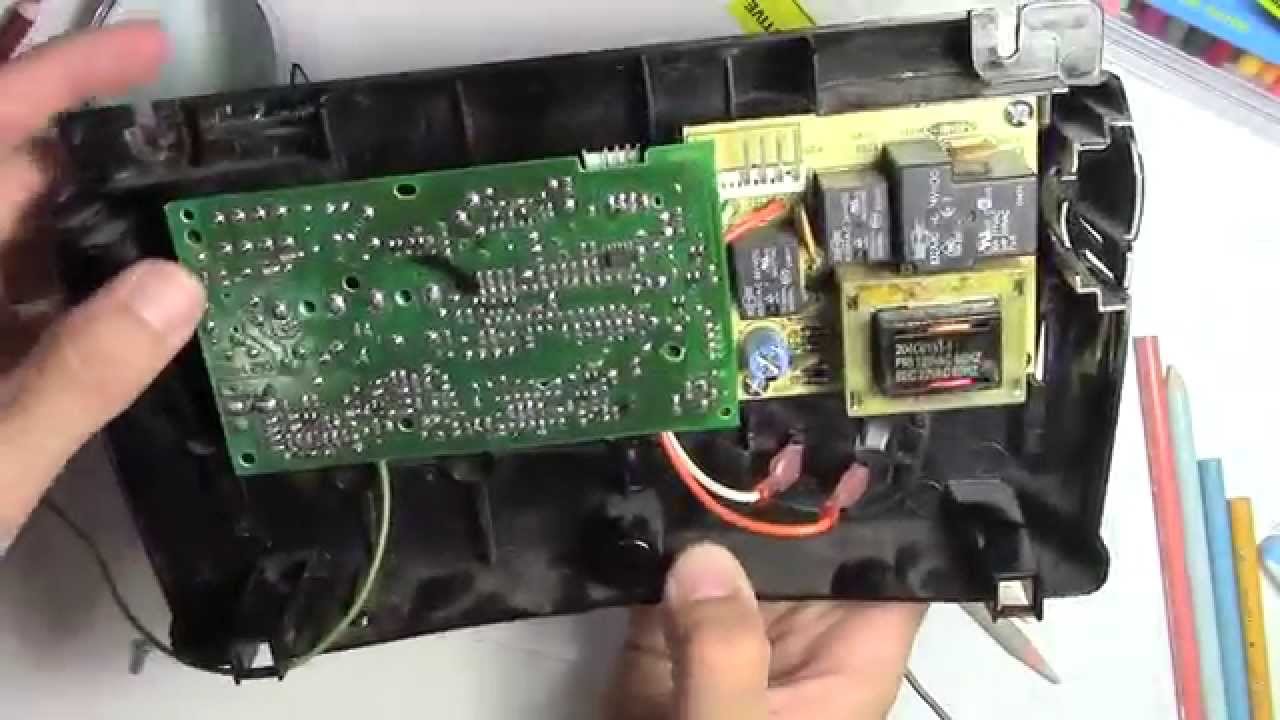
Credit: m.youtube.com
Resetting The Liftmaster Logic Board
When troubleshooting issues with your Liftmaster garage door opener, resetting the logic board can often resolve the problem. Resetting the logic board essentially clears any stored data and restores the board to its default settings, which can help address various operational issues.
Factory Reset Procedures
To perform a factory reset on your Liftmaster logic board, follow these steps:
- Locate the “Learn” button on the logic board, typically found near the antenna wire.
- Press and hold the “Learn” button for about 6 seconds until the LED light next to it turns off.
- Release the button, and the LED light should turn back on, indicating that the factory reset is complete.
Memory Erase And Reprogramming
If you need to erase the memory and reprogram the logic board, you can follow these steps:
- Press and hold the “Learn” button until the LED light goes out, then release the button.
- Press and release the “Learn” button again. The LED light will come on and remain lit.
- Within 30 seconds, press and hold the remote control button that you want to program until the opener lights flash or you hear two clicks from the opener. This action erases the memory and reprograms the remote control or keypad.
Cost Considerations
When troubleshooting a Liftmaster logic board, it’s essential to factor in the cost considerations. Repairing the board can be a cost-effective solution compared to a full replacement. It’s important to weigh the costs of repair versus replacement to make an informed decision.
Regular Upkeep For Longevity
Perform routine maintenance to ensure the longevity of your Liftmaster logic board. Regularly check for loose connections and clean any dust or debris that may accumulate.
- Inspect for loose connections
- Clean dust and debris
When To Upgrade To A Newer Model
If your Liftmaster logic board is outdated and experiencing frequent issues, it may be time to consider upgrading to a newer model. Upgrading can provide enhanced features and improved performance.
- Frequent issues with current board
- Desire for enhanced features
Maintenance Tips To Prevent Future Issues
To prevent future issues with your Liftmaster logic board, regular maintenance is crucial. Inspect and clean the board for dust and debris, check for loose connections, and ensure proper power supply. Regularly testing and resetting the board can also help in troubleshooting and preventing potential problems down the line.
If you are experiencing issues with your LiftMaster logic board, don’t worry – there are plenty of resources available to help you troubleshoot and solve the problem. Here are some of the best troubleshooting guide resources to turn to when you need assistance.Online Manuals And Videos
One of the most useful resources for troubleshooting LiftMaster logic board issues is the online manuals and videos available on the LiftMaster website and other online platforms. These resources provide step-by-step instructions for diagnosing and repairing a wide range of issues, from circuit board problems to motor malfunctions. Whether you prefer to read through detailed instructions or follow along with a video tutorial, LiftMaster has you covered with a variety of helpful resources.Professional Support And Community Forums
For more complex or difficult issues, it may be helpful to turn to professional support or community forums for assistance. LiftMaster offers a range of support options, including phone and email support, as well as an online community forum where you can connect with other LiftMaster users and get advice and tips from experts in the field. Whether you’re a DIYer looking to fix your own logic board issues or a professional installer seeking guidance, LiftMaster’s support resources are an invaluable tool for troubleshooting and problem-solving.In conclusion, when you encounter issues with your LiftMaster logic board, don’t panic – there are plenty of resources available to help you diagnose and repair the problem. Whether you prefer to consult online manuals and videos, connect with other users on community forums, or seek professional support, LiftMaster has you covered with a range of helpful troubleshooting guide resources.Troubleshooting Guide Resources
Discover valuable Liftmaster logic board troubleshooting resources for effective garage door repairs. Easily resolve issues with step-by-step guides, videos, and expert tips for seamless troubleshooting and logic board repairs.
Recap Of Troubleshooting Steps
Step 1: Disconnect the motor unit from power.
Step 2: Open the back of the motor unit using a socket or screwdriver.
Step 3: Inspect the antenna wire for any damage or loose connections.
Step 4: Review the logic board for any visible signs of damage or corrosion.
Step 5: Check the circuitry and connections for any loose wires or faulty components.
Final Thoughts On Maintaining Your Liftmaster Opener
Regular maintenance and troubleshooting of your Liftmaster logic board are essential to ensure smooth and reliable garage door operation. By following the steps outlined above, you can diagnose and address common issues that may arise with your opener, saving you time and money in the long run.
Remember to always consult the manufacturer’s manual for specific instructions and safety precautions when working on your garage door opener. By staying proactive and addressing any problems promptly, you can prolong the lifespan of your Liftmaster opener and enjoy hassle-free operation for years to come.
Frequently Asked Questions
How Do I Reset My Liftmaster Board?
To reset your LiftMaster board, remove power, wait a few minutes, then reconnect power.
Is There A Hard Reset On Liftmaster Garage Door Opener?
Yes, there is a hard reset option on LiftMaster garage door opener. You can do it by pressing and holding the “Learn” button on the opener until the LED light beside it turns off (about 6 seconds). This will erase all the codes and reset the opener to its original settings.
How Much Does It Cost To Replace A Circuit Board On A Garage Door Opener?
Replacing a circuit board on a garage door opener typically costs between $100 to $200.
How To Tell If A Garage Door Receiver Is Bad?
To determine if a garage door receiver is bad, check for these signs: door won’t open/close, intermittent operation, reversal, unusual noises, or an older model. Additionally, inspect the logic board for visible damage or loose connections. If issues persist, seek professional assistance for troubleshooting and repairs.
Conclusion
Troubleshooting your Liftmaster logic board can be a DIY project with the right guidance. By following step-by-step repair videos and seeking professional help when needed, you can save time and money. Remember to prioritize safety and thorough testing to ensure a successful fix.
Happy repairing!
")


