To troubleshoot Milnor washer issues, check power supply and connections before inspecting for clogs or leaks. Proper maintenance is key to preventing problems with your commercial washer.
Regularly cleaning and inspecting the machine can help identify issues early on and avoid costly repairs down the line. By following manufacturer guidelines and understanding common washer problems, you can keep your Milnor washer running smoothly and efficiently. Investing time in troubleshooting and addressing any issues promptly will prolong the lifespan of your equipment and ensure optimal performance in your commercial laundry operation.
Common Milnor Washer Issues
Leakage Problems
Milnor washers may experience leakage problems due to damaged hoses or loose connections.
To fix this, check hoses for cracks and tighten connections with a wrench.
Drainage Issues
An obstruction in the drainage system can cause Milnor washers to have drainage problems.
Clear any blockages in the drain pipe with a plumber’s snake for efficient drainage.
Electrical Malfunctions
Electrical malfunctions may occur in Milnor washers, leading to operational issues.
Ensure the power supply is stable and check the circuit breaker for any tripped switches.
Diagnosing The Problems
When it comes to troubleshooting your Milnor washer, identifying the issues correctly is crucial for effective repairs. Diagnosing the problems is the first step in resolving any laundry equipment malfunction.
Visual Inspection
- Inspect the exterior for any visible damage or leaks.
- Check the belts and pulleys for signs of wear or breakage.
- Look for loose connections or blockages in the water inlet/outlet.
Testing Electrical Components
- Ensure the power source is properly connected and functioning.
- Test the control panel for any error codes or malfunctions.
- Check the wiring for fraying or damage that may impede electrical flow.
Basic Troubleshooting Procedures
In order to ensure your Milnor washer functions smoothly and efficiently, it’s crucial to be familiar with the basic troubleshooting procedures. These procedures can help you identify and fix common issues that may arise, preventing potential downtime and costly repairs.
Cleaning Filters And Drains
To maintain the optimal performance of your Milnor washer, it’s important to regularly clean the filters and drains. Clogged filters and drains can lead to water drainage problems and may impact the overall washing process.
- Check the user manual for guidance on locating and accessing the filters and drains.
- Remove any accumulated debris or foreign objects from the filters to ensure proper water flow.
- Clean the drains to prevent any blockages that could impede draining during the wash cycle.
Checking And Replacing Hoses
Periodically inspecting and replacing hoses is essential to prevent leaks and ensure proper water supply to the washer. Over time, hoses can deteriorate, leading to potential water damage or disruption of the washing cycle.
- Visually inspect the hoses for any signs of wear, cracks, or damage.
- Replace worn or damaged hoses with compatible and high-quality replacements to guarantee reliable water connections.
- Ensure that the hoses are securely attached to both the washer and the water supply to prevent leaks.
Advanced Tips For Repairing Milnor Washers
Milnor washers are known for their durability and high performance. However, like any other appliance, they may encounter issues over time. In this blog post, we will discuss some advanced tips for repairing Milnor washers, focusing on calibrating sensors and controls and replacing faulty components. By following these steps, you can troubleshoot and fix common problems, ensuring that your Milnor washer continues to work efficiently.
Calibrating Sensors And Controls
Calibrating the sensors and controls of your Milnor washer is an essential step in ensuring its proper functioning. Incorrect calibration can cause issues such as incorrect water levels, unresponsive controls, or inaccurate cycle times. To calibrate the sensors and controls, follow these steps:
- Start by consulting the user manual for specific instructions on calibrating your model of Milnor washer.
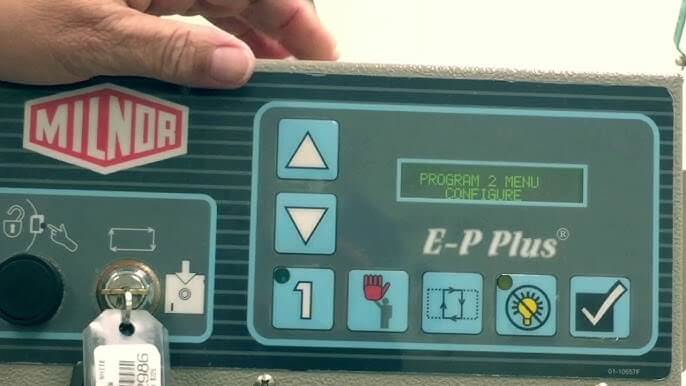
- Identify the location of the control panel which houses the sensors and controls.
- Ensure that the power supply to the washer is turned off before proceeding with any calibration.
- Locate the calibration settings within the control panel. This can usually be accessed through a menu or button labeled “calibrate.”
- Follow the on-screen prompts or instructions in the user manual to perform the calibration process.
- Once the calibration is complete, test the washer to see if the issues have been resolved. If not, you may need to repeat the calibration process or contact a professional technician for further assistance.
Replacing Faulty Components
If calibrating the sensors and controls does not resolve the issues with your Milnor washer, it may be necessary to replace faulty components. Common faulty components in Milnor washers include malfunctioning pumps, clogged drainage systems, and damaged belts. Here are the steps to follow when replacing faulty components:
- Turn off the power supply to the washer to ensure safety during the replacement process.
- Identify the specific faulty component that needs to be replaced. Consult the user manual for guidance.
- Source a suitable replacement component from an authorized dealer or reputable supplier.
- Before replacing any component, make sure you have the necessary tools and equipment to perform the job safely.
- Follow the step-by-step instructions provided in the user manual or any accompanying documentation that came with the replacement component.
- Once the faulty component is replaced, turn on the power supply and test the washer.
- If the issues persist, it may indicate a more significant problem that requires professional attention. Contact a qualified technician for further assistance.
By carefully calibrating the sensors and controls and replacing faulty components, you can effectively troubleshoot and fix common issues with Milnor washers. Regular maintenance and prompt repairs will ensure that your washer continues to operate at its best, delivering clean and fresh laundry.
Routine Maintenance Practices
Proper routine maintenance practices are essential for keeping your Milnor washer running smoothly and efficiently. By implementing these practices, you can avoid potential issues and extend the lifespan of your washer. In this section, we will discuss two important routines that should be a part of your maintenance plan: Cleaning and descaling and Lubrication of moving parts.
Cleaning And Descaling
Cleaning and descaling your Milnor washer regularly is crucial for optimal performance. Over time, mineral deposits and soap scum can build up inside the washer, leading to clogged hoses, reduced water flow, and inefficient cleaning cycles. To prevent these issues, follow these simple steps:
- Remove any leftover laundry and clothing from the washer.
- Mix a solution of equal parts water and white vinegar.
- Using a clean cloth or sponge, wipe down the interior of the washer, paying special attention to the drum, agitator, and detergent dispenser.
- For hard-to-reach areas, such as the drum’s gasket, use a soft-bristle brush.
- Rinse thoroughly with water to remove any vinegar residue.
- To prevent future mineral buildup, consider using a descaling agent specifically designed for washing machines. Follow the manufacturer’s instructions for proper usage.
By routinely cleaning and descaling your Milnor washer, you can maintain its performance, prevent malfunctions, and ensure your laundry comes out fresh and clean every time.
Lubrication Of Moving Parts
Proper lubrication of the moving parts in your Milnor washer is another essential maintenance practice. Lubrication helps reduce friction, wear, and tear, allowing the washer to operate smoothly and quietly. Follow these steps to ensure the moving parts are properly lubricated:
- Refer to the manufacturer’s instructions to identify the parts that require lubrication.
- Use a high-quality lubricant recommended by Milnor for your specific washer model.
- Apply a small amount of lubricant to the designated areas, such as the motor shaft, bearings, and pulleys.
- Wipe away any excess lubricant to prevent buildup.
- Regularly check the lubrication levels and reapply as needed, especially if you notice any unusual noises or resistance during the washer’s operation.
By following these simple lubrication steps, you can ensure the longevity and efficiency of your Milnor washer, minimizing the risk of costly repairs down the line.
Frequently Asked Questions Of Milnor Washer Troubleshooting
Why Won’t My Milnor Washer Turn On?
If your Milnor washer won’t turn on, check if the power cord is properly plugged in and if the circuit breaker hasn’t tripped.
How Can I Fix A Leaking Milnor Washer?
To fix a leaking Milnor washer, check the hoses for any cracks or loose connections, and ensure the door gasket is clean and intact.
Why Is My Milnor Washer Not Draining Water?
If your Milnor washer is not draining water, inspect the drain hose for any blockages or kinks, and make sure the drain pump is functioning properly.
What Should I Do If My Milnor Washer Is Not Spinning?
If your Milnor washer is not spinning, check if the load is balanced and not too heavy, and inspect the drive belt for any signs of damage.
How Do I Clean The Drum Of My Milnor Washer?
To clean the drum of your Milnor washer, run a cycle without any clothes using hot water and vinegar, and wipe the inside with a damp cloth afterward.
Conclusion
Troubleshooting your Milnor washer can be a straightforward process with the right knowledge and understanding. By following the tips and steps provided in this blog post, you can efficiently address common issues and keep your washer running smoothly. Remember to refer back to this guide whenever you encounter any problems with your Milnor washer.
")


Can you tell why I am getting this code: F02S01
Hi there! The F02S01 code on your Milnor washer usually indicates a problem with the water filling process. It might be due to a clogged filter, a faulty water valve, or low water pressure. I recommend checking your water supply and cleaning the filter to see if that helps. If the issue persists, you might want to contact a technician for further assistance. Let us know if you need more help!
Says too Long to Drain code F02S01 do you know why i am getting this code?