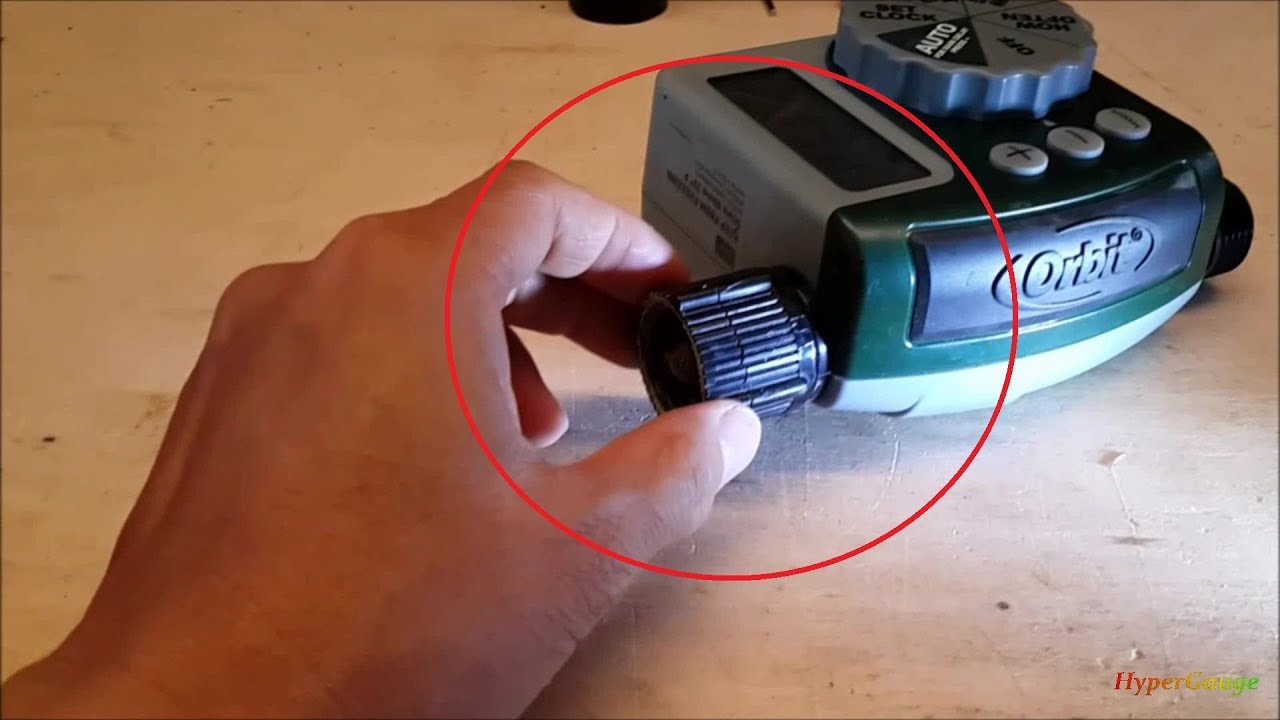
To troubleshoot an Orbit sprinkler timer, check and tighten any loose screws. Ensure the wiring is well-seated and try moving the wire to a different terminal for testing.
If the timer is not operating the valves, there may be multiple potential causes such as a defective controller or a programming error with too many start times. Maintaining a well-functioning sprinkler system is crucial for a healthy and vibrant lawn or garden.
However, encountering issues with the Orbit sprinkler timer can be frustrating. Understanding how to troubleshoot common problems is essential for proper maintenance and efficient operation. We will explore some common issues that may arise with Orbit sprinkler timers and provide practical troubleshooting tips to help you resolve these issues effectively.
Initial Steps Before Orbit Sprinkler Timer Troubleshooting
Before troubleshooting your Orbit sprinkler timer, it’s crucial to take some initial steps. Start by checking the terminal screws and wire connections. If the issue persists, try moving the wire to a different terminal to identify the problem. This approach can help pinpoint the source of the malfunction and guide your troubleshooting process.
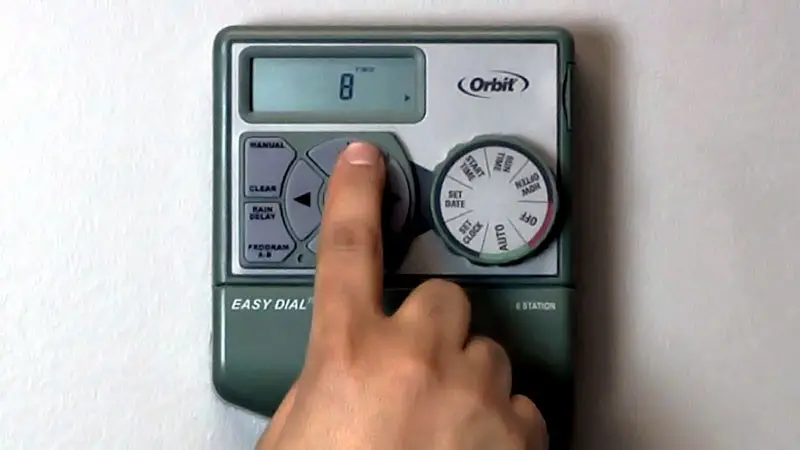
Identify Your Model
Before you start troubleshooting your Orbit sprinkler timer, it’s important to identify the model you have. This information is usually located on the timer itself or in the user manual. Knowing the model number will help you find specific troubleshooting steps or support if needed.
Safety Precautions
Before you begin any troubleshooting, it’s important to take safety precautions to prevent any accidents or damage to your system. Here are some things to keep in mind:
- Turn off the power to your sprinkler system before working on the timer.
- Wear protective gear such as gloves and safety glasses.
- Be careful when handling wires and electrical components.
If your Orbit sprinkler timer is not working properly, there are a few initial steps you can take before troubleshooting. These include:
- Check the power source: Make sure the timer is receiving power and the outlet is working.
- Check the wiring: Ensure that the wires are connected properly and are not damaged or frayed.
- Check the valve: Test the valve by manually turning it on and off to ensure it is functioning properly.
By following these initial steps and taking necessary safety precautions, you can ensure that your Orbit sprinkler timer troubleshooting goes smoothly and effectively.
Orbit Sprinkler Timer Troubleshooting Common Symptoms
When troubleshooting your Orbit sprinkler timer, it’s essential to identify common symptoms and their solutions. Understanding these issues can help you quickly diagnose and fix any problems that may arise.
No Ac Message Fixes
If your Orbit sprinkler timer displays a ‘No AC’ message, it indicates a power issue. Here are some potential fixes:
- Check the power outlet and ensure it’s functioning.
- Inspect the power cord for any damage.
- Reset the timer by unplugging it for a few minutes and then plugging it back in.
Controller Display Issues
Controller display problems can be frustrating, but they can usually be resolved with these steps:
- Ensure the display screen is not damaged or obscured.
- Reset the controller by removing the batteries and reinserting them.
- Check the wiring connections to the display for any loose connections.
Orbit Sprinkler Timer Assessing Electrical Problems
When troubleshooting an Orbit sprinkler timer, assessing electrical problems is essential to identify and resolve issues. Electrical problems can cause the timer to malfunction and disrupt the watering schedule. Therefore, it’s crucial to follow a systematic approach to diagnose and address any electrical issues.
Testing Power Supply
First, ensure the power supply to the Orbit sprinkler timer is functioning correctly. Use a multimeter to test the outlet where the timer is plugged in. Check for the presence of power and verify that the voltage matches the specifications required for the timer.
Checking For Faulty Wiring
Inspect the wiring connections within the timer and the associated valves. Look for any signs of fraying, damage, or loose connections. Make sure the wires are securely attached to the terminals and there are no exposed conductors that could cause a short circuit.
Orbit Sprinkler Timer Valve Operation Troubleshooting
When it comes to troubleshooting your Orbit sprinkler timer, it’s essential to understand the valve operation to ensure proper functioning of your irrigation system. Valve operation troubleshooting is crucial for identifying and resolving issues related to the performance of the valves in your sprinkler system.
Manual Valve Testing
If you suspect that a particular valve is not functioning as intended, manual valve testing can help you determine if the valve is the source of the problem. Follow these steps to manually test the valves:
- Locate the valve box and remove the lid to access the valves.
- Identify the valve that you want to test and manually turn the solenoid on top of the valve counterclockwise to open the valve.
- Observe the sprinkler heads connected to the valve to see if they are spraying water as expected.
- If the sprinkler heads do not activate, there may be an issue with the valve or the wiring connected to it.
Solving Continuous Running
If your sprinkler system’s controller is continuously running or repeating cycles when it should be off, it could be due to programming errors or electrical issues. Here are some troubleshooting steps to address continuous running:
- Check the programming of your controller to ensure that there are no overlapping or excessive start times that could cause the system to run continuously.
- Inspect the wiring connections and solenoids to identify any loose connections or damaged components that may be causing the continuous operation.
- If the issue persists, consider resetting the controller and reprogramming it to see if that resolves the continuous running problem.
Orbit Sprinkler Timer Programming And Timer Problems

When it comes to Orbit sprinkler timer troubleshooting, programming and timer issues can often cause frustration. Correcting multiple start times, resetting programmed cycles, and addressing other timer-related problems are crucial for ensuring an efficient irrigation system.
Correcting Multiple Start Times
If your sprinklers are running at multiple start times, it could be due to a programming error. To correct this, access the timer’s programming settings and remove any unnecessary start times. Ensure that there is only one start time programmed for each zone to avoid overlapping schedules.
Resetting Programmed Cycles
When encountering issues with programmed cycles, it’s essential to reset the timer and reprogram the desired watering schedule. Begin by clearing the existing programs and re-entering the watering times and days for each zone. Ensure that the timer is set to the correct date and time to avoid any discrepancies in the watering schedule.
Orbit Sprinkler Timer Head Malfunctions
When it comes to maintaining your irrigation system, dealing with sprinkler head malfunctions is essential for proper functioning. Whether it’s clogged or broken heads, addressing these issues promptly is crucial for efficient watering of your lawn or garden.
Identifying Clogged Or Dirty Heads
Clogged or dirty sprinkler heads can lead to uneven watering and poor coverage, affecting the health of your landscape. Here’s how to identify and address this common issue:
- Inspect the Sprinkler Heads: Check for any visible debris, dirt, or clogs obstructing the water flow.
- Clean the Heads: Use a small brush or specialized tool to remove any debris and clean the nozzles to ensure unobstructed water flow.
- Adjust the Water Pressure: Ensure the water pressure is appropriate for the sprinkler heads to function effectively.
Dealing With Broken Heads
Broken sprinkler heads can result in water wastage and inefficient irrigation. Here’s how to address this issue:
- Locate the Broken Head: Inspect the area and identify any broken or damaged sprinkler heads.
- Replace the Head: Carefully unscrew the broken head and replace it with a new one, ensuring proper alignment and connection.
- Test the System: After replacement, run a test cycle to ensure the new head is functioning correctly and providing adequate coverage.
By promptly identifying and addressing clogged or broken sprinkler heads, you can ensure the optimal performance of your irrigation system, promoting healthy and well-maintained landscaping.
Advanced Diagnostic Tactics For Orbit Sprinkler Timer
Troubleshooting Orbit sprinkler timers involves advanced diagnostic tactics to address issues such as non-operating valves and power supply problems. By checking the wiring and testing different terminals, you can effectively identify and resolve common irrigation timer issues. Utilizing multimeters and manual running techniques can help pinpoint and solve these problems efficiently.
Using A Multimeter
When troubleshooting an Orbit sprinkler timer, using a multimeter can help identify electrical issues.
Ensure the multimeter is set to the appropriate setting to measure voltage accurately.
Swapping Valve Wires
Another tactic is swapping valve wires to determine if the issue lies with a specific valve or the timer itself.
By swapping wires, you can isolate the problem area and pinpoint the source of the malfunction.
Seeking Professional Help
For effective Orbit Sprinkler Timer troubleshooting, seeking professional help ensures accurate diagnosis and timely solutions. Expert assistance guarantees efficient resolution of common irrigation timer issues, such as faulty wiring or malfunctioning controllers, optimizing your system’s performance.
When To Call Customer Service
If you have followed all the troubleshooting steps provided in the instruction manual and your Orbit sprinkler timer is still not functioning properly, it may be time to reach out to the manufacturer’s customer service. You can find their contact information in the manual or on their website. Before calling, make sure you have your timer model number and any error messages that may have appeared on the screen.
Finding A Local Repair Service
If you prefer to have your Orbit sprinkler timer serviced by a professional, you can search for local repair services in your area. A quick Google search for “Orbit sprinkler timer repair near me” should provide you with a list of options. Make sure to read reviews and check their ratings before making a decision. You can also reach out to local lawn care providers or irrigation system repair companies for recommendations.
It’s important to note that if your sprinkler system is still under warranty, you should contact Orbit customer service before seeking repairs from a third-party service. They may be able to provide free repairs or replacement parts.
Remember, seeking professional help can save you time and frustration in the long run. Don’t hesitate to reach out for assistance if you’re unable to troubleshoot the issue on your own.
Preventative Measures And Maintenance
- Regular Cleaning Tips: Regularly clean your Orbit sprinkler timer to prevent malfunctions.
- Seasonal System Checks: Perform seasonal checks on your sprinkler system to ensure proper functionality.
Upgrading Your System
When it’s time to enhance your sprinkler system, consider upgrading to a new Orbit sprinkler timer. Upgrading your system can lead to improved efficiency and performance.
Considering New Models
Before making a purchase, research the latest Orbit sprinkler timer models available. Look for features such as smart technology and weather sensors to optimize watering schedules.
Installation Tips For Upgrades
- Ensure proper placement of the new timer for optimal signal reception.
- Follow the manufacturer’s instructions carefully during installation.
- Test the system after installation to confirm everything is functioning correctly.
Frequently Asked Questions
Why Is My Orbit Sprinkler Timer Not Working?
If your Orbit sprinkler timer isn’t working, check the screws, wiring, and move wires between terminals for testing.
Why Is My Sprinkler Timer Not Turning My Sprinklers On?
If your sprinkler timer is not turning on your sprinklers, there could be several reasons. Firstly, check if the lawn sprinkler control timer is working correctly. Secondly, check for clogged or dirty sprinkler heads or broken sprinkler heads. If it’s only affecting one valve/terminal, try moving the sprinkler wire from that terminal to one of the others and test using that terminal to see if it works normally.
Additionally, check if the sprinkler wire is well-seated and tightened. You can manually test your orbit sprinkler system to troubleshoot the issue.
How Can You Tell If An Irrigation Controller Is Bad?
To determine if an irrigation controller is bad, check if the display remains blank despite a working outlet. If the controller runs continuously or repeats cycles incorrectly, it may be defective or programmed with too many start times.
How Do I Manually Test My Orbit Sprinkler System?
To manually test your Orbit sprinkler system,
- First, ensure the wiring is secure and properly connected.
- Then, move the wire from the affected terminal to another and test it. If the issue persists, the controller may be defective.
- Finally, verify that the power supply is functioning properly.
Conclusion
Troubleshooting your Orbit sprinkler timer can be manageable with the right tips. Make sure to check wiring connections and valve functionality for common issues. Seeking professional help or contacting customer service can also provide valuable solutions for a smoothly running irrigation system.
")


1. First, using Program A, I set all four Stations to start at 7pm and run for 10 minutes.
2. But when station 4 ends the, system restarts with Program A Station 1.
3. I switch the sysytem Off then Auto to stop the process.
4. I push the Reset to clear everything.
5. I repeat step one. The next time everything works as programmed.
6. Days later using Program B I set all four Stations to start at 6am and run for 5 minutes.
7. Now step 2 repeats on Program B.
8. Now I plan to stagger the Run Times to let each Station in each Program to turn off and wait before the next Station is timed to start.
9. We’ll see if that fixes it. (I hope.)
It sounds like you’re dealing with some interesting automation challenges! Transitioning between different programs and adjusting run times can definitely lead to unexpected behaviors, as you’ve described. Staggering the run times to allow for a smooth transition between stations in each program seems like a smart move. Hopefully, that adjustment will resolve the issues you’ve been experiencing and ensure everything runs smoothly as intended. Good luck with your automation adjustments!
Works fine on auto, put it on manual it cycles,and starts to cycle again. I turn it to off. What is the fix. Please?
It sounds like there might be an issue with the programming or the internal settings of your Orbit Sprinkler Timer. Here are a few steps you can try to troubleshoot and fix the problem:
Check Programming: Ensure that there are no overlapping start times set for the manual mode. Sometimes, multiple start times can cause the timer to cycle repeatedly.
Reset the Timer: Try resetting the timer to its factory settings. This can often resolve any programming glitches. Refer to the user manual for instructions on how to reset your specific model.
Battery Check: If your timer uses a battery, check if it needs to be replaced. A weak battery can sometimes cause erratic behavior.
Firmware Update: Some models might require a firmware update. Check the Orbit website or contact their customer support for any available updates for your model.
Manual Override: Ensure that the manual mode is being correctly overridden. Sometimes, toggling between auto and manual mode can help reset the internal cycle.
If none of these steps resolve the issue, it might be a hardware problem, and contacting Orbit customer support or a professional technician for further assistance would be the next best step.
New batteries not charging. Do I wait 10 minutes to reinsert good batteries then reset
Resolved problem. Someone said he kept putting in new batteries and the sprinkler would not work. Then he said to wait 4 hours. The next morning the sprinkler turned on at the right set time.
Thank you for reaching out! If your new batteries are not charging, try waiting about 10 minutes before reinserting them, then reset your hearing aids. Some users have reported that waiting a few hours before testing again can help. If the issue persists, you may want to check if the battery contacts are clean and properly aligned.
Let us know if you need further assistance!
TroubleshootingLAB