Is your RV electrical converter acting up and leaving you in the dark? You rely on it to keep your appliances running smoothly, but when it stops working, it can quickly turn your trip into a frustrating experience.
Don’t let confusion or uncertainty slow you down. In this guide, you’ll discover simple, clear steps to troubleshoot your RV electrical converter like a pro. By the end, you’ll feel confident fixing common issues and keeping your power flowing no matter where the road takes you.
Keep reading to take control of your RV’s electrical system today.

Common Converter Issues
RV electrical converters are vital for powering your camper’s electrical systems. They convert 120V AC power to 12V DC power. This power runs lights, appliances, and charges batteries. Common issues can stop your converter from working properly. Knowing these problems helps keep your RV running smoothly.
No Power Output
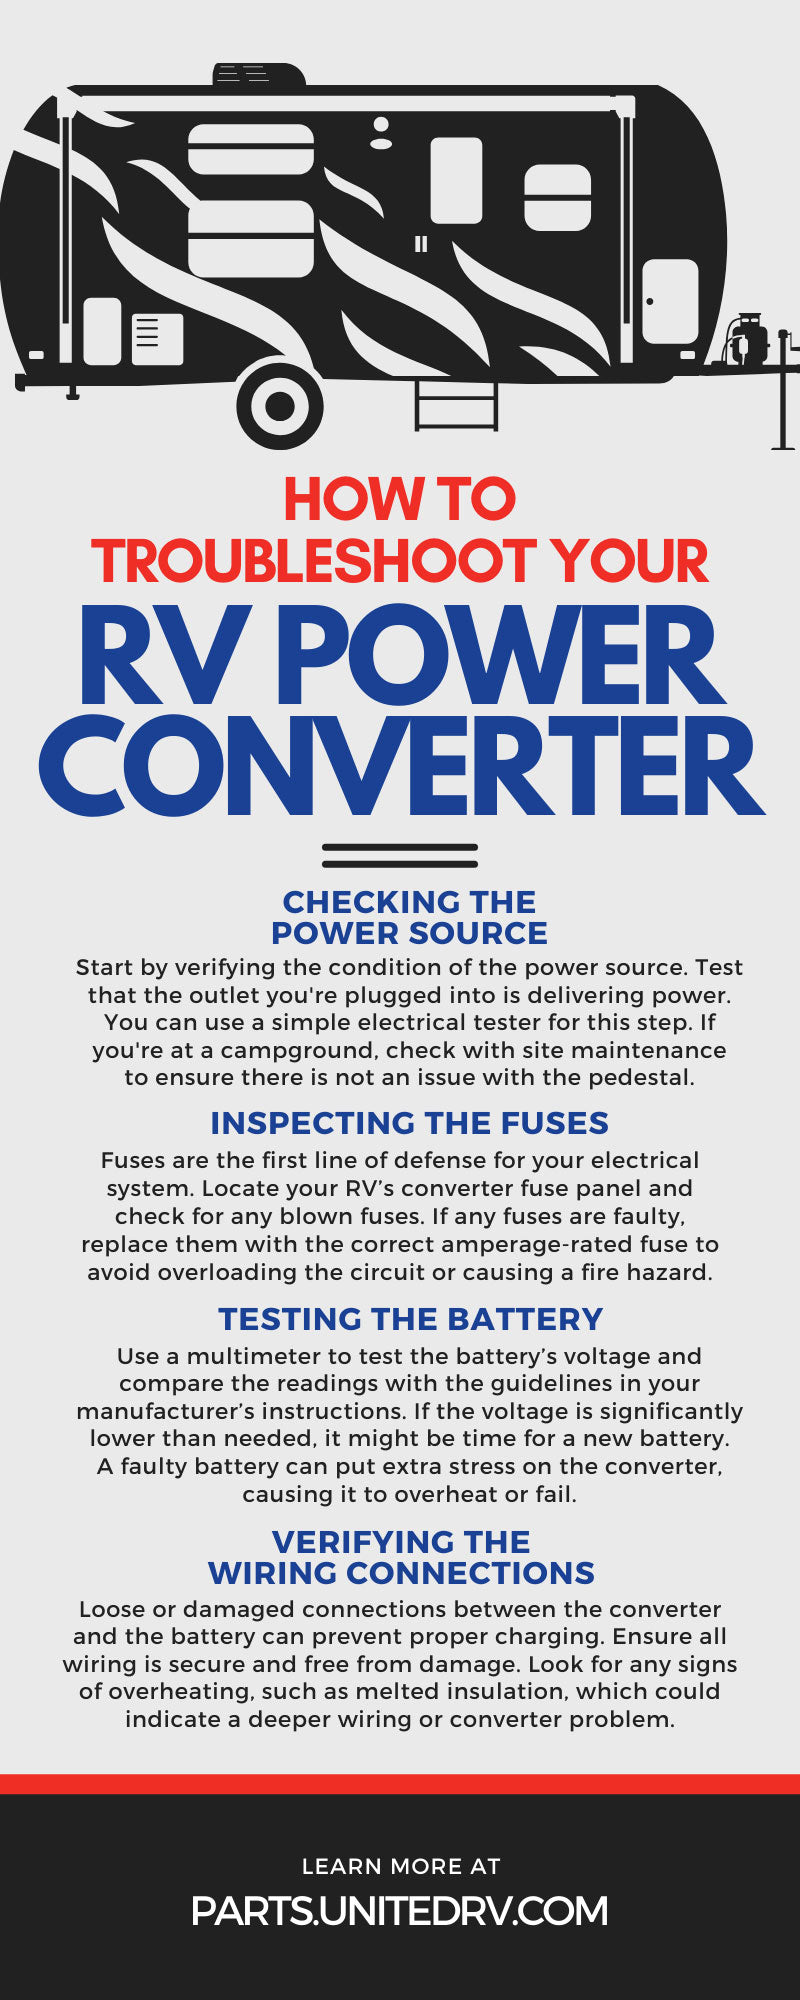
No power output means the converter is not delivering electricity. This can cause lights and appliances to stop working. Check the main fuse or circuit breaker first. A blown fuse or tripped breaker often causes this problem. Also, inspect wiring for loose connections or damage. Fixing these issues can restore power quickly.
Overheating Problems
Converters can overheat if they run too long or are overloaded. Overheating may cause the converter to shut down or fail. Dust and debris inside the unit block airflow and add heat. Clean the converter regularly to prevent this. Make sure your converter is the right size for your RV’s electrical load.
Unstable Voltage Levels
Voltage levels should stay steady to protect your devices. Unstable voltage can cause flickering lights and poor appliance performance. Check battery connections and wiring for corrosion or looseness. Bad wiring can cause voltage drops or spikes. Use a multimeter to monitor voltage and find issues.
Battery Not Charging
A common sign of converter trouble is the battery not charging. This can happen if the converter’s charging circuit is faulty. Test the output voltage to see if the converter sends power to the battery. Replace or repair the converter if it fails to charge. Always keep battery terminals clean and tight.
Basic Troubleshooting Steps
Basic troubleshooting steps help find common problems with an RV electrical converter. These steps save time and avoid costly repairs. Start with simple checks before moving to complex tests. Follow these clear steps to keep your converter working well.
Checking Fuses And Breakers
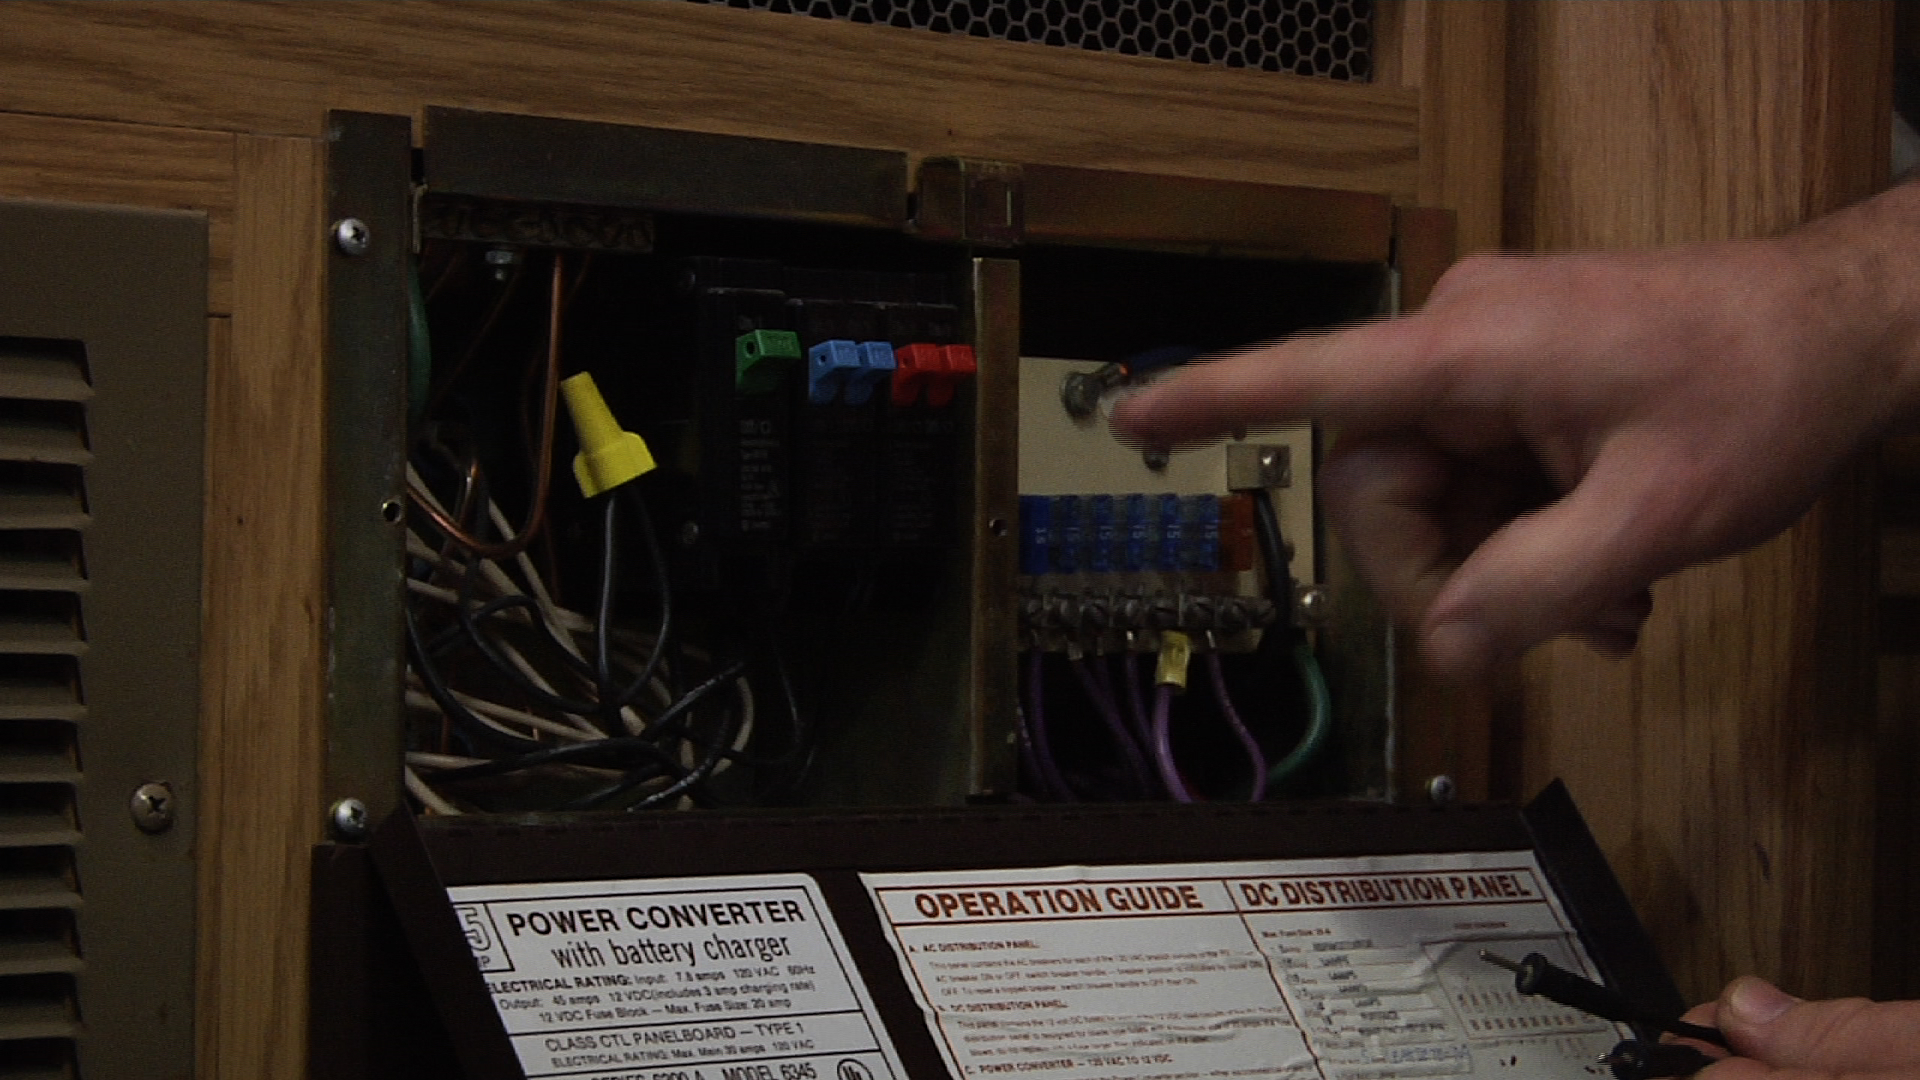
Fuses and breakers protect your RV’s electrical system. Look for any blown fuses or tripped breakers. Replace blown fuses with the same type and rating. Reset any tripped breakers by switching them off and on. This step often solves power issues quickly.
Inspecting Wiring Connections
Loose or damaged wires cause poor electrical flow. Check all wiring connections near the converter. Tighten any loose screws or terminals. Look for signs of corrosion or frayed wires. Clean corroded contacts with a wire brush or sandpaper. Proper wiring ensures smooth power delivery.
Testing Battery Health
The battery supplies power to the converter. A weak battery reduces converter performance. Test the battery with a voltmeter or multimeter. A fully charged battery reads about 12.6 volts or higher. Replace the battery if the voltage is low or it cannot hold charge.
Measuring Output Voltage
Use a multimeter to measure the converter’s output voltage. Set the meter to DC volts and connect it to the converter output terminals. The voltage should match the battery’s charging voltage, usually around 13.5 to 14.5 volts. Low or no output voltage signals a faulty converter.
Quick Fixes For Frequent Problems
RV electrical converters sometimes stop working properly. Quick fixes can solve many common issues fast. These simple steps save time and keep your RV powered. Try these easy repairs before calling for help.
Resetting The Converter
Resetting the converter often fixes small glitches. Turn off the RV power completely. Wait for about 30 seconds. Turn the power back on. This clears errors and restarts the system.
Cleaning Corroded Terminals
Corrosion blocks electrical flow. Check battery and converter terminals for rust or white buildup. Use a wire brush or sandpaper to clean terminals gently. Wipe with a dry cloth before reconnecting. Clean terminals improve power delivery.
Replacing Faulty Fuses
Blown fuses stop electricity from flowing. Locate the fuse box near the converter. Remove and inspect each fuse carefully. Replace any blown fuse with one of the same rating. This restores power safely and quickly.
Securing Loose Connections
Loose wires cause flickering or no power. Check all connections at the converter and batteries. Tighten any loose screws or clamps. Make sure wires are snug and secure. Good connections keep power steady and reliable.
Advanced Diagnostic Techniques
Advanced diagnostic techniques help find hidden problems in RV electrical converters. These methods go beyond simple checks. They provide detailed information about the health and function of the converter. Using the right tools and steps can save time and money. It makes repairs easier and more accurate.
Using A Multimeter
A multimeter measures voltage, current, and resistance. It helps check if the converter supplies correct voltage. Start by setting the multimeter to the right mode. Measure voltage at the converter output. Compare readings to the converter’s specs. Low or no voltage means a problem inside. Also, test continuity to find broken wires or fuses.
Load Testing The Converter
Load testing checks how the converter works under real conditions. Connect a known load, such as batteries or appliances. Measure voltage and current during this test. The converter should keep voltage steady. If voltage drops or fluctuates, the converter might be weak or faulty. This test shows if the converter handles normal power needs.
Monitoring Temperature Sensors
Temperature sensors protect converters from overheating. Check sensor readings to find thermal problems. Use a thermometer or sensor reader for accuracy. High temperatures can cause converter failure. Inspect sensor wires and connections. Replace damaged sensors to avoid overheating risks. Proper sensor function keeps the converter safe and reliable.
Analyzing Error Codes
Many modern converters have error codes. These codes show specific problems inside the unit. Use the converter manual to understand codes. Codes can point to voltage issues, overheating, or internal faults. Reading error codes speeds up troubleshooting. It guides what part needs repair or replacement.
Preventive Maintenance Tips
Keeping your RV’s electrical converter in good shape saves time and money. Simple steps stop small problems from becoming big troubles. Regular care boosts the converter’s life and keeps it running well. The tips below help you protect your RV’s power system.
Regular Inspection Schedule
Check the converter every month. Look for loose wires or burnt smells. Tighten any loose connections carefully. Clean dust and dirt from the unit. Early checks catch issues before they grow.
Keeping Ventilation Clear
Make sure air flows freely around the converter. Remove any objects blocking vents. Good airflow stops the unit from overheating. Overheating can cause failure or damage inside.
Upgrading Old Components
Replace old fuses and wires with new ones. Old parts can cause shorts and power loss. Use parts that match the original specs. New components improve safety and performance.
Protecting Against Moisture
Keep the converter dry at all times. Water and moisture cause rust and electrical shorts. Use covers or shields if needed. Check seals and fix leaks fast to avoid damage.
When To Seek Professional Help
Knowing when to call a professional for RV electrical converter problems is important. Some issues need expert skills to avoid damage or danger. Recognizing these signs can save time and money.
Complex Electrical Faults
Complex faults involve multiple components or unclear causes. Troubleshooting wiring, fuses, and circuits can confuse most RV owners. Professionals have the right tools and knowledge to diagnose these problems safely.
Persistent Overheating
If your converter keeps overheating despite resets, it signals a serious problem. Overheating can damage the converter and other electrical parts. A technician can find the root cause and fix it properly.
Converter Replacement Signs
Converters that frequently fail or make unusual noises may need replacement. Flickering lights or inconsistent power also show signs of failure. Professionals can confirm if replacement is necessary and install a new unit correctly.
Safety Precautions
Electrical systems can be dangerous. Avoid working on high-voltage parts without experience. Always disconnect power before inspection. Call a professional to reduce risks of shock or fire.
Frequently Asked Questions
What Causes An Rv Electrical Converter To Stop Working?
Common causes include blown fuses, bad wiring, or faulty converter units. Check these parts first for issues.
How Do I Test My Rv Converter For Problems?
Use a multimeter to measure voltage output and check fuses. Low or no voltage means a problem exists.
Why Is My Rv Converter Not Charging The Battery?
Dirty connections or a failed converter can stop charging. Clean terminals and test the unit to find the issue.
Can Overheating Damage An Rv Electrical Converter?
Yes, overheating can cause permanent damage to converters. Ensure proper ventilation and avoid overloading the system.
How Often Should I Inspect My Rv Electrical Converter?
Inspect the converter every 6 to 12 months. Regular checks help prevent small issues from becoming bigger problems.
Conclusion
Troubleshooting your RV electrical converter can save time and money. Start with simple checks like fuses and connections. Watch for signs of power loss or unusual sounds. Keep tools and manuals handy for quick fixes. Regular care helps avoid major problems later.
Stay calm and work step-by-step for best results. With patience, you can keep your RV’s power running strong.
")


