If your unit isn’t cooling, the first step for effective deep freezer troubleshooting is to verify the power supply and ensure the thermostat is set to the correct temperature. A common cause is a tripped circuit breaker or a loose power cord, which cuts energy to the compressor. If the light inside is off and you can’t hear the compressor running, check your home’s main electrical panel before calling a professional. These steps help you rule out simple electrical failures before you assume the unit is broken.
Troubleshooting why your deep freezer stopped
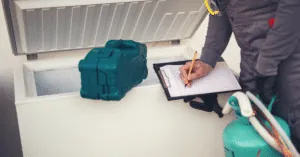
When a freezer loses its ability to stay cold, the issue usually stems from airflow restrictions, mechanical failure, or electrical interruptions. Most units rely on a consistent flow of air to remove heat from the condenser coils. If these coils are covered in dust or blocked by boxes, the system can’t dissipate heat, which causes the motor to run constantly until it eventually overheats or fails.
Another common cause involves the door seal, also known as the gasket. If this rubber strip is cracked or dirty, warm air leaks into the cabinet. This forces the compressor to work harder than intended to maintain a freezing temperature. Over time, this extra strain leads to ice buildup on the interior walls and eventually causes the cooling system to struggle or shut down entirely.
Finally, mechanical parts like the start relay or the compressor itself can wear out after years of heavy use. If the freezer is plugged into an outlet that shares power with high-draw appliances, voltage drops can prevent the compressor from kicking in. Before assuming the motor is dead, always confirm the outlet is providing steady power.
If the unit makes a clicking sound every few minutes but never cools, the start relay is likely the component that needs replacement by a qualified technician.
Safety: Inside a mains-powered machine, the parts behind the outer cover can hold a dangerous electrical charge even after it has been unplugged — that’s why they sit behind a cover. Opening the housing, or testing or replacing anything behind it, is a job for a qualified technician, never a home repair.
Check the Power and Settings
For basic electrical issues, start by confirming that your appliance is properly connected to the wall. Ensure the plug is pushed all the way into the outlet and that the cord isn’t pinched or damaged. If the freezer is plugged into a GFCI outlet, press the reset button on the face of the outlet to see if it has tripped. This fix is for users who have no power to the unit and whose lights or controls remain off.
Next, inspect your home’s electrical panel. Look for a breaker that has moved to the “off” or middle position. If you find one, flip it all the way to “off” and then back to “on” to reset the circuit. If the breaker trips again immediately, don’t try to force it, as this indicates a short circuit that requires a professional electrician.
Verify the thermostat dial inside or on the back of the cabinet. It’s easy to bump this dial while loading or unloading food, accidentally turning the cooling power down to the lowest setting. Set the dial to the manufacturer’s recommended mid-point.
If you have a digital display, make sure it isn’t set to a “demo” or “vacation” mode. If the unit has power and the dial is correct but it still doesn’t cool, you must contact a repair service, as internal components like the thermostat sensor or control board have likely failed.
Clear the Airflow and Coils
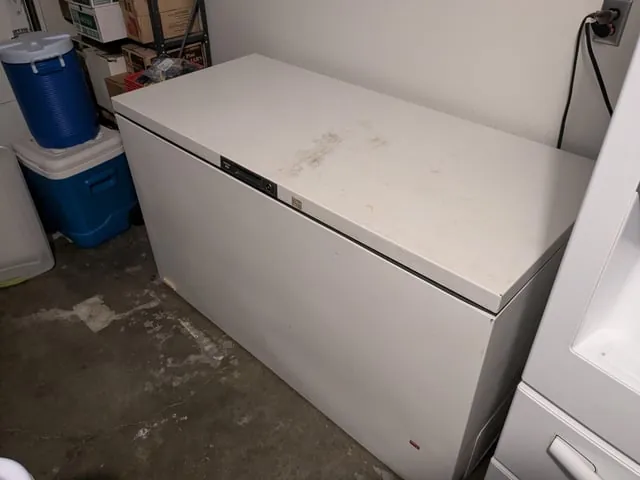
To improve cooling performance, you should clean the condenser coils located at the back or bottom of the freezer. Dust and pet hair act as insulation, trapping heat inside the system and preventing the refrigerant from cooling down. This fix is for freezers that run constantly but still feel warm or struggle to maintain a hard freeze.
Unplug the unit before you begin cleaning to avoid any risk of electric shock. Use a soft brush or a vacuum attachment to gently remove debris from the coils. Be careful not to bend the thin metal fins, as they’re fragile and essential for heat transfer. If your model has a fan near the coils, ensure it’s free of obstructions and spins freely when the unit is powered on.
After cleaning, ensure there’s at least 3 inches of space between the freezer walls and any surrounding cabinets or walls. This gap allows hot air to escape away from the unit. If the unit is pushed flush against a wall, it will trap its own heat and struggle to maintain temperature.
You’ll know this fix worked if the compressor runs for shorter periods and the interior temperature stabilizes within 24 hours. For detailed guidance on maintaining your appliance’s efficiency, you can review the ENERGY STAR appliance maintenance guidelines.
Inspect the Door Gasket
A faulty door seal is a major cause of frost buildup and temperature loss. If the gasket doesn’t create an airtight seal, moisture from the room enters the freezer and turns into ice, which blocks air vents and stresses the cooling system. This fix is for anyone who notices frost forming near the door or finds that the door does not “stick” when they try to close it.
Test the seal by placing a piece of paper between the door and the frame and closing it. If the paper falls out or pulls out with zero resistance, the gasket is loose or deformed.
You can often fix a slightly warped gasket by gently heating it with a hair dryer on a low setting to soften the rubber, then pulling it into the correct shape. If the rubber is brittle, torn, or cracked, it must be replaced with a new part specific to your model number.
Avoid using sharp tools to scrape ice off the gasket, as you might puncture the rubber. If you see ice forming, defrost the unit completely by unplugging it and leaving the door open for 24 hours. Once the ice is gone, clean the frame and the rubber seal with warm, soapy water. Keeping the contact surfaces clean ensures the magnet inside the gasket can lock the door firmly.
Common Mistakes to Avoid
Overloading the freezer: Filling the unit beyond its capacity blocks internal air vents. This prevents cold air from circulating, creating warm spots that cause rapid spoilage. A good rule is to leave at least two inches of space between your items and the walls to allow for proper airflow.
Storing hot food: Placing warm leftovers directly into the freezer raises the ambient temperature. This forces the compressor to run extra cycles and risks thawing nearby items. Always chill food in the refrigerator for at least two hours before moving it to the freezer.
Ignoring frost buildup: Leaving thick layers of ice on the walls makes the unit work harder. It also hides underlying issues like a failing door seal. If you see frost thicker than a quarter-inch, you’re wasting energy and likely need to replace the gasket.
Using extension cords: Plugging a freezer into a standard household cord causes voltage drops. This damages the compressor motor, often leading to a total unit failure within months. Always use a dedicated wall outlet.
How to Prevent Future Issues
To keep your freezer running for years, you must balance your storage habits with regular maintenance. If you’re frequently adding large amounts of warm food, the internal temperature will fluctuate, leading to ice crystals on your goods.
| If you’re doing this | Do this instead | Why |
|---|---|---|
| Leaving the door open | Use a checklist on the door | Minimizes warm air entry |
| Storing food against walls | Leave 1-2 inches of space | Allows air to circulate |
| Wiping with harsh chemicals | Use water and mild soap | Protects the rubber gaskets |
| Forgetting the defrost cycle | Check for ice every month | Prevents permanent blockages |
Frequently asked questions
How long should a freezer run before it cycles off?
If your unit runs for several hours, check the door seal for leaks or clean the condenser coils. A freezer running constantly indicates it can’t reach the set temperature, which may eventually damage the compressor.
Is it safe to eat food that thawed during a power outage?
No, food is unsafe if held above 40°F for more than 2 hours. The USDA recommends using a food thermometer to check items; if the temperature exceeds 40°F, discard perishables like meat or dairy. If food still contains ice crystals, it may be safe to refreeze, but never rely on smell.
How often should I defrost a manual freezer?
You should defrost a manual freezer whenever the ice buildup on the interior walls reaches 1/4 inch thick. Allowing ice to grow thicker than this makes the cooling system work significantly harder and reduces the total storage volume of your unit. For most households, this means a full manual defrost happens about once or twice per year, depending on the local humidity levels and how frequently the door is opened.
Why is there water on the floor under my freezer?
Water on the floor usually indicates a clogged defrost drain or a failed door gasket that allows excessive humidity to enter. If the drain hole inside the freezer is blocked by debris, meltwater can’t flow into the evaporation pan and instead leaks out of the unit. Clear the drain with a flexible plastic tool, but never use a metal rod that could puncture the cooling lines or the floor of the appliance.
How cold should my deep freezer be?
Your deep freezer should be set to 0°F to ensure long-term food safety and quality. Keeping the unit at this temperature prevents the growth of bacteria and slows the chemical changes that cause food to lose flavor or texture. Use a separate appliance thermometer placed in the center of the freezer to get an accurate reading, as the built-in dial is often just a relative setting rather than an exact temperature gauge.
Can I fix a broken compressor myself?
No, you can’t fix a broken compressor yourself because it involves sealed refrigerant systems that require professional certification. A compressor failure is a major mechanical issue that requires specialized tools and handling of pressurized gases, which carry significant risks to your health and the environment. If your freezer isn’t cooling and the compressor doesn’t start, contact a licensed appliance repair technician to diagnose the problem safely and legally.
Conclusion
If you have tried cleaning the coils, checking the door seal, and confirming the power supply without success, it’s time to call a repair technician. A freezer that continues to fail after these basic steps usually has a faulty start relay, a bad thermostat, or a leak in the sealed refrigerant system. Attempting to repair these internal components without training often voids your warranty and can result in permanent damage to the machine.
Related guides