When your tool stops working, simple dewalt impact driver troubleshooting usually involves checking the battery connection or the trigger switch for debris. If your tool fails to spin or loses power, the most common cause is a dirty battery contact or a battery that has reached its maximum discharge cycle. By cleaning these points and testing with a known working power pack, you can often restore full function without needing a professional repair service.
Troubleshooting your Dewalt impact driver power issues
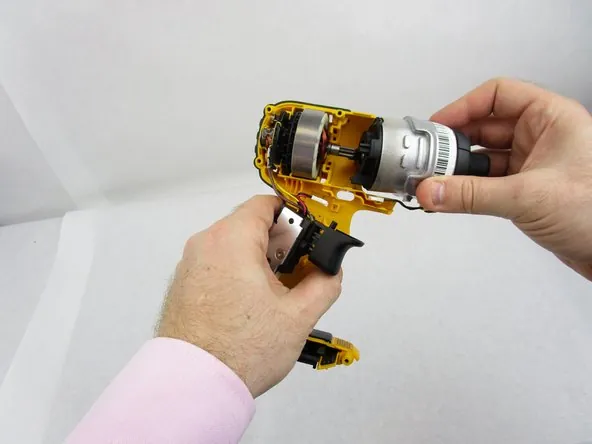
When your tool behaves erratically, the cause is almost always related to the power flow or the internal switch. A common reason for intermittent operation is a buildup of dust inside the battery housing. Over time, fine particles from drilling or driving screws can settle on the metal terminals, creating a barrier that prevents a steady electrical current from reaching the motor. If you notice the tool cutting out while you apply pressure, this is often the culprit.
Another frequent issue is the battery pack itself. Lithium-ion cells have a finite lifespan, and they eventually lose their ability to hold a charge or provide the high burst of energy needed for heavy-duty impact driving.
If the tool works fine for a few seconds but dies immediately under load, the battery is likely failing to sustain the necessary voltage. You can verify this by checking the DeWalt battery care and maintenance guidelines to understand the expected performance and signs of a cell reaching the end of its life.
Finally, consider the trigger switch. If the tool doesn’t spin at all, but the battery is fully charged, the switch mechanism might be jammed. Small wood chips or metal shavings can get trapped behind the trigger, preventing it from making a full electrical connection. This is a common point of failure for tools used in dusty environments without regular cleaning.
Clean the battery terminals
If your tool isn’t receiving power, you must clean the battery terminals to ensure a solid connection. This fix is for users who have noticed the tool losing power or cutting out during use.
To do this, remove the battery from the tool and inspect the metal contact points on both the battery pack and the tool itself. If you see dark residue or debris, use a clean, dry, lint-free cloth to gently wipe these areas until the metal looks bright and shiny.
Never use water, soap, or chemical cleaners on these electrical contacts, as liquids can cause corrosion or lead to a short circuit. If the debris is stuck, you can use a soft-bristled brush to gently dislodge it. Once clean, reinsert the battery firmly until you hear the locking mechanism click into place.
If the tool starts working, the issue was simply a bad connection. This approach isn’t for someone who smells burning plastic or sees smoke, as those signs indicate an internal motor failure that requires a professional service center.
Inspect the trigger and vents
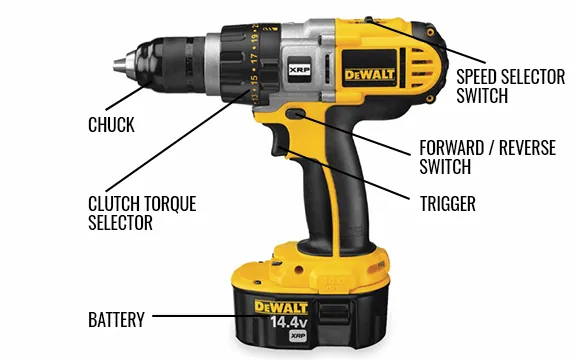
If the tool runs but seems to struggle or sounds different, you should inspect the air vents and the trigger area. This fix is designed for users who notice the tool getting hot quickly or acting sluggish. Check the vents on the side of the tool body for any blockage. If dust or debris covers these holes, the motor can’t cool itself, causing the thermal protection to kick in and slow the tool down to prevent damage.
Use a vacuum on a low setting or a can of compressed air to clear the vents. Keep the nozzle at least two inches away from the tool to avoid forcing debris deeper into the motor housing. After clearing the vents, press the trigger several times while the battery is disconnected to ensure it moves freely without sticking.
If the trigger feels gritty, gently blow air around the edges of the switch. If the tool still feels weak after these steps, the internal motor brushes or the electronic control board may be worn out. These parts aren’t user-serviceable, so you should contact a certified repair shop to avoid voiding your warranty or causing an electrical hazard.
Verify the battery health
The third fix is to test your tool with a different, fully charged battery to rule out a faulty power source. This is the most effective way to determine if the problem is in the tool or the battery. If you have another battery of the same voltage, slide it into the tool and try it under a light load. If the tool performs perfectly, your original battery is likely the issue and needs to be replaced or recycled.
This step is worth the time if you suspect the battery is old or has been dropped, as batteries are the most common point of failure in cordless tools. If the tool still refuses to start or acts weak with a brand-new, known-working battery, then the problem is definitely inside the tool’s motor or control unit.
In this case, don’t attempt to open the housing or take the tool apart. Opening the tool casing will void your warranty and may expose you to electrical components. Visit an authorized service center to have a technician perform a professional diagnostic test.
Common mistakes during troubleshooting
Prying open the tool housing: This is dangerous and voids the warranty, as internal components are sensitive and require precise alignment. If you lack specialized torque-limiting drivers, you risk stripping the proprietary screws, rendering the device impossible to reassemble securely.
Using metal tools to clean contacts: Using a screwdriver or knife can scratch the metal terminals, which creates permanent damage and makes future connections even worse. Instead, use a soft-bristled nylon brush or a dedicated electrical contact cleaner spray. Metal-on-metal contact creates microscopic burrs that trap debris and accelerate oxidation.
Forcing a battery that doesn’t click: If you have to push too hard, you might be misaligning the pins, which can snap the plastic battery clip inside the tool. If the battery resists, check the rail for impacted sawdust or debris. If the rail is clear and the battery still binds, stop; the internal housing has likely warped from heat.
Ignoring the smell of smoke: If you smell burning, stop immediately. The motor is already damaged, and continuing to use it will lead to a total hardware failure. If the smell persists after a cool-down period, the windings have shorted.
Preventing future performance issues
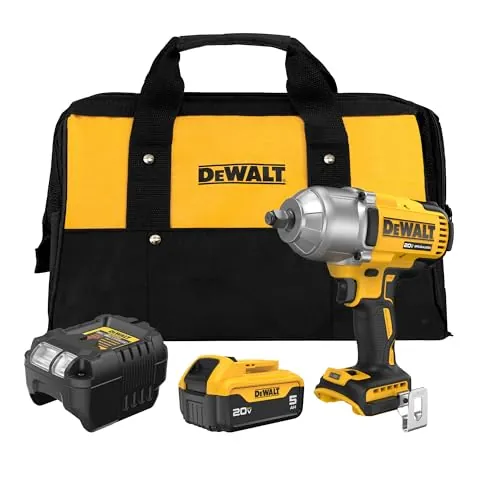
When your tool isn’t performing, check your current maintenance habits against the professional recommendations. The following table helps you identify if your current routine is causing the issue.
| If you’re doing this | Do this instead | Why |
|---|---|---|
| Leaving batteries in the tool | Remove the battery after use | Prevents slow, deep discharge cycles |
| Storing in a damp garage | Store in a dry, room-temp area | Moisture causes terminal corrosion |
| Dropping the tool on hard concrete | Use a holster or tool bag | Prevents internal misalignment of parts |
| Using a damaged battery | Recycle it immediately | Prevents damage to the tool’s motor |
Most users mistake a sluggish motor for a dying battery. If the tool feels warm to the touch after only five minutes of light work, the issue is likely internal friction from debris rather than power loss.
Apply this decision rule: if the tool vibrates abnormally, stop immediately and inspect the housing for hairline cracks. If the tool simply lacks torque, clean the intake vents with compressed air first. Ignoring these early warnings often leads to a total motor burn-out. Replacing a burnt motor usually costs sixty percent of the tool’s original retail price. Regular cleaning prevents this expense entirely.
Frequently asked questions
How long does a dewalt battery last?
A typical battery lasts between 300 and 500 full charge cycles. Heavy daily use can exhaust this capacity in two to three years, while occasional use lasts much longer. You’ll know it’s time for a replacement when the tool stops holding a charge for more than a few minutes.
Is it safe to use a third-party battery?
No, you shouldn’t use third-party batteries because they often lack the essential safety circuits found in official packs. These circuits protect your tool from overheating and prevent motor damage. Using unapproved batteries can cause the tool to run too hot and may void your manufacturer warranty.
Why is my impact driver sparking?
Small sparks near motor vents are normal for brushed motors as carbon brushes contact the internal shaft. Continuous, bright orange sparks or a burning smell indicate that the brushes are worn or the motor is failing. Stop using the tool immediately and take it to an authorized service center.
How do I know if the motor is dead?
The motor is likely dead if the tool shows no signs of life or makes grinding sounds after testing with a charged battery. A dead motor often feels very hot to the touch after minimal use. This is a professional repair job requiring specific replacement parts and testing equipment.
What happens if I get water in my impact driver?
Water inside the housing can cause internal circuit board shorts or rust on motor bearings. Immediately remove the battery and leave the tool in a warm, dry place for 24 hours. Don’t attempt to turn the tool on while wet, as this will cause a permanent electrical short.
How often should I clean the tool?
You should wipe down your tool and clear the vents after every major project or whenever you notice dust buildup. Clearing debris keeps the motor cool and prevents damage to the sensitive trigger switch. This simple habit is the best way to ensure your tool lasts for many years.
Regular maintenance is the best way to keep your equipment running smoothly. If you have followed these steps and the tool still doesn’t operate correctly, it’s time to have a professional look at the internal components.
Conclusion
If your tool still won’t perform after these quick checks, it’s time to look at the internal motor brushes or the electronic control board. Don’t hesitate to reach out to a local service center if you aren’t comfortable opening the casing. Keeping your gear well-maintained ensures it’ll stay ready for every project.