If your battery unit fails to start your engine, dewalt jump starter troubleshooting often begins with checking the status of the internal charging cable and the battery state-of-charge indicators. The most common cause for a jump starter failing to provide power is a battery that has been left in a depleted state for too long, which causes the internal lead-acid cells to lose their ability to hold a charge. If the unit doesn’t show a solid green light after a full charging cycle, the internal battery has likely reached the end of its life.
Troubleshoot your Dewalt jump starter failure
The primary reason these portable power stations stop working is the natural degradation of the internal lead-acid battery. These batteries require regular maintenance; if they’re stored for long periods without being topped off, they undergo a process called sulfation. This chemical change on the lead plates prevents the battery from accepting or holding a charge, rendering the jump starter effectively useless.
Another frequent cause is poor contact between the clamps and the vehicle’s battery terminals. Over time, corrosion can build up on the metal surfaces of the terminals, creating a high-resistance barrier that blocks the high current needed for an engine start. Even if the jumper unit is fully charged, it can’t push power through a layer of oxidized metal or loose connections.
Finally, internal circuit protection can trip if the device detects a short circuit or a reverse polarity connection. Most modern portable units have built-in safeguards to prevent electrical damage to the vehicle’s computer systems.
If you have ever accidentally touched the positive and negative clamps together, or if you connected them to the wrong terminals, the unit may enter a lockout mode to protect its internal components. You can verify the health of your battery or the specific charging requirements by checking the official DeWalt product support page for the manual specific to your model number.
Check the battery and cable connections
The first step in fixing a power delivery issue is to verify that the clamps are making a direct, metal-to-metal connection with the vehicle’s battery posts. Remove any plastic covers from the car battery, then wiggle the jumper clamps back and forth to break through any light corrosion or surface film. If the clamps are loose, the jump starter can’t transfer the massive amount of current required to crank a cold engine.
If the connections are solid but the unit still won’t engage, check the charging status of the device itself. Most models feature an LED display or a button that shows the current voltage level. If the indicator shows a low charge, plug the unit into a wall outlet for at least 24 to 48 hours. If the light doesn’t change from red to green after this time, the internal battery is likely defective.
This fix is intended for users who have a device that’s physically intact but unresponsive. If you see signs of a swollen case, leaking fluid, or burnt plastic near the charging port, don’t attempt to charge or use the device. These are signs of a critical failure of the internal battery chemistry, which requires you to stop using the unit immediately and recycle it at a certified battery collection center.
Reset the internal safety features
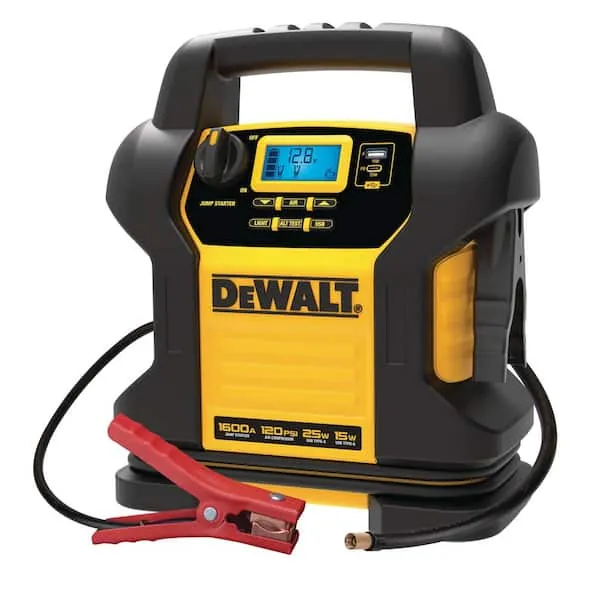
When you suspect the unit has entered a protection mode, the best approach is to perform a hard reset by disconnecting all cables and leaving the unit powered off for several hours. Many units have an automatic shut-off feature that resets the internal logic board once it detects no current draw. Ensure the power switch is in the “off” position during this time to allow the capacitors to drain completely.
If your jump starter has a dedicated “boost” or “override” button, read the instructions carefully before pressing it. This button is designed to bypass the safety checks in cases where the vehicle battery is completely dead and shows zero voltage. Only use this feature if you’re certain the clamps are connected to the correct terminals, as this mode removes the protection against sparks and short circuits.
Use a dedicated charging source
Many users experience power loss because they attempt to charge their jump starter using an incorrect power source, such as a low-amperage USB port or an incompatible adapter. These devices are designed to draw a specific current to maintain the health of the lead-acid cells. Always use the wall charger provided with the unit or a manufacturer-approved replacement that matches the voltage and amperage requirements listed on the back of the case.
If you’re using an extension cord to reach your wall outlet, make sure it’s a heavy-duty cord rated for outdoor use. Thin, household-grade extension cords often suffer from voltage drop over long distances, which prevents the jump starter from receiving the full power it needs to complete a charge cycle. A weak power flow often results in a “false full” reading, where the unit appears charged but lacks the power to turn over an engine.
This fix is ideal for users who have a unit that seems to charge but loses power quickly. If you have been using a third-party charger, switch back to the original equipment. If the unit still fails to hold a charge after using the correct power source for the full recommended time, the battery has reached its limit. At this point, it’s usually more cost-effective to replace the unit than to attempt a battery cell replacement.
Avoid common mistakes
Some people believe that keeping a jump starter plugged into a wall outlet at all times will keep it in peak condition. This is a myth; lead-acid batteries can suffer from overcharging if they’re left on a trickle charger for months on end. Constant heat from a plugged-in charger can accelerate the degradation of the internal battery.
- Never leave the clamps connected for long periods: Leaving clamps attached to a dead vehicle battery after the engine has started can cause a back-feed of current, which may fry the jump starter’s internal electronics.
- Don’t store the unit in extreme temperatures: Storing your jump starter in a hot trunk or a freezing shed causes the battery to lose capacity quickly and can cause the plastic housing to become brittle.
- Avoid using the unit to charge phones for too long: Using the jump starter as a large power bank for mobile devices drains the battery deeply, which is harmful to lead-acid chemistry compared to lithium alternatives.
- Never bypass the safety clamps: Attempting to modify or clip the safety sensors on the clamps removes the only protection you have against electrical fires or damage to your vehicle’s engine control unit.
- Don’t ignore the maintenance cycle: Most manufacturers suggest charging the unit every 30 to 90 days, even if you haven’t used it, to keep the battery healthy.
Prevent future power issues
| If you’re doing this | Do this instead | Why |
|---|---|---|
| Storing in the car | Store in a climate-controlled area | Heat/cold reduces battery life |
| Charging only when needed | Charge every 3 months | Prevents deep discharge and sulfation |
| Using thin extension cords | Use a heavy-duty, short cord | Ensures full voltage reaches the battery |
| Leaving clamps on the car | Disconnect immediately after start | Prevents back-feeding current to the unit |
| Ignoring the manual | Check for specific charge times | Models vary by battery capacity |
Frequently asked questions
How long should I charge my jump starter?
Most units require 24 to 48 hours to reach 100% capacity. If the unit is completely drained, charge it fully as soon as possible to prevent sulfation. Note that if the indicator light remains red after the manufacturer’s recommended charging time, the internal battery may no longer be capable of holding a charge.
Is it safe to leave my jump starter plugged in all the time?
No, it isn’t safe or recommended to leave a lead-acid jump starter plugged into a wall outlet permanently. Constant charging can lead to overheating and overcharging, which will significantly shorten the lifespan of the internal battery. Only charge the unit when the battery level is low or as directed by your owner’s manual, which should be consulted for specific maintenance frequency based on your usage.
Why is my jump starter beeping when I connect it?
A beeping sound typically indicates that the unit has detected a reverse polarity connection or a short circuit. Immediately disconnect the clamps and verify that the red clamp is on the positive terminal and the black clamp is on the negative terminal. If connections are correct and beeping persists, the unit or vehicle battery may be faulty.
How many times can a jump starter be used?
A well-maintained unit can provide dozens of starts over several years. The total number of uses depends on the engine size you’re starting and the state of the vehicle battery. If the unit only starts your engine once before needing a full recharge, the internal battery is losing capacity and will soon fail.
Can I replace the battery inside the jump starter?
It isn’t recommended for the average user to open the case and swap the lead-acid battery. Improper installation can lead to fire or damage to your vehicle’s electronics. Most manufacturers don’t sell replacement batteries, as the cost of the replacement often exceeds the price of a brand-new jump starter.
What happens if I connect the clamps backward?
Connecting the clamps backward triggers the reverse polarity protection circuit, which prevents the unit from sending power and potentially damaging your car’s computer. Most DeWalt models will emit an alarm or show an error light to warn you of the mistake. Don’t attempt to force a start if you hear this warning, as it confirms that the positive and negative connections are reversed, which could cause a dangerous short circuit.
Conclusion
Proper care for your device involves keeping it in a dry, cool environment and following the manufacturer’s charging schedule. If the unit fails to hold a charge despite following these steps, it has likely reached the end of its useful life and should be recycled at a local electronics or battery drop-off center.
Related guides