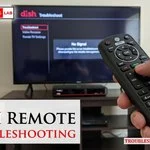
You can resolve most issues with your device by performing a simple dish remote troubleshooting reset, which usually involves replacing the batteries or re-pairing the unit with your receiver. The most common cause for a non-responsive remote is drained battery power or a signal blockage between the remote and your satellite receiver. If your remote still fails to operate after these basic steps, you may need to consult the manufacturer’s diagnostic tools to see if the hardware requires a full replacement.
Troubleshoot why your dish remote fails

The primary reason a remote stops responding is a loss of communication with the satellite receiver. This often happens because the remote has been accidentally set to the wrong mode or the internal pairing code has become corrupted. If you find the remote works only when you’re standing directly in front of the receiver, the issue is likely a physical obstruction or a failing infrared transmitter.
Another common factor is physical interference. Satellite receivers are often tucked into cabinets or behind glass, which can block infrared signals. If your remote uses radio frequency (RF) technology, it’s less sensitive to line-of-sight issues, but it can still suffer from signal congestion if other electronic devices are placed too close to the receiver. You can find official guidance on managing these signal connections at the DISH Network support page.
Finally, consider the state of the buttons themselves. Over time, dust and debris can settle under the rubber contact pads, preventing the signal from sending even when the button feels like it’s being pressed. If you have recently moved your receiver or changed your television setup, the remote might simply need to be reprogrammed to recognize the new hardware configuration.
Replace batteries and check contacts
This fix is for anyone whose remote lights up but doesn’t send a command, or for those whose remote is completely unresponsive. Start by removing the battery cover and taking out the existing batteries. If you see any white or blue powdery residue inside the compartment, clean it gently with a cotton swab dipped in white vinegar or lemon juice to neutralize the alkaline corrosion.
Insert two fresh, high-quality alkaline batteries, ensuring the positive and negative ends match the markings inside the casing. Don’t mix old batteries with new ones, as this often leads to inconsistent power delivery that confuses the remote’s internal processor. Once the new batteries are seated, press the “System Info” button on the front of your receiver to verify that it’s still active and responding to manual input.
If your remote has a “Mode” button, press it once to ensure it’s set to the correct device, usually indicated by a light above the “SAT” button. If the remote still fails to control the receiver, a technician can confirm whether the part has failed.
Re-pair the remote with your receiver
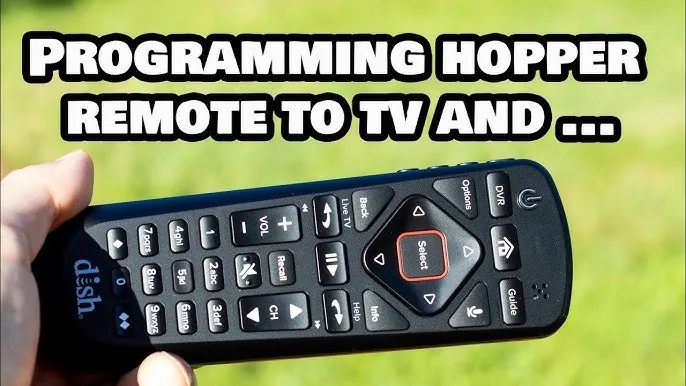
This method is for users who have confirmed their batteries are fresh but still can’t control their receiver. Most modern satellite remotes use a pairing process to lock the signal to a specific receiver, which prevents your remote from accidentally changing channels on a neighbor’s device. To start, locate the “System Info” button on the front panel of your satellite receiver.
Press and hold the “System Info” button for five seconds until you see a menu appear on your television screen. Once this screen is visible, press the “SAT” or “Info” button on your remote control. You should see a message on your television confirming that the remote has been successfully paired with the receiver. If no message appears, try moving the remote closer to the receiver during the pairing process to ensure the signal strength is sufficient.
If you have a remote with a “Recovery” or “Reset” button located inside the battery compartment, press that for three seconds instead of the standard pairing method. This forces the remote to clear its current memory and return to factory settings. If you can’t get the remote to pair after three attempts, it’s time to stop troubleshooting and contact your service provider, as the internal antenna within the remote may have failed.
Clear the signal path and reset
This fix is for cases where the remote works intermittently or only from very close range. First, ensure there’s nothing blocking the front of your receiver, such as soundbars, decorative items, or cabinet doors. Even if the remote uses radio frequency, placing the receiver inside a metal cabinet acts as a Faraday cage, which significantly weakens the signal and makes button presses feel sluggish or unresponsive.
If you have recently added new electronics to your entertainment center, try moving them at least 12 inches away from your receiver. High-frequency devices like wireless routers or cordless phones can create interference that disrupts the signal between your remote and the satellite box. If you still experience issues after moving these items, perform a hard reset by unplugging the receiver from the wall outlet for 60 seconds.
This power cycle clears the receiver’s temporary memory and forces it to re-establish a connection with all registered accessories. Once you plug the power cord back in, wait for the receiver to finish its reboot sequence—usually 3 to 5 minutes—before trying the remote again. If the remote continues to lag after the full reboot, the issue is likely a failing internal component that can’t be repaired by the user.
Common remote control mistakes
Mixing battery types: Using one new battery with an old one creates an uneven power supply. This mismatch forces the remote to draw power unevenly, leading to intermittent signal failures. If the remote only works when held close to the device, a technician should confirm if the batteries are the problem.
Blocking the receiver: Placing your satellite box inside a closed cabinet prevents the infrared signal from reaching the sensor. If you must hide your hardware, install a $20 infrared repeater kit to extend the signal.
Using rechargeable batteries: Many remotes require the steady output of alkaline cells. Rechargeable batteries often drop voltage too quickly, causing the remote to become unresponsive within days. A technician can confirm if your remote is compatible with rechargeable power sources.
Ignoring button debris: Pressing buttons harder when they stick often damages the internal circuit board. This is a permanent error. If a button feels mushy, clean the contact pad with 90% isopropyl alcohol instead of increasing your force.
How to stop it happening again
You can keep your remote functioning longer by being mindful of how you store it and how you manage your receiver’s environment. The following table helps you compare common bad habits with better alternatives to ensure your setup remains reliable.
| If you’re doing this | Do this instead | Why |
|---|---|---|
| Leaving batteries in old remotes | Remove batteries if not using for 30+ days | Prevents acid leaks and corrosion |
| Storing remote under heavy items | Keep remote on a flat, clear surface | Protects buttons from accidental activation |
| Keeping receiver in a closed cabinet | Place receiver on an open shelf | Ensures clear signal path for IR remotes |
| Using high-force button presses | Press buttons gently until they click | Protects the sensitive rubber contact pads |
Most users mistake a sluggish remote for a dead battery. If you notice a delay, check the infrared emitter through your smartphone camera. Point the remote at the lens and press a button; if you see a flickering purple light, the remote is sending a signal. If the light is absent, the issue is internal circuitry, not power.
If your remote works intermittently, inspect the battery contacts for white, crusty residue. This corrosion acts as an insulator, blocking current flow. Scrub it away with a cotton swab dipped in 90% isopropyl alcohol. If the metal springs remain pitted or rusted, the remote may suffer from intermittent power loss or total failure. In that case, replace the unit entirely to prevent permanent damage to your receiver’s interface.
Frequently asked questions
Can I use a universal remote with my satellite box?
Yes, you can use a universal remote, but you must first program it using the specific code for your satellite receiver model. Check your remote’s manual for the manufacturer’s list of codes. If your receiver isn’t listed, the remote may not be compatible with your system.
How long should the batteries in my remote last?
Satellite remote batteries typically last between 6 and 12 months, depending on usage. If they drain in weeks, a stuck button may be constantly sending a signal. Check each button to ensure they all spring back up immediately after being pressed.
Is it safe to open the remote to clean it?
Opening the remote housing can be difficult and may break the plastic clips, but it’s generally safe to do so if you’re careful. The internal circuits are easily damaged by static or touch. If the remote is dirty, wipe the exterior with a dry cloth, but consult a professional if buttons fail.
What happens if I lose the pairing code?
If you lose the pairing code, you can trigger a re-pairing process by pressing the “System Info” button on the receiver. The receiver will automatically search for and pair with any compatible remote in range. This process works for most modern digital receivers.
Why does my remote only work from five feet away?
A remote that only works from a short distance is usually suffering from low battery voltage or signal interference. Try replacing the batteries with a brand-new set first. If the range remains poor, the internal antenna or infrared transmitter may be failing, requiring a replacement unit.
How do I know if the remote is broken?
A remote is likely broken if you have tried fresh batteries and a full pairing process without success. If the remote fails to send a signal, it has experienced a total hardware failure. You should consider purchasing a replacement unit if troubleshooting doesn’t restore functionality.
Conclusion
If you’ve tried these fixes and things still aren’t working right, don’t worry. You can reach out to the support team through the official website to chat with a technician. They’ll help you figure out if it’s time for a new device so you don’t miss your favorite shows.
Related guides