
The fastest way to perform dymo label printer troubleshooting is to power cycle the device and check that the label roll is seated correctly. Most connection or printing errors happen because the sensor can’t detect the label gap or the print head is blocked by dust. If the printer light is blinking red or orange, it usually means the paper is jammed or the roll is empty. You can check the official Dymo support site for specific error codes related to your exact model number.
Why your label printer is failing
Printing issues often stem from simple physical obstructions rather than complex software bugs. The most common cause is a misaligned label roll, which stops the internal sensor from finding the start of a new label. If the labels aren’t tight against the guide, the printer will often feed too many labels or show a jam light because it can’t read the mark on the backing paper.
Another frequent problem is a dirty print head. Over time, adhesive residue from the labels builds up on the thermal element. This buildup prevents heat from transferring to the label, which causes faded text or blank spots on your prints. This happens regardless of the label quality, though cheaper labels often leave more residue behind.
Connectivity issues also occur if you’re using a wireless or USB hub. If the printer is connected to a computer but the job stays in the queue, the driver might need a refresh. You should also verify that the USB cable is plugged directly into the computer port. If you use a port expander, the printer may not receive enough power to initiate the thermal printing process.
Reset the connection and power
The first step in fixing a non-responsive printer is a hard reset. Turn the printer off and unplug the power cable from the wall outlet. Wait 60 seconds to ensure the internal memory is fully cleared. While the power is off, disconnect the USB cable from both the printer and your computer.
Plug the power cable back into the wall first, then turn the printer on. Wait until the status light is solid green before you reconnect the data cable. If you’re using a USB connection, plug the cable into a different port on your computer. This forces your operating system to re-recognize the device as a new piece of hardware.
If the printer is still not responding, check your computer’s print queue. Delete all pending jobs to clear the buffer. If the status remains offline, you must restart your computer to force the driver to reload. If you have another computer nearby, try plugging the printer into that one. If it works there, the issue is with your computer settings, not the hardware itself.
Clear a label jam properly
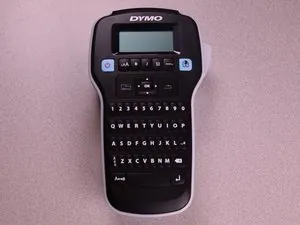
If your printer is flashing, a physical blockage is likely the culprit. You must never use sharp tools like knives or screwdrivers to clear a jam, as you’ll scratch the delicate thermal print head. Instead, open the top cover and remove the label roll entirely. Look for small scraps of paper or adhesive stuck to the rollers or the sensor path.
Use a lint-free cloth or a dedicated thermal printer cleaning pen to wipe the print head gently. If you don’t have a cleaning pen, a soft cloth with a tiny amount of isopropyl alcohol works well. Wipe the head in one direction only to avoid pushing debris back into the mechanism. Ensure the area is completely dry before you reload the labels.
Once the path is clear, reinsert the label roll. Ensure the labels are pulled forward until they’re just past the exit slot. Close the lid firmly until you hear a click. Most models will automatically feed one label to calibrate the sensor. If the light turns solid green after this feed, the printer is ready to use. If it continues to blink, the sensor may be faulty and requires professional inspection.
Update drivers for better performance
If your printer feeds labels but produces garbled text or incorrect sizes, the driver is likely outdated. You should visit the manufacturer’s website to download the latest driver version for your specific operating system. Before installing the new driver, remove the old one through your computer’s device manager to prevent conflicts.
Many users make the mistake of simply installing the new driver over the old one. This often leaves behind corrupted registry files that cause persistent spooling errors. If you see a “Driver Conflict” notification during installation, stop immediately and use a dedicated uninstaller tool to wipe the remaining fragments.
This fix is for users who have recently upgraded their operating system or moved the printer to a new machine. If you’re using a legacy printer model, check if the manufacturer still provides updates for your current OS. If your computer is too new for the printer’s software, you may need to use a generic label driver or consider an upgrade.
If you aren’t comfortable managing system drivers, ask a local IT professional for help. Installing the wrong driver can cause system errors or prevent other peripherals from functioning correctly. Only proceed if you have administrative rights on your computer and can access the device settings menu safely. If the printer still fails after a clean install, the issue is likely a physical hardware fault rather than software.
Common mistakes to avoid
Forcing the lid closed: If the lid doesn’t snap shut easily, the label roll is likely too wide or off-center. Forcing it breaks the plastic latch, a repair that often exceeds the cost of a new unit. Check that the roll spins freely before applying pressure.
Using incompatible labels: Some third-party labels have backing paper too thick for the sensor to read. This causes the printer to miscalculate length, resulting in wasted stock. If your printer skips labels, swap to a thinner, manufacturer-approved roll to verify if the sensor is the issue.
Touching the print head with fingers: Oil from your skin degrades the thermal coating, leading to permanent white streaks on your prints. Always use a lint-free cloth dampened with isopropyl alcohol for cleaning. Never use metal tools, which can scratch the delicate heating elements.
Pulling labels while printing: Never pull a label while the motor is active. This strips internal gears and misaligns the feed. If you need to clear a jam, power the unit off entirely before pulling.
Troubleshooting common Dymo label printer errors
| If you’re doing this | Do this instead | Why |
|---|---|---|
| Using a USB hub | Plug directly into the PC | Hubs often lack steady power |
| Tearing labels by hand | Use the built-in cutter | Rough edges can cause jams |
| Cleaning with water | Use isopropyl alcohol | Alcohol evaporates without residue |
| Storing rolls in the heat | Store in a cool, dry place | Heat ruins the thermal coating |
Most users assume a USB hub works for all peripherals, but printers require a constant, high-amperage draw that hubs frequently throttle. If your print job cuts off mid-page or shows a “device not recognized” error, bypass the hub immediately.
When cleaning the print head, never use water or household cleaners. These leave mineral deposits or streaks that trap dust, leading to permanent hardware failure within months. Always use 90% or higher isopropyl alcohol on a lint-free cloth.
If you’re unsure if your thermal paper is damaged, check the edge of the roll for a yellow tint. If the color has shifted, the thermal coating is already compromised. Using this paper will cause the printer to skip lines or produce faint, unreadable text, forcing you to waste an entire roll to find a clean section.
Frequently asked questions
How long should a label printer last?
Most label printers last 5 to 7 years with regular cleaning and proper storage. Longevity depends primarily on your daily print volume and how well you maintain the print head. Note that mechanical parts like rollers will wear out faster if you exceed the manufacturer’s recommended duty cycle.
Why is my printer light flashing red?
A red light typically indicates the printer is out of labels or the sensor can’t detect the gap. Ensure the roll is seated firmly against the guide and clean the sensor path with a lint-free cloth. If the light remains red after these steps, the internal sensor may require professional repair.
Is it safe to use generic labels?
Yes, generic labels are safe if they’re designed for your specific thermal printer model. Low-quality labels may leave sticky residue on the print head, requiring more frequent cleaning. Always ensure the backing paper is thin enough for the printer’s sensor to detect the gaps between labels.
How do I fix a blank label output?
A blank label usually means the roll is loaded upside down or the print head is blocked. Thermal labels only print on one side, so verify that the label is facing the print head correctly. If the orientation is right, clean the print head with isopropyl alcohol to remove adhesive residue.
Can I fix a paper jam myself?
You can fix a paper jam by opening the lid and carefully removing any stuck scraps or misaligned labels. Never use metal objects to pry the paper out, as this will scratch the print head and cause permanent damage. If you can’t reach the jam, don’t force the mechanism.
Why is the text coming out faded?
Faded text is usually caused by a dirty print head or a low-quality label roll. Clean the print head with a cotton swab and isopropyl alcohol to remove accumulated dust and adhesive. If the problem persists, try slowing your print speed to give the thermal head more time to heat.
Conclusion
The most important rule for printer maintenance is to keep the internal path clean and free of dust. If your printer continues to show errors after you have cleaned the head and checked the alignment, the hardware may have reached the end of its life. For persistent issues, contact the manufacturer’s support team before attempting any internal repairs that could void your warranty.