You can usually resolve problems with a system that isn’t cooling or heating correctly by performing basic fujitsu heat pump troubleshooting on your own. Start by checking your remote control settings and cleaning the air filters, as these two factors cause the majority of performance issues. If the unit still fails to respond after you verify the power supply, it’s likely time to contact a certified HVAC technician for a deeper inspection.
Troubleshoot common Fujitsu heat pump failures
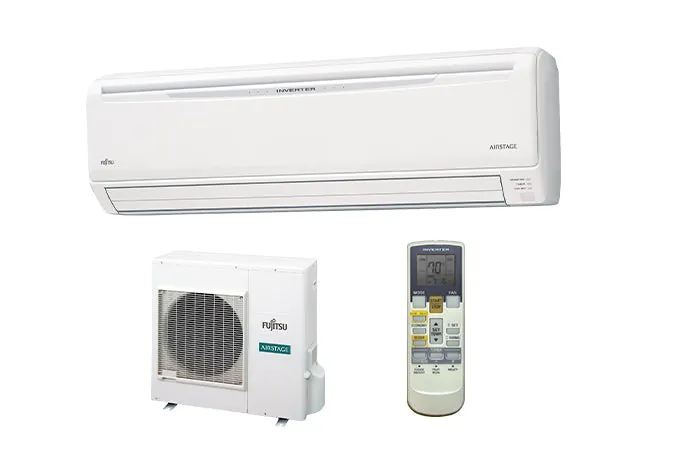
Most issues arise from simple blockages or incorrect settings rather than mechanical failure. The first thing to check is the air filter, which collects dust and debris over time. When the filter is clogged, air can’t circulate through the coils, which forces the system to work much harder to maintain your desired temperature. This often results in weak airflow or the system cycling on and off too frequently.
If the system short-cycles, check the evaporator coils for ice buildup. A frozen coil usually indicates a dirty filter or low refrigerant levels. If you see frost, turn the unit to “Fan Only” mode immediately to thaw the system before calling a technician.
Another common cause is the remote control being set to the wrong mode or having low battery power. If the remote shows a mode like “Dry” instead of “Cool” or “Heat,” the unit will behave in ways you don’t expect. Always confirm that the mode matches your current needs and replace the batteries if the display is dim or flickering.
Finally, verify that the outdoor unit isn’t blocked by leaves, tall grass, or snow. The outdoor condenser needs at least 24 inches of clear space to exchange heat with the outside air. If the unit is crowded by plants or debris, its efficiency drops sharply.
Many homeowners mistake this drop in performance for a failing compressor, leading to unnecessary repair calls. If the unit is clear but still fails to cool, check your circuit breaker before assuming the internal motor has failed.
Reset the remote control settings
If your system isn’t responding, the first step is to perform a full reset of the remote control. Many units stop working correctly if the internal software gets stuck or if the settings were changed accidentally. To do this, locate the small, recessed reset button on the remote, usually found inside the battery compartment. Press this with a paperclip or a similar thin tool for three seconds.
Once you reset the remote, ensure the unit is set to the correct temperature. A common mistake is setting the cooling temperature too close to the current room temperature, which prevents the compressor from kicking in. Set the cooling at least 5 degrees below the room temperature to force the system to activate.
This fix is ideal for systems that have power but seem to ignore your commands. However, this isn’t for you if the unit is making loud grinding noises or if you see smoke. If you notice strange smells or electrical buzzing sounds, turn the breaker off immediately and call a professional. Never attempt to open the main electrical housing of the indoor or outdoor units, as this carries a high risk of electric shock and will void your warranty.
Clean the indoor air filters
Cleaning the filters is the most effective way to restore airflow when the unit feels weak. Open the front panel of the indoor unit gently by lifting it from both sides until it clicks into place. Remove the plastic mesh filters by sliding them upward and out of their tracks. Take these filters to a sink and rinse them with cool water to remove all trapped dust.
You must allow the filters to air dry completely before putting them back into the unit. If you reinstall them while damp, you risk growing mold inside the housing, which can lead to poor air quality and unpleasant odors in your home. Once they’re dry, slide them back into the slots and press the front panel firmly until it locks.
This process should be done every two to four weeks depending on how much dust is in your home. If your home has pets or high levels of pollen, you may need to clean them more often. This fix isn’t for you if the filter frame is cracked or if the mesh is torn. If the filter is physically damaged, you must order a replacement from an authorized parts dealer to ensure proper fit and airflow.
Inspect the outdoor unit clearance
The outdoor unit requires a specific amount of open space to function efficiently. If you have placed bushes, fences, or storage boxes near the outdoor condenser, you’re likely restricting the airflow. Move any objects at least 24 inches away from all sides of the outdoor cabinet. If the unit is covered in leaves or grass clippings, use a soft brush to clear the intake vents.
This is worth the effort if your system runs constantly but never reaches the target temperature. It isn’t worth the time if the unit is failing because of a refrigerant leak or a faulty compressor, as these require specialized tools and EPA-certified training to repair. You should never try to bend the metal fins on the outdoor coils, as they’re very fragile and will break easily if handled without care.
If the unit still doesn’t cool or heat after you clear the area, check the power disconnect box located near the outdoor unit. Ensure the handle is in the “On” position. If it’s already on, you have reached the limit of what you can safely do. At this point, the problem is likely internal, and you should call a licensed HVAC contractor to diagnose the refrigerant levels or electrical components.
Troubleshooting myths to avoid
Spraying water inside the indoor unit: Never spray water directly into the unit to clean it. Moisture corrodes sensitive electrical boards and triggers a short circuit. If you need to clean the coils, use a specialized foaming cleaner designed for HVAC systems rather than liquid water.
Adding your own refrigerant: Refrigerant is a pressurized gas that requires specialized gauges and legal certification to handle. Attempting to top off a system yourself often leads to overcharging, which destroys the compressor. If your system is low, you have a leak that must be sealed first.
Using a screwdriver to force the fan: If the fan is stuck, don’t try to spin it manually with a tool. This ruins the motor bearings and risks personal injury from sudden activation. If the fan doesn’t spin freely by hand, the motor is likely seized and requires a full replacement.
Resetting the breaker repeatedly: If the circuit breaker trips immediately after you flip it back, stop. You have a hard electrical short. Forcing the breaker back on can melt internal wiring and ignite a fire.
Preventing future system issues
To keep your system running well, you must move away from reactive fixes and adopt a routine maintenance schedule. The following table helps you understand how to manage your unit throughout the year to avoid common performance drops.
| If you’re doing this | Do this instead | Why |
|---|---|---|
| Waiting for low air | Clean filters monthly | Prevents dust buildup |
| Ignoring the leaves | Clear outdoor area | Allows heat exchange |
| Setting extreme temps | Use modest offsets | Reduces motor strain |
| Skipping annual checks | Call for a tune-up | Finds leaks early |
Most owners mistake a quiet system for a healthy one. This is a costly error.
If the bill remains steady, stick to your seasonal calendar.
Frequently asked questions
How often should I clean the filters?
Clean your air filters every 2 to 4 weeks, depending on your home environment. Frequent cleaning ensures the fan moves air efficiently without straining the motor. If you have pets or allergies, check them every 2 weeks.
Why is my unit dripping water inside?
Water dripping inside is usually caused by a clogged condensate drain line. Algae or dust often block the tube that carries water away from the indoor unit. You may need a technician to flush the line safely.
Is it safe to leave the unit on all day?
It’s safe and efficient to leave your unit running to maintain a steady temperature. Systems consume the most energy during the initial startup phase when working at maximum capacity. Avoid turning the unit on and off repeatedly.
How do I know if the refrigerant is low?
Low refrigerant is indicated if the unit runs constantly without changing the air temperature or if ice forms on copper pipes. This sealed-system issue requires a licensed professional to test pressures. Never attempt to add refrigerant yourself.
What happens if I ignore a noisy unit?
Unusual noises often indicate that a mechanical part is failing or a fan blade is hitting an obstruction. Turn the unit off at the breaker immediately to prevent further damage to the motor. Prompt repairs are cheaper than replacing the entire system.
Conclusion
The most important step you can take is to keep the air filters clean and the outdoor unit clear of any debris. These two actions prevent most common performance issues and help your system last for many years. If you have tried these steps and the unit still doesn’t work, contact a qualified HVAC technician to handle the internal electrical or mechanical components.
Related guides