If your unit stops cooling or heating, you can perform basic hessaire mini split troubleshooting by checking the power supply, air filters, and remote settings. Most issues stem from a tripped breaker, a clogged filter, or incorrect thermostat modes. These simple checks often resolve the problem without needing a professional. If these steps don’t fix your system, you should stop and contact a licensed HVAC technician to avoid damaging the internal components or voiding your warranty.
Hessaire mini split system failure causes
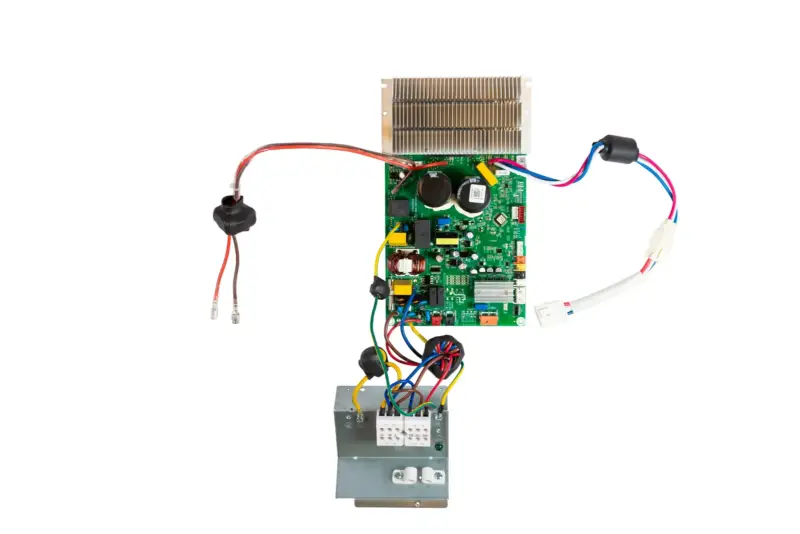
System failure in these units usually happens due to power interruptions, airflow restrictions, or sensor errors. The most common cause is a lack of power reaching the indoor or outdoor unit. Always verify that your circuit breaker hasn’t tripped, as power surges or heavy load usage can disconnect the system from the electrical grid. You can check your home’s electrical panel to see if the switch for the air conditioner is in the “off” or “tripped” position.
Another frequent cause is poor airflow through the evaporator coil. When dust and debris build up on the filters, the unit can’t move enough air to regulate the temperature. This creates a thermal imbalance, causing the system to short-cycle or fail to reach your set temperature. Dirty coils also force the compressor to work harder than necessary, which may lead to early mechanical fatigue.
Finally, remote control settings often cause confusion for users. If the remote is set to the wrong mode, such as “Fan Only” or “Dry,” the unit won’t provide the cooling or heating you expect. Ensure the mode icon matches your desired outcome and that the temperature set point is significantly different from the current room temperature. If the unit still doesn’t respond to these inputs, there may be a deeper communication error between the indoor head and the outdoor condenser.
Reset the power and check connections
The first step in fixing a non-responsive unit is to perform a hard reset of the power supply. Locate the dedicated circuit breaker for your system in your electrical panel and switch it to the “off” position. Leave it off for at least 15 minutes to allow the internal capacitors to discharge. After the wait, flip the breaker back to the “on” position and observe if the indoor unit displays any lights or emits a beep.
While the power is off, check the visible wiring connections between the indoor and outdoor units for any signs of physical damage or loose terminals. Don’t attempt to open the electrical housing or touch any internal wiring, as capacitors can hold a lethal charge even when the power is disconnected. If you notice frayed wires or burnt insulation, stop immediately and call a professional.
If the unit powers on but fails to cool, ensure the outdoor condenser has at least 24 inches of clearance on all sides from walls, fences, or vegetation. Restricted airflow around the outdoor unit forces the compressor to overheat and shut down for safety. You can confirm the unit is working properly by feeling for warm air being exhausted from the outdoor fan while the indoor unit is in cooling mode.
Clean the filters and evaporator coils
Cleaning the air filters is a simple task that improves efficiency and prevents system shutdowns. Open the front panel of the indoor unit by lifting it from both sides until it clicks into place. Remove the mesh filters and wash them gently with warm water and mild soap. Let them dry completely in the shade before reinserting them into the slots.
If the evaporator coils behind the filter look dusty, use a soft brush or a vacuum with a brush attachment to remove the debris. Be extremely careful not to bend the delicate aluminum fins, as damaged fins block airflow and reduce the system’s cooling capacity. If the coils appear heavily frosted or caked in grime, don’t use water or harsh chemicals.
This fix is for users who are comfortable performing basic routine maintenance. If you haven’t cleaned your filters in over six months, you may notice a significant improvement in airflow immediately after reassembly. If the unit continues to freeze up or emit strange odors after cleaning, the issue is likely a refrigerant leak or a failing blower motor. These repairs require specialized gauges and tools, so you should contact a qualified technician to handle the inspection and service.
Verify remote settings and modes
Incorrect settings on your remote control are a common reason for a system that feels like it isn’t working. First, check the batteries in your remote and replace them if the screen is dim or flickering. Ensure the remote is set to the “Cool” (snowflake icon) or “Heat” (sun icon) mode rather than “Auto” or “Fan.” A common mistake is setting the temperature too close to the ambient room temperature, which prevents the compressor from engaging.
If you’re trying to cool the room, set the temperature at least 5 degrees lower than the current room reading. Wait for about 5 to 10 minutes, as most systems have a built-in delay to protect the compressor from rapid cycling. If the indoor unit fan is running but the air isn’t changing temperature, verify that the outdoor fan is also spinning.
If the outdoor fan is silent, the system may be in a “defrost” cycle if it’s cold outside, or it may be waiting for a signal from the internal thermostat. If the remote shows an error code, note the specific letters or numbers and consult the user manual for your model. If you can’t find the manual, contact the manufacturer’s customer service line to identify what the code signifies before attempting any further troubleshooting.
Common mistakes to avoid
Don’t spray water directly into the indoor unit. Moisture triggers short circuits and destroys the electronic control board. If the unit is dusty, use a dry, soft brush or a vacuum with a brush attachment instead.
Avoid using high-pressure air or water to clean the condenser coils. These tools flatten the thin metal fins, which restricts airflow and forces the compressor to work harder. If you see bent fins, use a fin comb to gently straighten them before they cause overheating.
Never attempt to add refrigerant yourself. This is a pressurized chemical requiring a professional license to handle safely. If the unit blows warm air, check the air filter first. A clogged filter is the most common cause of poor cooling.
Don’t bypass safety switches or fuses. These components prevent electrical fires. If a fuse blows repeatedly, don’t replace it with a higher amperage rating. This indicates a short circuit that requires a technician’s inspection.
Avoid leaving the unit running if you hear loud grinding or screeching. This indicates a failing motor or fan bearing. Shut the system down immediately to prevent the motor from seizing, which turns a simple bearing replacement into a total system failure.
Preventing future system issues
To keep your unit running smoothly, you should establish a routine for inspection and maintenance. Compare your current habits against the recommended care schedule in the table below to ensure your system stays in peak condition.
| If you’re doing this | Do this instead | Why |
|---|---|---|
| Ignoring dust buildup | Clean filters every 30 days | Prevents airflow restriction |
| Leaving unit unattended | Check for error codes weekly | Spots problems before failure |
| Blocking the unit vents | Maintain 24-inch clearance | Allows proper heat exchange |
| Setting extreme temperatures | Use consistent, moderate settings | Reduces stress on compressor |
Most owners fail by waiting until the room feels warm before checking the filters. If you notice a musty odor, the coils likely already have mold growth. You should clean the evaporator coils with a no-rinse foaming cleaner based on your specific usage, as the owner’s manual is the final authority.
If the outdoor condenser unit sits in direct sunlight for most of the day, install a shade cover. If the unit makes a rattling sound, tighten the mounting bolts immediately. Ignoring vibrations often leads to refrigerant line leaks that require professional repair.
Related guides
- Mini Split Troubleshooting: Quick Fixes for Common Issues
- Carrier Mini Split Troubleshooting: Quick Fixes for Common Issues
- Mini Educator E-Collar Troubleshooting: Fixing Common Issues
Frequently asked questions
Why is my unit blowing room temperature air?
Your unit is likely in “Fan Only” mode or the compressor has failed to start. Check your remote settings to ensure you have selected the “Cool” or “Heat” mode. If the mode is correct and the outdoor unit is silent, you must call a technician.
How long should it take to cool a room?
A properly functioning system typically takes 15 to 30 minutes to show a noticeable difference in room temperature. This assumes the room size is appropriate for the unit’s BTU rating and the windows are closed. If the room remains hot after an hour, the unit may be undersized.
Is it safe to clean the outdoor unit?
It’s safe to remove debris from the exterior of the unit, provided you don’t open the cabinet. Use a soft brush or low-pressure water to gently rinse the exterior fins. Always ensure the power is switched off at the breaker before cleaning to prevent accidental activation.
Why is water dripping from the indoor unit?
Water dripping inside usually means the condensate drain line is clogged with algae or debris. Check the outside drain hose for blockages or kinks. If the hose is dry but the unit is dripping, call a professional to flush the drain system to avoid damaging the internal housing.
How often should I replace the filters?
You should inspect and clean your filters regularly to maintain system efficiency. A clean filter prevents the evaporator coils from freezing, which is a common cause of cooling loss. If you have pets or live in a dusty area, you may need to clean them more frequently.
Conclusion
Regular maintenance keeps your system running smoothly and prevents unexpected breakdowns during extreme weather. If you’re still having trouble after checking the basics, don’t hesitate to reach out to a local pro. They’ll help you get your comfort back on track so you won’t have to worry about the heat anymore.