You can usually resolve a weak or stuck flush by adjusting the control stop valve, which is the most common step in effective flushometer troubleshooting. When a valve fails to shut off, stays open, or provides a weak flush, the issue often stems from debris in the filter or an incorrect flow rate. If you aren’t a licensed plumber, keep in mind that these devices are under high pressure, and you should avoid any actions that involve opening the internal valve housing.
Common flushometer troubleshooting reasons
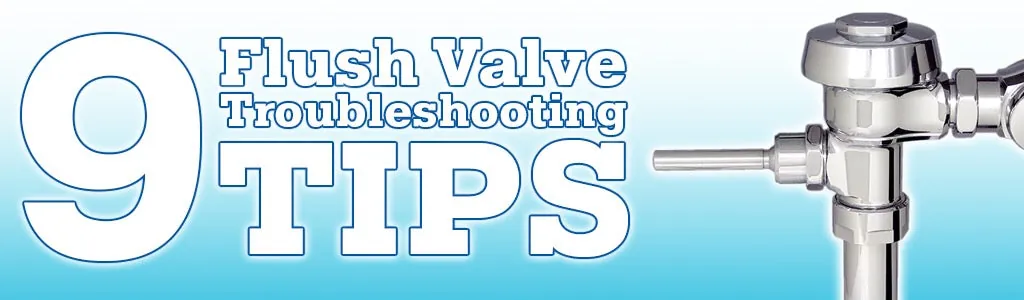
The most frequent cause for a malfunctioning valve is a clogged or blocked filter. Over time, small pieces of sediment from your water lines collect inside the internal components. This prevents the valve from closing correctly or limits the water volume needed for a full flush. You can often clear this by adjusting the flow, but if the internal seal is worn, the valve will continue to leak or cycle endlessly.
Another common issue is an incorrect flow rate setting. If someone has recently worked on the plumbing or the pressure in your building has changed, the control stop may be set too low or too high. A setting that’s too low results in a weak flush that doesn’t clear the bowl. Conversely, an opening that’s too wide can cause the valve to “slam” shut or create excessive noise, which stresses the pipe joints.
Finally, the diaphragm or the relief valve can wear out. These are rubber parts that move every time the handle is pressed. When they become brittle or crack, they lose the ability to create the pressure seal required to stop the water flow. If the valve is constantly running and you have already checked the external settings, it’s likely that these internal parts have reached their natural end of life.
Adjust the control stop valve
The control stop is the small valve located on the pipe near the wall. Adjusting this is for anyone who needs to fix a weak flush or a valve that’s splashing water. Use a flat-head screwdriver to turn the screw on the control stop. Turning it clockwise decreases the flow, while turning it counter-clockwise increases the flow. Only move the screw in small increments, about a quarter-turn at a time, to avoid sudden pressure changes.
If you aren’t sure where to start, turn the screw clockwise until it stops to shut off the water completely. Then, slowly open it by turning it counter-clockwise until you reach the desired flush strength. If you see water leaking from the control stop stem, tighten the packing nut located behind the screw head slightly with a wrench. Don’t force the screw if it feels stuck, as this can break the brass seat inside.
If the valve continues to run or fails to flush after these adjustments, the internal seals are likely damaged. At this point, the repair requires specific tools and replacement parts from the manufacturer. Because commercial plumbing fixtures must meet specific flow standards to prevent water waste, you should contact a licensed professional for any work that requires replacing internal components. This protects your warranty and ensures the fixture remains compliant with local building codes.
Test the handle assembly
The handle assembly is another common point of failure, especially in high-traffic areas. If the handle feels loose, sticks, or doesn’t trigger a flush, the spring or the plunger inside may be jammed. This fix is for those who notice the handle doesn’t return to its original position after being pressed. Start by checking for any buildup of soap or grime around the base of the handle cover.
Clean the area around the handle with a damp cloth to ensure that nothing is preventing the button from moving freely. If the handle still feels stiff, try moving it gently in different directions to see if it catches on the housing. Sometimes, the internal spring loses its tension and simply can’t push the handle back out. If the handle remains stuck in the inward position, the internal seal is likely allowing constant water flow.
This fix isn’t for you if the handle is leaking water from the center of the push button. A leak here means the internal O-rings have failed. Because the handle assembly is a sealed unit in many modern designs, you can’t repair the internal O-rings yourself. If the handle is broken, the entire unit must be replaced by a qualified maintenance technician. Don’t attempt to use lubricants or sprays, as these can damage the rubber seals and void your warranty.
Clean the external components
Sometimes the issue isn’t the valve itself but the surrounding environment. This fix is for when the valve looks dirty or has mineral buildup that affects the operation of the handle. Use a mild soap and a soft cloth to wipe down the exterior of the valve body and the handle. Never use harsh chemicals or abrasive scouring pads, as these can strip the finish and cause the metal to corrode over time.
Check the area where the handle meets the valve body for any debris. If you find heavy mineral deposits, gently scrape them away with a soft plastic tool. Be careful not to press too hard against the valve, as this can shift the internal alignment. Once the area is clean, test the handle by pressing it firmly to see if the movement has improved.
If you clean the exterior and the valve still functions poorly, you have ruled out external grime as the cause. This means the problem is internal. If you aren’t comfortable with plumbing, don’t attempt to disassemble the valve. Improper reassembly can lead to major leaks that cause water damage to your floors or walls. At this stage, it’s safer to call a plumber who has the correct parts and experience to handle the repair.
Avoid common mistakes
- Don’t use pliers on the valve body: Using metal tools on the finish will scratch the chrome, which leads to rust and permanent damage.
- Never force a stuck control stop: If the screw doesn’t turn with gentle pressure, you risk snapping the brass stem, which creates an emergency leak.
- Avoid using chemical drain cleaners: These liquids are meant for pipes, not valves, and will quickly melt the rubber seals inside the flushometer.
- Don’t ignore a constant “hissing” sound: This indicates the valve isn’t sealing, which wastes thousands of gallons of water and increases your utility bills.
- Never attempt internal repairs without water shut-off: Always ensure the main water supply is controlled before touching any part of the plumbing system.
Prevent future valve issues
| If you’re doing this | Do this instead | Why |
|---|---|---|
| Using abrasive pads | Use soft cloths and soap | Prevents damage to the finish |
| Ignoring a slight leak | Tighten the packing nut | Stops small leaks becoming big ones |
| Forcing a stiff handle | Clean around the base | Removes debris blocking movement |
| Turning screws too fast | Turn in quarter-increments | Prevents water hammer and pipe shock |
| Using chemical cleaners | Use damp, soapy cloths | Protects rubber seals from melting |
Most homeowners mistake a stiff valve for a mechanical failure. In reality, mineral buildup around the stem is usually the culprit. If the handle resists, stop immediately. Forcing it often shears the internal brass stem, turning a five-minute cleaning job into a costly plumbing replacement.
When tightening a packing nut, use a wrench with a steady, controlled grip. If you feel resistance, stop and back it off a quarter turn. Overtightening crushes the internal washer, which creates a permanent drip that no amount of adjustment can fix.
Finally, distinguish between a weeping valve and a failed seal. If the valve drips while closed, the seat is pitted. If it drips while open, the packing nut is loose. If you see water pooling on the floor, inspect the connections and the valve body for leaks, and contact a plumber to identify the source. Ignoring this sign often leads to a catastrophic pipe burst during the next cold snap.
Frequently asked questions
Can I fix a constantly running flushometer myself?
You can’t fix a constantly running valve if the issue is internal, as this requires replacing the diaphragm or relief valve. A continuous flow usually indicates that internal rubber parts are worn out. You should call a professional plumber to avoid flooding if minor adjustments fail.
How long does a flushometer last?
A flushometer typically lasts between 5 and 10 years, depending on water quality and usage frequency. High mineral content causes internal components to wear down faster due to sediment buildup. If your valve is older than 10 years and keeps failing, replacing the entire unit is often more cost-effective.
Is it safe to shut off the water to the flushometer?
Yes, it’s safe to shut off the water using the control stop valve if you turn the screw slowly without excessive force. This is the standard method to isolate the fixture for maintenance or to stop a leak. Don’t force the valve if it sticks, as you could cause a major leak.
Why is my flushometer making a loud banging noise?
A loud banging noise, or water hammer, usually occurs because water pressure is too high or the control stop is opened too far. Try turning the control stop screw clockwise by a quarter-turn to reduce the flow rate. If the noise continues, there may be an issue with pipe mounting or internal components.
What happens if I keep using a broken flushometer?
Using a broken valve wastes significant water and risks damaging your plumbing system. A valve that leaks constantly leads to high water bills and potential water damage to surrounding walls or floors. It’s best to resolve the issue immediately to prevent further stress on your pipes.
Conclusion
The health of your plumbing system relies on regular observation rather than constant tinkering. By keeping the exterior clean and only adjusting the control stop when you notice a clear change in performance, you protect the internal seals from unnecessary wear. If you reach a point where the valve refuses to close or the handle remains unresponsive after basic cleaning, call a professional to ensure the repair is done safely and correctly.