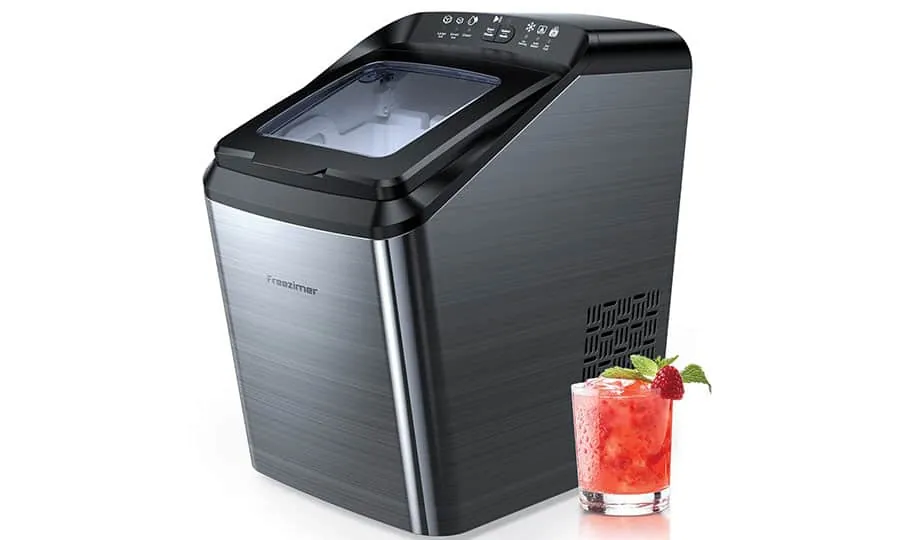
Portable ice makers are convenient kitchen appliances, but they often encounter common operational hurdles that require a systematic approach to resolve. If you’re experiencing issues with your unit, performing a freezimer ice maker troubleshooting sequence can often restore functionality without the need for a professional repair technician. These machines rely on a delicate balance of water temperature, ambient airflow, and sensor accuracy, all of which can drift over time due to mineral buildup or environmental factors.
Key Takeaways
- Regularly descale the water reservoir to prevent mineral deposits from clogging the internal pump.
- Ensure the unit has at least six inches of clearance on all sides for proper heat dissipation.
- Verify that the ambient room temperature is between 50°F and 90°F for optimal ice production.
- Use only clean, room-temperature water to avoid stressing the cooling system or triggering false sensors.
- Check the ice level sensor regularly to ensure it isn’t blocked by ice or debris.
Safety: Inside a mains-powered machine, the parts behind the outer cover can hold a dangerous electrical charge even after it has been unplugged — that’s why they sit behind a cover. Opening the housing, or testing or replacing anything behind it, is a job for a qualified technician, never a home repair.
Troubleshooting Common Freezimer Ice Maker Issues
Most operational failures in portable ice makers stem from either water flow restrictions or thermodynamic inefficiencies. When the machine fails to cycle properly, it’s frequently due to a clogged internal pump or a buildup of scale within the water lines. If the unit runs but fails to drop ice, the issue is often related to the evaporator fingers not reaching the required sub-freezing temperature, which may be caused by a faulty compressor or a lack of ventilation.
| Symptom | Primary Cause | Recommended Action |
|---|---|---|
| Machine runs but no ice | Low water or air lock | Fill tank and prime pump |
| Ice cubes are thin/slushy | High ambient temperature | Move to a cooler area |
| “Add Water” light stays on | Sensor blockage or scale | Clean sensor and reservoir |
| Unit makes loud grinding noise | Debris in water pump | Flush system with vinegar |
| Ice basket sensor error | Obstruction in bin | Clear ice from sensor eyes |
Is Your Power Supply Stable?
Electrical inconsistencies are a frequent culprit for erratic behavior. Portable ice makers are designed for standard household outlets, but they’re highly sensitive to voltage drops. If you’re using an extension cord, you’re likely introducing resistance that prevents the compressor from starting. Always plug the unit directly into a grounded wall outlet to ensure the motor receives the consistent current it requires to function according to Underwriters Laboratories safety standards.
- Avoid power strips or surge protectors that limit current.
- Check the circuit breaker to ensure the outlet isn’t overloaded.
- Inspect the power cord for any visible signs of fraying or heat damage.
How to Clean the Water System
Mineral scale is the silent killer of portable ice makers. Over time, calcium and magnesium from tap water accumulate on the evaporator fingers and inside the pump, acting as an insulator that prevents effective heat transfer. To address this, perform a deep clean using a solution of white vinegar and water.
Pro Tip: Use a soft-bristled toothbrush to gently scrub the internal sensor eyes, as even a thin film of mineral residue can cause them to report a “Full” or “Empty” status incorrectly.
- Drain the unit completely by removing the rear drain plug.
- Fill the reservoir with a mixture of two parts water and one part white vinegar.
- Run the “Clean” cycle for at least 30 minutes.
- Drain the vinegar solution and run two full cycles with plain, fresh water to remove any lingering taste.
Why Is My Ice Too Small?
If your ice cubes are coming out thin, hollow, or slushy, the machine is likely struggling with heat exchange. The evaporator fingers, which are the metal prongs that dip into the water, must get cold enough to freeze solid ice layers. If the ambient air is too hot, the compressor can’t dissipate heat efficiently. Additionally, using water that’s too warm to start with will significantly increase the cycle time and reduce the quality of the cubes.
- Ensure the unit is kept away from direct sunlight or heat sources like ovens.
- Use room-temperature water rather than ice-cold water to prevent thermal shock to the sensor.
- Clean the condenser coils located at the back of the unit to ensure airflow.
Checking the Water Pump Function
The water pump is responsible for moving water from the reservoir to the ice tray. If you hear the machine humming but no water is flowing, an air pocket may be trapped in the pump housing. You can often resolve this by gently tilting the unit at a 45-degree angle while it’s running to help dislodge the trapped air. If the pump remains silent, it may have failed due to a mechanical motor blockage or electrical fault.
Signs of a Failing Pump
- A high-pitched whining sound during the water transfer phase.
- The water level in the reservoir doesn’t decrease during a cycle.
- The machine enters a “Water Error” state despite the reservoir being full.
Proper Ventilation for Cooling
Portable ice makers are essentially small refrigerators, and they require significant airflow to exhaust the heat generated by the compressor. If the vents are blocked by curtains, walls, or clutter, the internal temperature will rise, causing the compressor to cycle off prematurely.
This thermal protection mode is designed to prevent a catastrophic compressor failure, but it results in poor ice production. Always maintain at least six to eight inches of clearance on all sides of the unit to allow heat to escape.
Is the Ice Sensor Obstructed?
Modern ice makers use infrared sensors to detect when the ice basket is full. These sensors are located on the sides of the ice collection area. If a stray piece of ice is stuck in front of the sensor, or if dust has accumulated on the lens, the machine will think the bin is full and stop producing ice.
- Use a flashlight to inspect the interior walls of the ice basket.
- Wipe the sensor lenses with a dry, lint-free cloth.
- Ensure the ice basket is seated correctly on the support rails.
Troubleshooting Error Light Patterns
Most units use a series of flashing LEDs to indicate specific problems. While these codes vary by manufacturer, a standard set of signals usually exists across most models. If your lights are blinking in an unusual sequence, consult the user manual or look for the specific brand’s diagnostic guide.
A common pattern involves the “Add Water” and “Ice Full” lights flashing simultaneously, which typically indicates a malfunctioning thermistor or a communication error between the main control board and the internal sensors.
| Light Sequence | Potential Meaning | Suggested Fix |
|---|---|---|
| Both lights flashing | Sensor communication error | Unplug for 10 minutes |
| “Add Water” solid light | Low water or pump issue | Refill or prime the pump |
| “Ice Full” solid light | Basket is physically full | Remove ice and check bin |
| All lights blinking | Internal circuit board fault | Reset unit power cycle |
Managing Ambient Temperature
The environment in which you place your ice maker is just as important as the water quality you use. These machines aren’t designed to operate in extreme conditions, such as outdoor patios in the middle of summer or unheated garages in the winter.
High humidity can also cause excessive frost buildup on the evaporator, which prevents the ice from releasing into the basket. If you operate the unit in a room that’s above 90°F, you’ll notice a significant drop in production speed and ice quality.
Related guides
- Jenn Air Refrigerator Ice Maker Troubleshooting: Quick Fixes
- Thermador Freezer Ice Maker Troubleshooting: Quick Fixes
- Kenmore Refrigerator Troubleshooting Ice Maker: Quick Fixes
Frequently Asked Questions
Why does my ice maker have a plastic taste?
New units often have a manufacturing residue on the plastic components. To eliminate this, run a cleaning cycle with a mix of water and baking soda. Rinse the reservoir thoroughly afterward. If the taste persists, ensure you’re using filtered water, as chlorine or other minerals in tap water can react with the plastic components, especially when subjected to the freezing process over time.
How often should I descale the unit?
You should perform a descaling process at least once every two to three months, depending on your local water hardness. If you live in an area with high mineral content, you may need to descale monthly. Regular maintenance prevents scale from damaging the internal pump and ensures that the evaporator fingers can freeze ice efficiently without an insulating layer of mineral deposits.
Can I leave the unit plugged in constantly?
While you can leave the unit plugged in, it isn’t recommended if it isn’t in use. Constant power draw keeps the internal components warm and can lead to unnecessary wear on the electronics. It’s best to unplug the device when you aren’t actively producing ice and ensure the reservoir is drained and dried completely to prevent mold or mildew growth inside the tank.
Why is the ice melting immediately after it drops?
If your ice is melting as soon as it hits the basket, the unit isn’t insulated to act as a freezer. Portable ice makers are designed for production, not long-term storage. Once the ice drops, you should transfer it to a freezer immediately. If the ice melts while the machine is still running, check that the ambient room temperature isn’t excessively high.
What should I do if the unit makes a loud banging noise?
A loud banging sound is usually caused by ice cubes that are too large or heavy, causing them to get stuck on the evaporator fingers. As the fingers heat up to release the ice, the cubes may fall forcefully. If the noise is grinding or metallic, it indicates a mechanical issue with the fan or the compressor motor, which typically requires professional service or unit replacement.
Conclusion
If the troubleshooting steps provided haven’t restored your machine to full working order, your next step should be to locate the serial number on the bottom of the unit and contact the manufacturer’s customer support line for a warranty claim or a specific repair part reference number. Consistent maintenance will ensure your unit continues to provide reliable service for many years.