If your machine fails to reach the proper water level, you can fix a frigidaire max fill washer troubleshooting issue by checking the water inlet valves and the pressure hose for blockages. Most of these problems stem from a clogged inlet screen or a kinked pressure tube. If the washer can’t sense the pressure, it will stop the fill cycle early to prevent an overflow. You can inspect these parts yourself without needing special tools.
Troubleshooting Frigidaire max fill issues
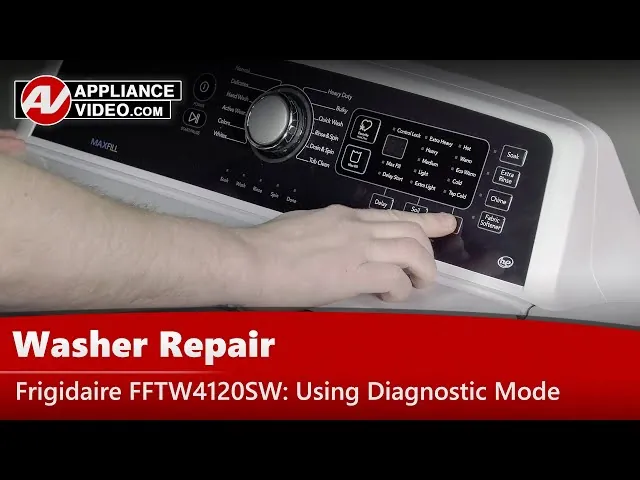
The main reason your washer stops filling is a failure in the pressure sensing system. A washing machine uses a small plastic tube to measure the air pressure inside the tub as it fills with water. If this tube is blocked by debris, disconnected, or pinched, the machine thinks the tub is already full when it’s actually empty. This is a common safety feature designed to prevent flooding your laundry room.
To diagnose this, pull the tube off the pressure switch and blow through it toward the tub. If you feel significant resistance or can’t hear air bubbling into the water basin, the line is clogged. A pinched line often occurs near the hinge of the lid or the door seal, where constant movement fatigues the plastic.
Another common cause is restricted water flow from your home supply. If the mesh screens inside the inlet valves are clogged with mineral deposits or sediment, the water pressure will be too low for the machine to reach the max fill level in the expected time. When the computer doesn’t see the water level rise fast enough, it may pause or trigger an error code to protect the pump.
Check the screens every six months if you live in an area with hard water. A mistake many owners make is ignoring a slight “humming” sound from the valves, which indicates they’re straining against a blockage. This eventually burns out the solenoid coil.
You should also consider the water pressure from your wall faucets. If the valves aren’t fully open, or if your home pressure is low, the machine will struggle to meet the demand.
If your fill cycle takes longer than ten minutes, the control board will likely time out and abort the process. You can verify your home’s water pressure requirements by checking the Frigidaire appliance support manual to see if your supply meets the manufacturer’s minimum specifications for a proper cycle.
Safety: Inside a mains-powered machine, the parts behind the outer cover can hold a dangerous electrical charge even after it has been unplugged — that’s why they sit behind a cover. Opening the housing, or testing or replacing anything behind it, is a job for a qualified technician, never a home repair.
Clean the inlet valve screens
This fix is for users who notice that water is entering the machine, but the flow seems very slow or weak. You’ll need to turn off the water supply faucets at the wall before you start. Once the water is off, unscrew the hoses from the back of the washer. You’ll see small plastic screens inside the inlet valves. Use needle-nose pliers to gently pull these screens out.
If they’re covered in sand or white mineral buildup, rinse them under a faucet until they’re clear. If the buildup is too hard to rinse off, use a soft toothbrush to scrub the mesh. After cleaning, push the screens back into the valves until they click into place. Reconnect the hoses, turn the water back on, and check for leaks. If the machine fills at the expected speed, the problem is solved.
This process is safe for most homeowners. However, if you find that the valves themselves are cracked or leaking, you must stop. Replacing the internal valve assembly involves opening the cabinet and working near electrical components, which is work for a professional technician.
Clear the pressure sensing hose
If the machine fills but stops before reaching the max fill line, the pressure hose is likely the culprit. This hose is a thin, clear plastic tube connected to the side of the outer tub. You can often access it by looking behind the machine or removing the back panel if it’s held by simple screws. Don’t force any panels open if they seem stuck.
Check the entire length of the tube for kinks, pinches, or cracks. If you see a kink, straighten it out so the air can move freely. If the tube is blocked with soapy residue or debris, carefully detach it from the tub and blow through it to clear the clog.
Reattach it firmly to the sensor and the tub. If the tube is cracked or brittle, it won’t hold air pressure, and it must be replaced by a qualified repair person.
This fix isn’t for those who are uncomfortable working with internal components. If the tube is disconnected at the bottom near the tub, it can be very difficult to reach without professional tools. If you can’t see the tube clearly, or if you have to remove more than one panel to find it, call a service center to avoid damaging the delicate sensors.
Inspect the water supply faucets
Sometimes the issue isn’t the washer but the plumbing leading into it. Check that your hot and cold water valves are turned completely to the open position. If they’re only partially open, the machine might time out during the fill cycle, triggering an error code on your display. Also, check the hoses for any sharp bends or twists that could be cutting off the water flow.
If you have a water softener or a whole-house filter, check if it needs servicing. A dirty filter can significantly reduce the water pressure reaching your laundry room. If the pressure seems fine at a nearby sink but the washer still fills slowly, the issue is likely internal to the machine’s valve system.
The decision rule is simple: if the water flow is weak at the sink, the blockage is in your home’s main lines or filters. If the sink runs strong but the washer remains sluggish, the inlet screens inside the machine are likely clogged with mineral deposits. In that case, you should contact a professional to test the electrical signal to the valves or clear the sediment.
What not to do during troubleshooting
Don’t use a wire or sharp tool to poke through the inlet screens. Tearing the fine mesh allows sediment to bypass the filter and permanently ruin the internal valve. If you suspect a clog, remove the screen entirely to rinse it under a faucet instead.
Don’t bypass the pressure switch by blowing air into it while the machine is running. This tricks the sensor into reporting an empty tub, which can cause the machine to overfill and flood your home. If the machine fails to fill, check the hose for kinks before touching the switch.
Don’t attempt to clean or repair the internal electronic control board. These components are highly sensitive to static electricity; even a minor discharge can destroy the logic circuits. If the board is unresponsive, the only safe fix is a full replacement.
Don’t use household cleaners or chemicals inside the water inlet valves. These agents degrade the rubber seals, leading to slow, hidden leaks that rot your flooring.
How to stop it happening again
Keeping your washer running smoothly requires regular maintenance of the water supply and drainage systems. Use this table to compare your current habits with the recommended care steps to keep the water levels consistent and the sensors clean.
| If you’re doing this | Do this instead | Why |
|---|---|---|
| Ignoring slow fills | Clean inlet screens yearly | Prevents mineral buildup |
| Using old rubber hoses | Replace with braided steel | Prevents leaks and bursts |
| Overloading the drum | Follow load size guides | Allows proper sensor readings |
| Using too much soap | Use high-efficiency detergent | Prevents suds in pressure tubes |
The most common mistake is ignoring the “suds error” code. Many owners assume it’s a sensor glitch and simply restart the cycle. This is a costly error. If you restart without clearing the excess soap, you risk burning out the drain pump motor.
If your machine displays a code, always check the pressure tube first. If the tube is clear but the code persists, you’re likely dealing with a faulty water level switch. If the drum is empty but the machine still detects water, replace the switch immediately. Always prioritize clearing the debris before resetting the electronics.
Frequently asked questions
Can a clogged drain cause fill issues?
A clogged drain doesn’t stop your machine from filling, but it can prevent the next cycle from starting. If water remains in the tub, the sensor may detect it and halt the fill process. Check your drain hose and standpipe for blockages to ensure proper drainage.
How long should a max fill cycle take?
A full cycle usually takes 10 to 15 minutes to reach the max fill level, depending on your home’s water pressure and the size of the tub. If your machine takes longer than 20 minutes to fill, it will often trigger an error code because the control board thinks there’s a leak. You can check your specific model’s expected fill time by looking at the cycle chart in your owner’s manual.
Is it safe to use the machine with a kinked hose?
You shouldn’t use the machine with a kinked pressure hose, as it leads to incorrect water levels. A faulty sensor reading may cause the washer to overfill and damage your floor. Straighten or replace the hose before running another load to ensure safe operation.
What happens if I ignore a slow fill?
Ignoring a slow fill will eventually trigger a permanent error that stops all cycles to prevent damage. This puts extra stress on the inlet valves, causing them to fail prematurely. Addressing the issue early prevents costly valve assembly repairs and unexpected laundry delays.
Why does my washer stop filling at the same spot every time?
Your washer stops because the pressure sensor is failing to detect rising water levels. This is typically caused by a blockage in the air tube that tricks the machine into thinking the tub is full. Clear the tube or sensor port to restore normal operation.
Conclusion
Regular maintenance of your water inlet screens and pressure hoses will keep your machine filling correctly for years to come. Always prioritize safety by turning off the water and power before you touch any part of the machine. If you’re unsure about a step or if the problem persists after cleaning, reach out to a certified technician to avoid accidental damage or injury.
Related guides