You can usually fix a display error or warning light by performing a simple power cycle of your system, as effective fronius ig plus troubleshooting often starts with a full restart. This process clears temporary software glitches that prevent the inverter from syncing with your local power grid. If the screen remains blank or shows a persistent red light after this, the issue likely involves a hardware fault or a loss of grid connection.
Troubleshoot common Fronius IG Plus errors
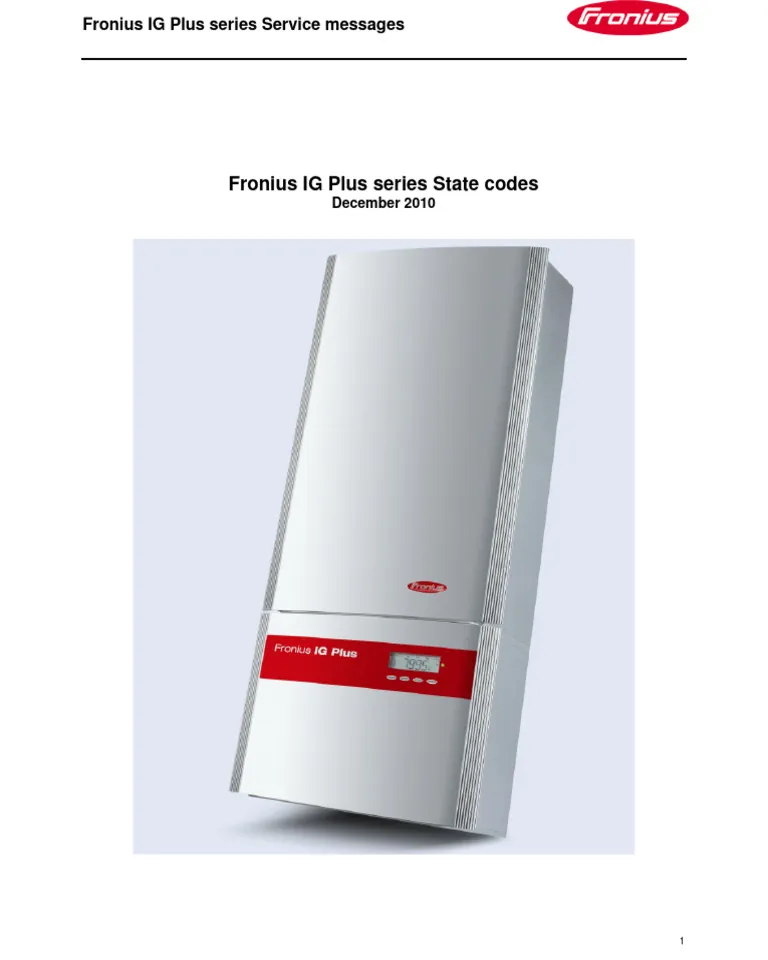
Most inverter faults stem from environmental factors or grid instability rather than internal component failure. When the grid voltage rises above 253V or drops below 216V, the inverter shuts down to protect itself and your home appliances. This is a safety feature required by utility standards to prevent back-feeding energy during a blackout or unstable power conditions.
Another frequent cause is extreme heat. These units rely on internal fans to move air across the heat sinks. If those fans become blocked by dust or debris, the unit will trigger an over-temperature warning to prevent permanent damage to the circuit boards.
You can check the cleanliness of the air vents on the side of the unit to ensure that nothing is preventing proper airflow. If the ambient temperature exceeds 113 degrees Fahrenheit, the inverter will automatically throttle its power output, which may appear as a system error.
Finally, check for external damage to the cables or the DC disconnect switch. A loose connection at the solar array input can trick the system into thinking there’s no power available, causing a “Power Low” message. If you see this error during peak sunlight hours, inspect the MC4 connectors for signs of melting or corrosion.
A common mistake is assuming the inverter is broken when the issue is actually a tripped AC breaker in your main panel. Always verify the state of your utility meter, as the inverter requires a stable signal from the grid to complete its startup sequence and begin exporting electricity to your home.
Restart the inverter safely
A manual reset is the first step for most minor software errors. Start by turning off the DC disconnect switch located on the bottom of the unit. Next, switch off the AC circuit breaker in your main electrical panel that feeds the system. Wait at least 5 minutes to allow all internal capacitors to discharge fully before you turn the AC breaker back on, followed by the DC switch.
This waiting period is vital to ensure the internal capacitors have fully discharged, which is necessary for safety and to allow the system to perform a complete power-on reset.
If the unit is working correctly, you’ll see a startup sequence on the LCD screen as it performs an internal self-test. This process is for users comfortable with standard household breakers; if you see signs of charring, smell smoke, or hear buzzing, don’t touch the equipment and contact a licensed electrician immediately.
If the display shows an error code, note it down before you restart. Codes beginning with a “1” usually relate to grid issues, while codes starting with “3” or “4” often indicate internal hardware faults. You can find the specific official error code meanings in the manufacturer’s documentation. If the system fails to start after three attempts, there’s likely a permanent hardware failure that requires a professional technician to evaluate.
Check external grid connections
Verify that the AC circuit breaker hasn’t tripped due to an overload or a power surge. If the breaker is in the “off” or “middle” position, flip it firmly to “off” and then back to “on” to reset it. If it trips again immediately, the problem is likely a short circuit in the wiring between your inverter and the main panel.
This step is for those who can safely access their main home electrical panel. If you aren’t confident identifying the correct breaker, or if the panel is cluttered with exposed wiring, stop and call a professional. Never force a breaker that refuses to stay in the “on” position, as this indicates a serious electrical fault that could lead to a fire hazard if ignored.
If your home has a secondary sub-panel for solar, check that all breakers there are also in the correct position. Sometimes, grid maintenance in your neighborhood can cause these breakers to trip to protect the home. Once you ensure all switches are set correctly, wait for the inverter to complete its standard synchronization delay, which typically lasts about 5 minutes before power production resumes.
Inspect internal cooling components
When the inverter runs hot, it reduces its power output or shuts down entirely to protect the sensitive internal electronics. Check the exterior of the inverter for any obstructions like overgrown vines, storage boxes, or heavy dust buildup that could block the intake vents. Keeping the area around the unit clear is essential for the longevity of the internal cooling fans.
If the unit is located in direct sunlight, the heat might be causing the issue even if the fans are working perfectly. While these units are built for outdoor use, extreme temperatures can still force them into a thermal protection mode. This fix is for those who can safely reach the unit; if it’s mounted high on a wall, don’t use a ladder unless you have proper safety training.
If you hear a loud grinding noise coming from the unit, the fan bearings may be failing. This is a mechanical issue that a user can’t fix without opening the sealed chassis. Opening the inverter housing voids the warranty and exposes you to high-voltage direct current, which is extremely dangerous. If the fan is clearly broken, contact a solar service company to perform a professional replacement of the cooling module.
Avoid dangerous repair habits
Never open the inverter cover: The internal DC capacitors hold a lethal charge long after the unit is disconnected from the grid. Touching these components can cause cardiac arrest. Beyond the risk of fatal injury, breaking the factory seal voids your warranty and invalidates the UL or CE safety certifications required by your insurance provider.
Don’t bypass the circuit breakers: Forcing a tripped breaker to stay closed with tape or wedges creates an immediate fire hazard. If the system experiences a genuine ground fault, the lack of a trip mechanism allows the wiring to melt or ignite.
Avoid using water for cleaning: Never spray the unit or use wet cloths. Moisture wicks into the high-voltage terminals through microscopic gaps, triggering internal shorts. Use only a dry, anti-static microfiber cloth for dust.
Don’t ignore persistent error codes: If a code returns after a power cycle, the component has likely reached its thermal or electrical limit. Replacing an inexpensive sensor now prevents a costly inverter failure later.
Prevent future system downtime
The best way to keep your solar system running is to monitor it regularly. If you’re doing this, you can catch small issues before they turn into expensive repairs.
| If you’re doing this | Do this instead | Why |
|---|---|---|
| Ignoring warning lights | Note the code and restart | Early detection saves hardware |
| Leaving vents blocked | Clear 12 inches of space | Heat kills internal electronics |
| Forcing a tripped breaker | Call a licensed electrician | Prevents fire and shock hazards |
| Resetting the unit daily | Request a service check | Frequent trips mean real damage |
Most owners fail by waiting for a total blackout before calling for help. This mistake often doubles your repair costs because a minor component failure, like a failing capacitor, can fry the entire inverter board if left unchecked.
Use this decision rule: if your system produces less than 80% of its expected output for three consecutive sunny days, schedule a professional diagnostic immediately. This threshold accounts for seasonal variance while catching genuine mechanical degradation. If you see a persistent error code, don’t reset the system more than twice. Repeatedly forcing a restart on a faulty circuit can trigger a permanent lockout, turning a simple software patch into a hardware replacement.
Frequently asked questions
Why is my fronius ig plus showing a red light?
A red light indicates a system fault that has stopped power export. Common causes include grid voltage fluctuations or internal hardware errors. Perform a full power cycle by turning off AC and DC switches for 15 minutes; if the light persists, contact a professional solar technician.
How long should the inverter take to restart?
The system requires 5 minutes of stable grid connection before resuming power production. This delay is a safety feature designed to ensure the grid is stable. If the unit takes significantly longer or fails to start, it may be struggling to detect grid voltage or experiencing a persistent internal fault.
Is it safe to reset the inverter myself?
It’s safe to perform a power cycle using external switches and circuit breakers. You don’t need to open the unit or touch internal wiring. However, if you see physical damage, smell burning, or notice breakers tripping immediately, don’t attempt further resets and seek expert help.
What happens if I ignore a persistent error code?
Ignoring an error code can lead to complete inverter failure or fire hazards. These codes warn that the system is operating outside safe parameters due to grid conditions or component wear. Always investigate the cause of the code immediately to prevent damage to internal power stages.
Can I clean the inverter with a pressure washer?
You must never use a pressure washer or liquid spray on your solar inverter. The unit is weather-resistant but not waterproof, and high-pressure water can force moisture past the seals. Use only a dry, soft cloth to wipe dust from the exterior vents.
Conclusion
The status of your solar system is the final indicator of whether you need professional help. If your unit is under warranty, check your original installation paperwork to find the contact information for your installer. A professional technician can access the internal logs to see exactly what triggered the fault, saving you time and preventing the risk of accidental injury during manual inspections.