If your water flow is slow or the taste seems off, ge reverse osmosis system troubleshooting often reveals that the issue is just a clogged pre-filter or a low air pressure setting in the storage tank. These systems rely on specific pressures to push water through the membrane, so when the internal environment changes, the output drops quickly. Most owners can fix these common performance gaps by checking the tank pressure or changing the sediment filters on a regular schedule.
Troubleshooting slow reverse osmosis flow
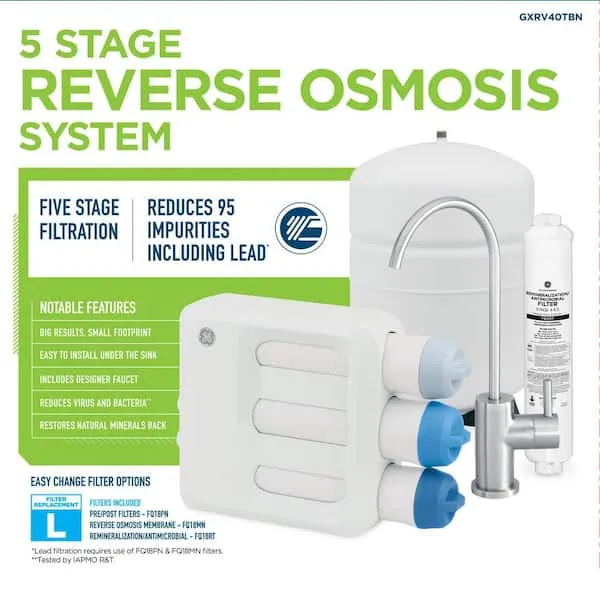
The most common reason for a drop in water production is a clogged sediment or carbon filter. These filters trap dirt and chlorine before the water reaches the membrane, but they have a limited capacity. If you live in an area with high sediment levels, these filters will saturate faster than the manual suggests. When they become blocked, the water can’t pass through to the membrane, which makes the whole system crawl.
Another frequent cause is low air pressure in the storage tank. The system needs a specific amount of air to push water out of the tank and into your faucet. If the air pressure is too low, the tank won’t empty completely, even if it’s technically full of water. You can usually find the required pressure rating for your specific model on the GE Appliances water filtration support page.
Finally, the reverse osmosis membrane itself can fail over time. While the filters last for months, the membrane is meant to last much longer, but it can be damaged by scale buildup or extremely hard water. If the filters are clean and the tank pressure is correct, the membrane is likely the final point of failure. This is a normal part of the system’s life cycle rather than a mechanical defect.
Replace the pre-filters to restore flow
This fix is for users who notice a sudden drop in water volume while the system still produces some output. Before you start, turn off the cold water supply valve that leads to the unit.
You should also close the valve on top of the storage tank to keep the remaining water inside. If you don’t have replacement filters on hand, don’t attempt to clean the old ones, as this can damage the fine mesh and let particles pass into the membrane.
To replace the filters, twist the housing canisters off according to your manual’s instructions. Discard the old cartridges and rinse the plastic housings with warm, soapy water to remove any slime or debris. Insert the new filters, ensuring they seat firmly against the O-rings. If the O-ring looks cracked or dry, replace it to ensure a perfect seal.
After putting the canisters back, slowly turn the water supply on and check for leaks. If you see water dripping, tighten the housing by hand; never use a wrench, as you might crack the plastic. Once the system is dry and tight, open the tank valve. It will take a few hours for the tank to refill completely before you see full pressure at your sink again.
Adjust the storage tank air pressure
This fix is for users who have good water pressure for the first cup but notice the flow dies out almost immediately after. You’ll need a standard bicycle tire pressure gauge and a manual hand pump.
If your tank has a small Schrader valve—which looks just like the air valve on a car tire—you can adjust the pressure yourself. If the tank shows signs of rust or heavy corrosion, don’t attempt to pressurize it, as the metal may be weakened; instead, contact a professional to replace the tank.
First, turn off the water supply and disconnect the line going to the tank. Open the faucet at the sink to drain all the remaining water out of the system. Once the water stops flowing, keep the faucet open and attach your pressure gauge to the valve on the side or top of the tank. The tank should be pressurized to the specific PSI rating recommended by the manufacturer, typically between 7 and 10 PSI when empty.
If the reading is lower, use the hand pump to add small bursts of air until you hit the target range. Don’t use an air compressor, as the high force can easily rupture the internal rubber bladder. After setting the pressure, reconnect the water line and turn the supply back on. If the tank doesn’t hold the air pressure after you pump it up, the internal bladder is torn and you must replace the tank.
Inspect the membrane for scaling
This step is for users who have replaced the filters and checked the tank pressure but still have poor water quality or very slow production. A failing membrane often shows signs of scaling, which is a white, crusty buildup on the surface. This happens when minerals in your water accumulate over time. If your home has very hard water, this process happens faster than in homes with soft water.
Replacing the membrane is a more involved task, and it requires following the specific sequence for your model found in your owner’s manual. If you aren’t comfortable working with tight plastic fittings or if your system is hard-plumbed into your home’s main line, it’s safer to call a qualified plumber. A professional can also test your water quality to see if your home needs a separate water softener to protect the membrane from future damage.
Remember that a new membrane needs to be flushed before you drink the water. The manufacturer will provide specific instructions on how many gallons to run through the system to clear the storage tank. Never drink the first full tank of water after a membrane change, as it may contain sanitizing agents or loose carbon dust from the new components.
Avoid common maintenance mistakes
Using a wrench to tighten plastic housings: This puts too much force on the threads. You should always hand-tighten these units until they seat firmly. If you use a tool, you risk permanent cracks that force a total replacement of the housing assembly.
Ignoring the O-ring condition: A dry or pinched rubber seal is the primary cause of slow, invisible leaks. Inspect the ring for flat spots or brittle edges before every install. If it looks deformed, replace it immediately to prevent long-term water damage to your cabinets.
Using high-pressure air compressors on the tank: These tools deliver a surge of force that ruptures the internal rubber bladder instantly. Always use a manual bicycle pump to adjust pressure. If the tank feels unusually light when empty or heavy when full, the bladder has likely failed.
Forgetting to shut off the water supply: You must close the intake valve before starting. If you skip this, you’ll face a pressurized spray the moment you unscrew the first filter. Always open a downstream faucet to bleed the remaining pressure after closing the main valve.
Prevent future system issues
To keep your system running smoothly, you should match your maintenance schedule to your actual water usage and the quality of your local supply. If you have a large family or use a lot of filtered water for cooking, your filters will reach their capacity faster than the standard time frames suggested in the manual.
Most users make the mistake of waiting for a drop in water quality before changing filters. This delay often results in sediment bypass, which permanently clogs the expensive reverse osmosis membrane. If your local water has a total dissolved solids (TDS) reading above 300 parts per million, you must replace your pre-filters every four months to protect the core system.
| If you’re doing this | Do this instead | Why |
|---|---|---|
| Changing filters once a year | Change every 6 months | Prevents buildup from reaching the membrane |
| Using high-pressure air | Use a manual hand pump | Protects the fragile rubber bladder |
| Tightening housings with tools | Tighten by hand only | Prevents cracking the plastic threads |
| Ignoring slow water flow | Check the tank pressure | Low air prevents the tank from emptying |
If you notice the tank feels heavy but the faucet flow is weak, the bladder pressure is likely lost. Use a standard tire gauge on the tank valve; it should read the specific PSI recommended by your system’s manufacturer when empty.
Frequently asked questions
Can I fix a leaking housing myself?
You can usually stop a leak by cleaning or replacing the O-ring. Wipe the O-ring with a cloth and apply food-grade silicone lubricant to help it seat properly. If the O-ring is cracked or the housing is damaged, you must replace the part to ensure the system remains water-tight.
How long does the membrane last?
The membrane typically lasts between 2 and 3 years, depending on water hardness and pre-filter maintenance. If sediment filters aren’t changed on time, the membrane will clog prematurely. You should replace the membrane if water flow remains slow after verifying tank pressure and installing fresh pre-filters.
What happens if I use the system without filters?
You should never run the system without filters, as this will permanently ruin the membrane. Pre-filters remove chlorine and sediment that otherwise destroy the membrane’s thin film and block its pores. Without these filters, your water quality will drop immediately, requiring an expensive replacement of the membrane.
Is it safe to use a bicycle pump on the tank?
Yes, you can use a bicycle pump if it has a pressure gauge to monitor the air intake. You must only add air when the tank is completely empty of water to ensure an accurate reading. Always stay within the exact PSI range specified for your model to prevent filling issues.
Why is my water still cloudy after a filter change?
Cloudy water is usually just trapped air bubbles from new filters and is harmless. Run the faucet for 10 to 15 minutes to flush the system and let the air escape. If the water remains cloudy, verify that the filters are installed in the correct order and all connections are tight.
Conclusion
Regular maintenance is the best way to ensure your system provides clean, fresh water for your home. By staying on top of your filter changes and checking your tank pressure, you avoid the most common causes of slow flow and poor quality. If you follow these steps, you’ll keep your system in good working order for many years.