If you have no hot water, the most common fix is to reset the high-temperature limit switch on your ge water heater troubleshooting process, as this safety device often trips due to a temporary power surge or minor overheating. You should first check your home’s circuit breaker to ensure the unit is receiving power. If the breaker is fine, the issue might be a faulty thermostat or a burned-out heating element. Always verify that your water supply valve is open and that the tank is full before you attempt any electrical checks.
Finding the cause of your water heater problems
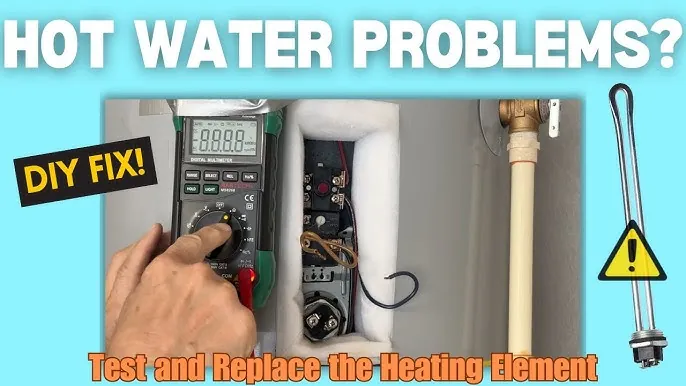
When your unit stops working, the root cause is usually related to either the power supply or the internal temperature control components. Electric models rely on thermostats to signal the heating elements to engage, and if these fail, the water will remain cold regardless of the tank’s status. For gas models, the issue often stems from a pilot light that has gone out or a thermocouple that’s no longer sensing the flame correctly.
Another frequent culprit is the accumulation of sediment at the bottom of the tank. Over time, minerals from your water supply settle and create a layer of insulation over the lower heating element. This makes the element work harder than necessary, which can lead to premature failure or cause the unit to cycle on and off too frequently.
If your water is lukewarm rather than cold, the upper heating element might be working while the lower one has failed. The upper element heats the top portion of the tank first, and once that water reaches the set temperature, the lower element engages to heat the rest of the tank.
If the lower element stops functioning, you’ll run out of hot water much faster than usual. This is a common sign that the components need inspection by a trained professional who can test the electrical continuity of the elements safely.
Safety: Inside a mains-powered machine, the parts behind the outer cover can hold a dangerous electrical charge even after it has been unplugged — that’s why they sit behind a cover. Opening the housing, or testing or replacing anything behind it, is a job for a qualified technician, never a home repair.
Resetting the high-temperature limit switch
The high-temperature limit switch is a vital safety feature designed to cut power if the water in the tank reaches dangerous levels. If you find the water is cold, locate the reset button, which is typically hidden behind the upper access panel on the side of the tank. Before touching any panels, ensure the power is completely off at the main breaker panel to avoid the risk of electric shock.
To perform this check, remove the upper access cover and the insulation pad. You’ll see a small red button located on the thermostat control box. If the button is popped out, press it firmly until you hear a click, which indicates it has been reset.
Replace the insulation and the cover, then turn the power back on at the breaker. If the button trips again immediately, it suggests a more serious issue like a faulty thermostat or a short circuit that requires a professional repair service.
This fix is only for those who are comfortable working near electrical components after the power is verified as off. If you’re unsure or if the panel feels difficult to remove, don’t force it. Contact a licensed plumber or electrician who has the proper tools to test the internal wiring without damaging the unit’s housing or voiding your warranty.
Checking the circuit breaker and power
The most common reason for a sudden loss of hot water is a tripped circuit breaker in your home’s main electrical panel. If the breaker has moved to the center position or the “off” position, it has cut power to the heater. Simply flip the switch all the way to the “off” position, then back to the “on” position to restore power to the unit.
If the breaker trips again shortly after you reset it, you must stop and call an electrician. Repeated tripping indicates a high-current fault or a short circuit within the heater’s wiring that could lead to a fire hazard. Never attempt to bypass a breaker or replace it with one of a higher amperage rating, as this can cause the wiring in your walls to overheat and melt.
This check is strictly for the external electrical supply. If the breaker is in the “on” position and you still have no power at the tank, the issue might be a loose connection at the junction box on top of the heater.
Always use a non-contact voltage tester to confirm there’s no power before touching any wires. If you don’t have this tool or the training to use it, leave the junction box closed and call a professional to handle the electrical diagnostic.
Inspecting for sediment and scale buildup
If your water heater makes popping or rumbling noises, it’s likely filled with mineral sediment. This buildup creates a barrier between the water and the heating elements, which forces the heater to run longer to reach the desired temperature. This not only wastes energy but also puts unnecessary stress on the tank walls, which can lead to leaks over time.
To address this, you may need to flush the tank to remove the debris. Connect a standard garden hose to the drain valve at the bottom of the tank and run the other end to a floor drain or outside.
Open the valve and let the water run until it appears clear. Note that this process can take up to 30 minutes depending on how much sediment has collected. If the valve is stuck or leaking, don’t force it, as you could break the seal and cause a flood.
This task isn’t for everyone. If your water heater is located in an area where draining could cause water damage, or if you aren’t physically able to manage the hose and valve safely, hire a professional. They have the equipment to flush the system efficiently and can inspect the integrity of the tank during the process.
Common mistakes to avoid
Turning the thermostat too high: Setting the temperature above 120°F (49°C) increases the risk of scalding. If you have elderly residents or young children, consider capping the output at 115°F to prevent accidental burns.
Ignoring a leaking tank: A small drip from the bottom is often a sign of a rusted-through tank that can’t be repaired and must be replaced immediately. If the water appears brown or rusty, the internal lining has already failed, and the unit is nearing a catastrophic rupture.
Replacing parts without turning off power: Never touch internal components while the breaker is on, as the unit uses high-voltage electricity that can be fatal. Always use a non-contact voltage tester to verify the circuit is dead before opening the access panel.
Using the wrong replacement parts: Always use genuine manufacturer-specified parts. Generic components often fail to meet safety standards, which can void your warranty or cause fire hazards.
Maintaining your water heater performance
Regular maintenance is the best way to prevent unexpected outages. You should check the anode rod periodically to see if it needs replacement, as the frequency depends on your water usage; consult your owner’s manual for the specific maintenance authority. This rod prevents the tank from rusting from the inside out.
| If you’re doing this | Do this instead | Why |
|---|---|---|
| Ignoring strange noises | Flush the tank | Sediment buildup causes rumbling |
| Ignoring a cold tank | Check the breaker | A tripped breaker is the most common fault |
| Turning heat to max | Set to 120°F | Prevents scalding and saves energy |
| Replacing parts yourself | Call a professional | Prevents injury and protects your warranty |
Frequently asked questions
Can I fix a leaking water heater myself?
No, you can’t safely repair a leaking tank because it indicates the interior steel has rusted through. Once a tank leaks, it’s structurally compromised and must be replaced to avoid failure. Don’t use sealants, as they won’t hold under pressure or stop internal corrosion.
How long does it take for a water heater to heat up?
A standard 40-gallon tank typically takes 60 to 120 minutes to heat water from cold to the set temperature. This duration depends on the wattage of your heating elements and the incoming water temperature. If it takes significantly longer, a heating element or thermostat may be failing.
How often should I flush my water heater?
You should flush your water heater regularly to prevent the buildup of mineral sediment. If you live in an area with hard water, you may need to perform this task more frequently. If you notice persistent rumbling or popping sounds, flush it sooner, as this indicates sediment is affecting heat transfer.
Is it safe to touch the water heater if it’s buzzing?
No, you shouldn’t touch the heater if it makes unusual electrical buzzing sounds, as this could indicate a short circuit. Buzzing often comes from high-voltage heating elements or contactors. Turn off the power at the main circuit breaker immediately and contact a licensed electrician to inspect the unit.
What happens if I ignore the high-temperature limit switch?
If you ignore a tripped high-temperature limit switch, you’ll have no hot water until the switch is manually reset. The switch prevents the water from reaching boiling temperatures that could cause over-pressurization. If the switch trips repeatedly, the thermostat is likely stuck, requiring a professional repair.
How do I know if my heating element is broken?
You know the heating element is broken if you have lukewarm water or if your hot water supply runs out quickly. This usually happens when the lower heating element fails, leaving only the upper element active. A professional can use a multimeter to confirm if the element has failed.
Conclusion
If these simple adjustments don’t restore your hot water, it’s time to call a licensed plumber for a professional inspection. They’ll have the right tools to safely test your tank’s internal components. Don’t worry if you can’t fix it yourself; getting an expert’s help will keep your home safe and comfortable.
Related guides