Is your RV air conditioner acting up just when you need it most? Whether it won’t turn on, blows warm air, or makes strange noises, these issues can quickly turn a relaxing trip into a frustrating experience.
But don’t worry—you don’t have to call a repair service right away or suffer in the heat. With a few simple checks and fixes, you can often get your RV air conditioner back to working perfectly. In this guide, you’ll learn easy troubleshooting steps that anyone can follow, even without technical experience.
Keep reading, and discover how to stay cool and comfortable on the road, no matter what your RV air conditioner throws at you.
Power Issues
Power issues are a common cause of RV air conditioner problems. Without proper power, the unit will not start or cool properly. Troubleshooting power problems can save time and money. It requires simple tools and careful checks.
Check Shore Power Connection
Begin by checking the shore power connection. Ensure the RV is plugged into a working power source. Look for loose or damaged cords and connectors. A poor connection can stop the air conditioner from receiving power. Test the outlet with another device to confirm it works. Replace any faulty cords or adapters.
Reset Circuit Breakers
Locate the RV’s circuit breaker panel. Switch off the breaker for the air conditioner completely. Wait a few seconds, then switch it back on. This resets the breaker and may restore power to the unit. If the breaker trips again immediately, there might be a short or overload. Avoid forcing the breaker on without fixing the cause.
Test Power With Multimeter
Use a multimeter to test the power supply to the air conditioner. Set the meter to measure AC voltage. Carefully check the voltage at the air conditioner’s power terminals. It should match the RV’s rated voltage, usually 120 volts. If no voltage shows, trace the wiring back to find the break or loose connection. Testing confirms if the problem is electrical or within the unit.
Thermostat And Controls
The thermostat and controls play a vital role in your RV air conditioner’s performance. They regulate the temperature and control the unit’s functions. Faulty settings or damaged controls can prevent the air conditioner from working properly. Troubleshooting these parts can help identify common issues and restore comfort in your RV.
Verify Thermostat Settings
Start by checking the thermostat settings. Ensure the temperature is set lower than the current room temperature. Confirm the mode is set to “cool” and not “fan” or “heat.” Replace batteries if the thermostat uses them. A wrong setting or dead batteries often cause cooling failure.
Inspect Control Board
Next, examine the control board for any visible damage. Look for burnt components, loose wires, or corrosion. A damaged control board can stop the air conditioner from turning on or responding to commands. Clean the board gently and tighten any loose connections to improve function.
Reset The Air Conditioner
Resetting the air conditioner can clear minor faults. Turn off the unit and disconnect power for a few minutes. Press the reset button if your model has one. Restore power and turn the unit back on. This simple step often fixes control glitches and restores normal operation.
Airflow Problems
Proper maintenance extends the life of your RV air conditioner. It keeps the unit running efficiently and prevents common problems. Small actions done regularly make a big difference. Follow these simple maintenance tips to avoid breakdowns and costly repairs.
Clean Condenser Coils
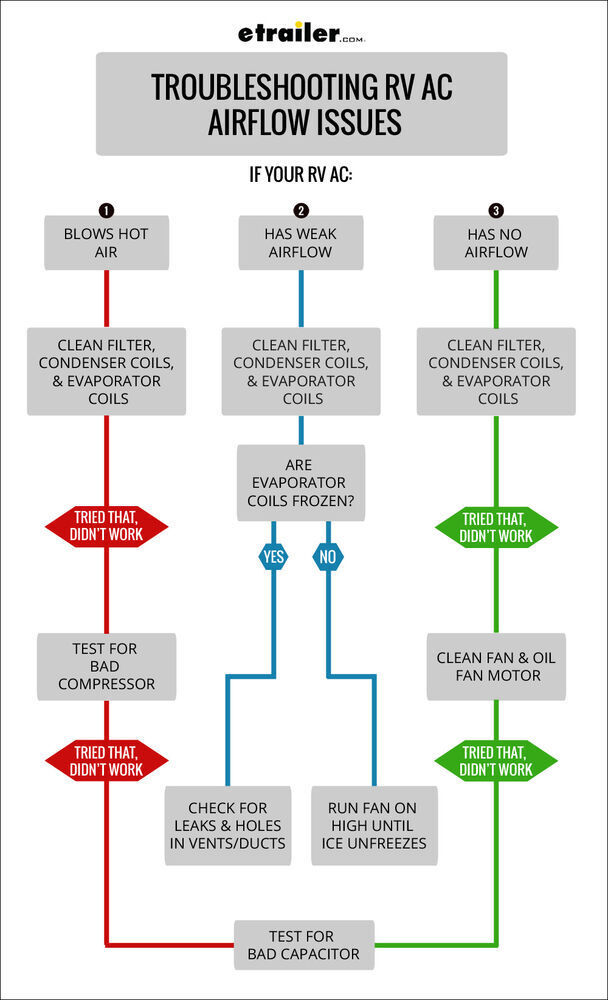
Dirty condenser coils reduce cooling efficiency. Dust and dirt block airflow and cause overheating. Clean the coils at least twice a year. Use a soft brush or a vacuum with a brush attachment. Gently remove all debris without damaging the fins. This helps your air conditioner cool better and use less energy.
Remove Roof Debris
Leaves, twigs, and dirt can gather on the roof unit. This buildup blocks air vents and causes poor airflow. Check the roof regularly, especially after windy days or storms. Clear away all debris to keep air flowing freely. This prevents the unit from working harder than it should.
Regular Filter Care
Filters catch dust and dirt from the air. A clogged filter reduces airflow and strains the system. Clean or replace the filter every month during heavy use. Use warm water and mild soap for washable filters. Dry completely before reinstalling. Clean filters improve air quality and boost cooling power.
Cooling Issues
Advanced troubleshooting for your RV air conditioner digs deeper into electrical and mechanical issues. It helps identify problems beyond simple fixes like checking the thermostat or replacing filters. This section guides you through testing critical electrical components and measuring voltage. You will learn when it is time to call a professional technician to avoid further damage or safety risks.
Test Electrical Components
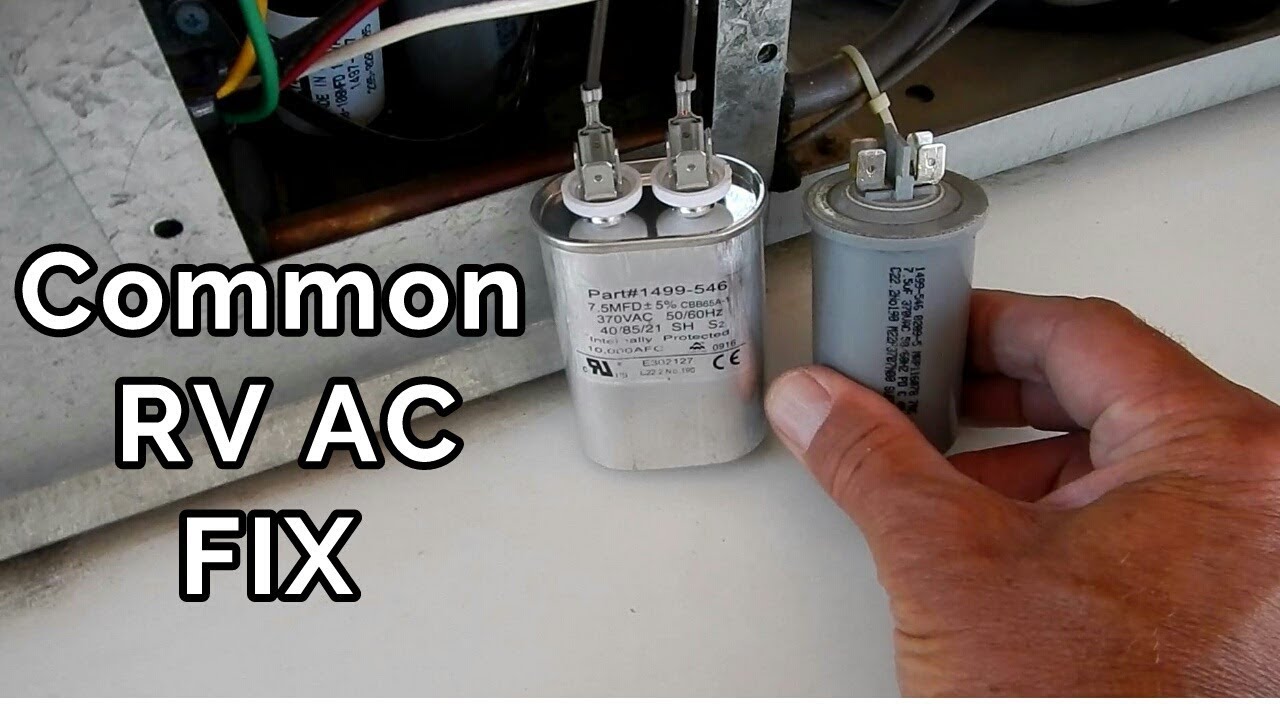
Begin by inspecting the capacitor, which stores energy to start the compressor and fan. Use a multimeter set to capacitance mode to test if it holds charge properly. Check the compressor for continuity and resistance. Examine the fan motor for any signs of wear or failure. Faulty components often cause the air conditioner to stop working or cool poorly.
Check Voltage Levels
Measure the voltage at the air conditioner’s power supply using a multimeter. Ensure the voltage matches the unit’s required input, typically 110-120 volts for RV systems. Low voltage can cause the compressor to overheat and shut down. Check for loose or corroded wiring connections that might reduce power flow. Proper voltage ensures the unit runs efficiently and avoids electrical damage.
When To Call A Technician
Call a technician if you find damaged wiring, burnt components, or inconsistent voltage. Avoid repairing complex electrical parts if you lack experience. Professional help is essential for issues like compressor failure or control board problems. Timely service prevents costly repairs and keeps your RV air conditioner running smoothly.
Frequently Asked Questions
How To Tell If An Rv Ac Compressor Is Bad?
Signs of a bad RV AC compressor include loud humming, no cold air, frequent cycling, or the unit not starting. Check for frozen coils and test the start capacitor to confirm compressor issues.
How Do I Reset My Rv Air Conditioner?
To reset your RV air conditioner, turn off the unit and flip the A/C circuit breaker off and on. Check and clean the air filter. Ensure shore power is connected properly. Wait a few minutes before restarting the unit to complete the reset process.
What Are Common Issues With Rv Ac Units?
Common RV AC issues include power problems, dirty filters, frozen coils, bad capacitors, and blocked condenser coils. Regular cleaning and checking breakers help maintain performance.
Why Is My Rv Ac Blowing Air But Not Cooling?
Your RV AC blows air but doesn’t cool due to dirty filters, frozen coils, a bad capacitor, or blocked condenser coils. Check power, reset breakers, clean filters, and inspect the roof unit to fix these issues.
How Do I Reset My Rv Air Conditioner?
To reset an RV air conditioner, turn off the unit and the circuit breaker. Wait a few minutes, then switch both back on. This can clear minor faults and restore normal function.
Conclusion
Troubleshooting your RV air conditioner can save time and money. Start by checking power sources and breakers. Clean or replace filters regularly for better airflow. Watch for frozen coils or strange noises. Adjust thermostat settings as needed. Small fixes often restore cooling quickly.
Stay calm and follow steps carefully. Your RV will feel cool again soon.