
If your toilet isn’t clearing waste or leaking, you can usually fix common issues by adjusting the water level or clearing the fill valve. Most eco flush toilet troubleshooting involves checking for simple blockages or incorrect water settings that stop the bowl from flushing as it should. If the tank water level is too low, the force of the flush will be weak, leading to recurring clogs and poor performance.
Why your toilet flushes poorly
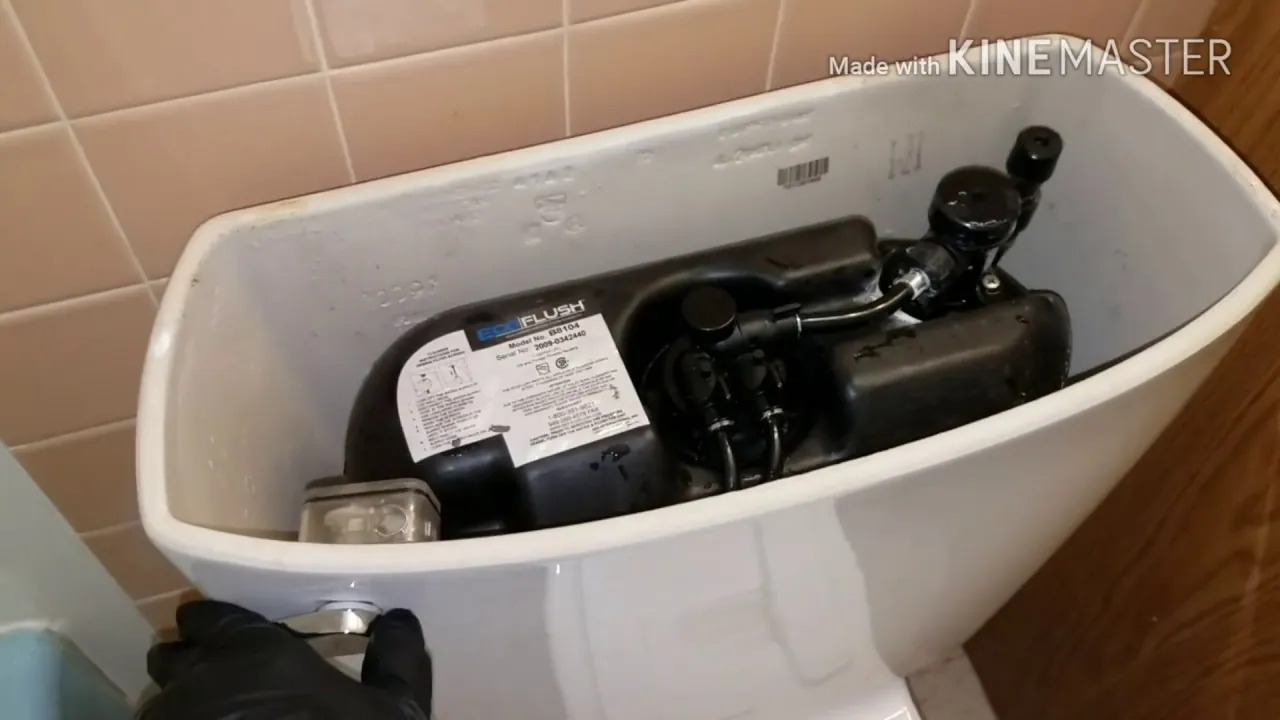
A major cause of weak flushing is an incorrect water level inside the tank. Manufacturers design these systems to work with a specific volume of water, and if the level is even an inch below the fill line, the pressure drops significantly. You can check your toilet’s specific water line requirements by looking for the stamped mark inside the porcelain tank.
Another common issue is a partially blocked trapway or vent. If the small holes under the rim of the bowl—known as jet holes—become clogged with mineral deposits, the water can’t enter the bowl with enough speed to create a siphon. This is especially common in areas with hard water. You should inspect these holes if the water enters the bowl slowly even when the tank is full.
Finally, the flapper or flush seal might be worn out. If the seal doesn’t close tightly, water leaks from the tank into the bowl constantly. This reduces the available water for the next flush and wastes significant amounts of water over time. According to the Environmental Protection Agency, a silent leak can waste thousands of gallons of water annually, which impacts both your utility bill and the toilet’s flushing efficiency.
Adjust the tank water level
If your toilet doesn’t clear waste on the first try, you should first check the water height. The water level must reach the fill line marked on the inside of the tank to provide enough force for a full flush. If the level is too low, locate the adjustment screw or knob on top of the fill valve.
Turn the screw clockwise to raise the float cup, which allows more water into the tank before the valve shuts off. If you have a float ball on a metal arm, gently bend the rod downward so the ball sits higher in the tank. After making these adjustments, wait for the tank to refill completely and then test the flush.
This fix is for users who notice the tank isn’t filling to the indicated mark. If the water level is already at the line but the flush is still weak, the issue is likely a blockage in the rim jets or the trapway. Don’t force the adjustment screw if it feels stuck; instead, check if the fill valve itself is damaged or clogged with debris from the supply line.
If the water level sits more than one inch below the fill line, you’re losing significant flushing pressure. A common mistake is adjusting the screw while the water is running, which can lead to overfilling. Always wait for the tank to stop filling before making further turns. If the valve continues to run after reaching the line, the float is likely waterlogged and needs a full replacement.
Clear the rim jet holes
The rim jets are the small holes located under the edge of the toilet bowl that release water during a flush. Over time, calcium and magnesium from your water supply build up and block these openings, preventing the water from creating the necessary swirl. You can clean these by using a small mirror to look under the rim and a stiff wire or a small brush to dislodge the mineral crust.
Use a piece of thin, flexible copper wire rather than a steel coat hanger. Steel tools often leave microscopic scratches on the porcelain finish.
If you notice the water is still moving slowly after cleaning the visible holes, the blockage might be deeper inside the internal channels of the bowl. This is a common point of failure for older toilets where the internal passageways are narrow.
To test if the blockage is internal, pour a bucket of water directly into the bowl. If the water drains quickly, the issue is strictly the rim jets. If the water remains stagnant, the obstruction is in the trapway or the sewer line.
If you have tried cleaning the jets and the flush remains sluggish, the issue might be a deeper clog in the main waste pipe. This isn’t a task for a standard user, as it requires specialized plumbing tools. If you suspect a main line blockage, call a licensed plumber to prevent accidental damage to your pipes or potential water backup in your home.
Replace the flush valve seal
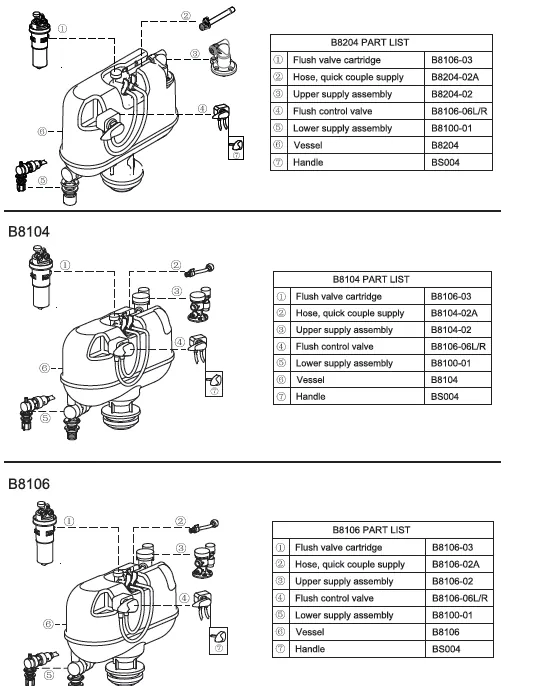
A worn flush valve seal prevents the toilet from holding enough water to create a powerful flush. If you hear a hissing sound or notice the water level in the tank dropping slowly after a flush, the seal is likely failing. To test this, add a few drops of food coloring to the tank and wait 15 minutes; if color appears in the bowl, the seal is leaking and must be replaced.
The seal is a simple rubber gasket found at the bottom of the flush tower. To replace it, you must turn off the water supply at the shut-off valve behind the toilet and flush the tank until it’s empty. Once dry, you can usually twist the flush tower to release it and swap the old gasket for a new one of the exact same size and model.
This process is only for those who are comfortable working with simple hand tools. If the flush valve assembly is old or cracked, replacing just the seal won’t fix the problem. In that case, you’ll need to replace the entire flush valve mechanism, which is a more involved repair that may require professional assistance if you aren’t familiar with plumbing connections.
Common myths about flushing efficiency
Using a brick in the tank to save water is dangerous because it can crumble. These fragments damage the flush valve or clog the trapway, forcing a full toilet replacement. If you need to save water, use a dedicated plastic displacement bag instead.
Adding heavy-duty chemical cleaners to the tank corrodes rubber seals and plastic components. This leads to silent, constant leaks that waste more water than you ever saved. If the water level in the bowl drops on its own, your flapper is likely already failing.
“Flushable” wipes never break down in time to avoid the trapway. They catch on internal parts and cause massive clogs. If you must use them, throw them in the trash.
Using a wire hanger to clear a deep clog scratches the porcelain. These micro-scratches trap waste, making the surface prone to permanent stains and future clogs. Use a plastic-coated toilet auger to protect the bowl’s finish.
Maintain your toilet for long life
| If you’re doing this | Do this instead | Why |
|---|---|---|
| Using thick bleach tablets | Use mild bowl cleaners | Bleach destroys rubber seals |
| Ignoring a running toilet | Replace the flapper seal | It wastes water and pressure |
| Forcing a plunger | Use a toilet auger | Plungers can push debris deeper |
| Scrubbing with steel wool | Use a nylon brush | Steel wool ruins the glaze |
Most homeowners make the costly mistake of dropping chemical pucks into the tank. These tablets dissolve slowly, eating through rubber gaskets and flapper chains within six months. If you notice a faint smell of chlorine or a slight wobble in the handle, check your tank immediately.
A running toilet isn’t just a nuisance; it’s a silent leak that increases your monthly water bill. If the water level fluctuates, replace the flapper first. It’s inexpensive compared to the cost of wasted water and takes five minutes to install.
Finally, distinguish between a simple clog and a structural blockage. If a plunger fails after three firm pumps, stop. Using an auger prevents you from driving debris into the trapway, which is a mistake that often requires a professional plumber to fix.
Frequently asked questions
How long does a toilet flapper usually last?
A high-quality rubber flapper typically lasts three to five years before it begins to warp. Hard water minerals can accelerate this process, causing the rubber to stiffen and leak sooner. You should inspect the flapper during every tank cleaning to ensure it remains soft and seals correctly against the flush valve.
Is it safe to use chemical drain cleaners?
No, you should never use harsh chemical drain cleaners in an eco flush toilet because they can melt plastic parts and damage the ceramic glaze. If a clog is too deep for a standard plunger, always use a plastic-coated toilet auger to prevent scratching the inner porcelain surface.
Why does my toilet make a loud banging sound?
A loud banging sound, often called water hammer, usually happens when the water supply valve shuts off too quickly or the fill valve is failing. It can also be caused by loose water pipes vibrating inside the wall when the toilet stops filling. If you notice this sound, ensure your water supply valve is fully open, as a partially closed valve can increase pressure spikes that cause the pipes to rattle.
How do I know if my toilet is leaking?
You can detect a silent leak by adding a few drops of food coloring to the tank and checking the bowl after 15 minutes. If the water in the bowl changes color, the flush valve seal is leaking and needs to be replaced. This is the most accurate way to verify a leak, as many slow leaks don’t make any audible sound or cause visible water on the floor.
Can I fix a weak flush without tools?
Yes, you can often improve a weak flush by ensuring the tank water level is at the manufacturer’s fill line. If the water level is low, the flush lacks the necessary weight to clear the trapway effectively. You can adjust the float level by hand in most modern toilets to ensure the tank fills to the correct height, which provides the maximum possible flushing force for your specific model.
Conclusion
Proper maintenance of your toilet’s internal components is the best way to ensure consistent performance. By keeping the tank level correct and the rim jets free of mineral buildup, you avoid the most common causes of flushing failure. If you notice recurring issues despite these simple adjustments, it’s wise to consult a plumbing professional to inspect the waste lines for deeper obstructions.
Related guides