
You can fix most issues by checking the power supply or cleaning the print head because reliable dymo labelmanager 160 troubleshooting usually involves simple steps like replacing batteries or clearing stuck tape. The most common cause for a screen that won’t turn on is low battery power or incorrectly installed cells. If your screen is blank, start by removing all batteries and checking the contacts for corrosion.
Troubleshooting your Dymo LabelManager 160
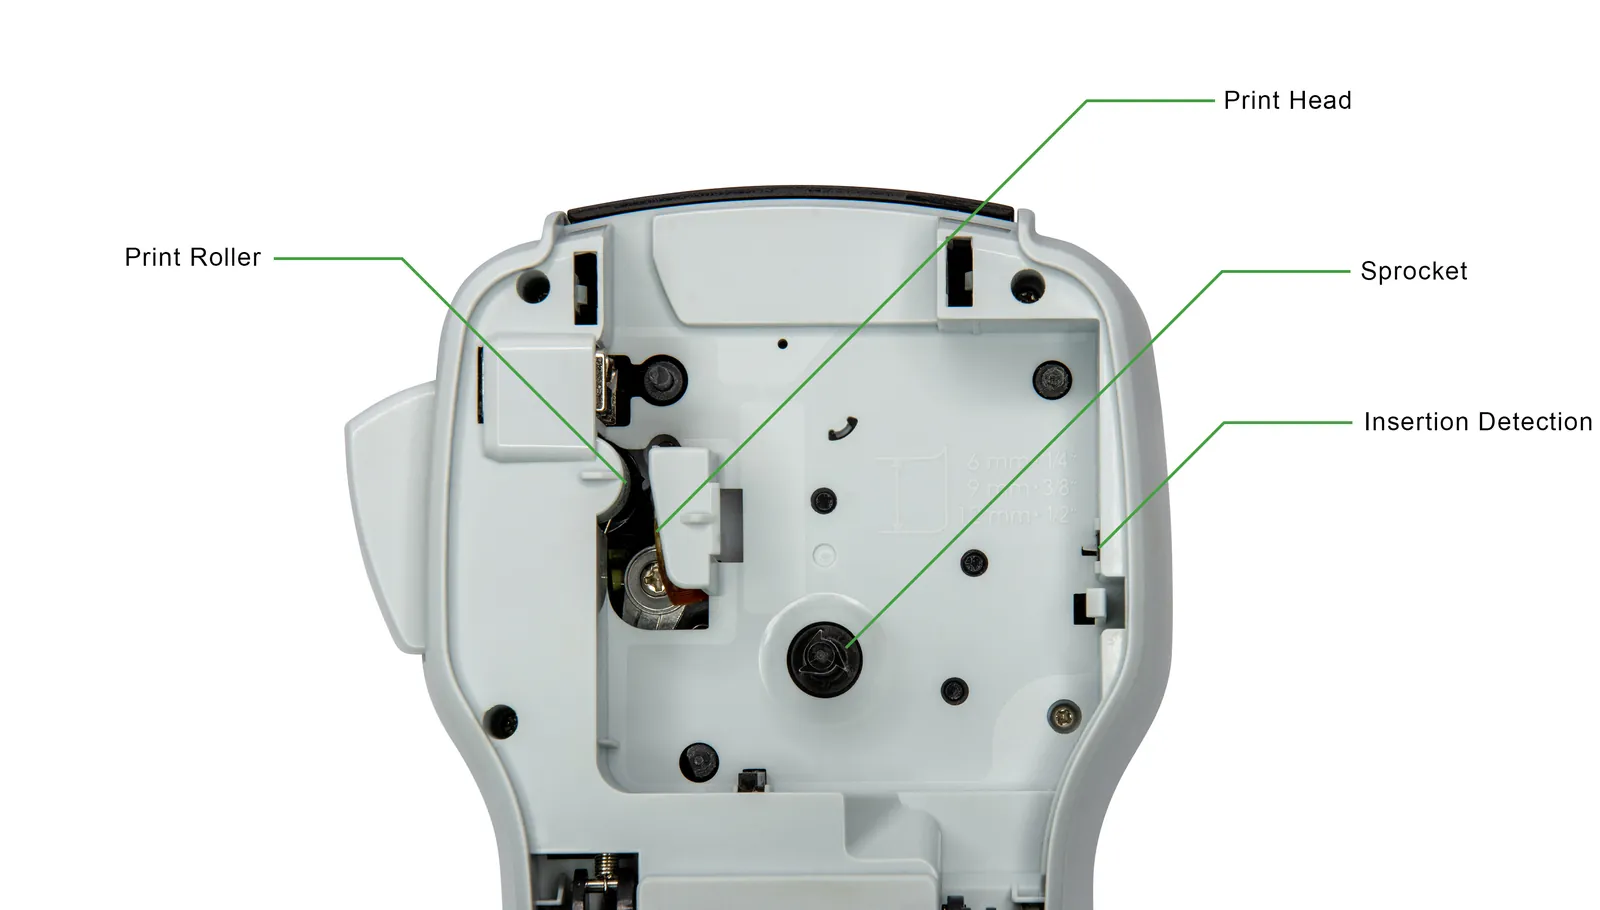
The primary reason for failure in this device is a lack of consistent power. Because the unit relies on six AAA alkaline batteries, any drop in voltage can cause the screen to fade or the motor to stop mid-print. If you notice the display is dimming or the motor sounds weak, the device is signaling that the current energy levels are too low to drive the internal printing mechanism.
Another frequent cause is physical obstruction within the tape compartment. If the tape is caught, bunched, or improperly threaded, the motor will stall to prevent damage to the gears. You can usually identify this by a grinding noise or a message on the screen. If the device makes a clicking sound but doesn’t advance the tape, the internal sensor is likely blocked by a small piece of adhesive debris.
Finally, user error during character entry often mimics a hardware fault. If you press a key and nothing happens, the device may be in a specific mode, such as the symbol or accent menu, which locks the standard keyboard until you press the “Escape” or “Clear” button. Ensure the device is in standard text entry mode before assuming the keyboard is broken.
Replace the batteries and check contacts
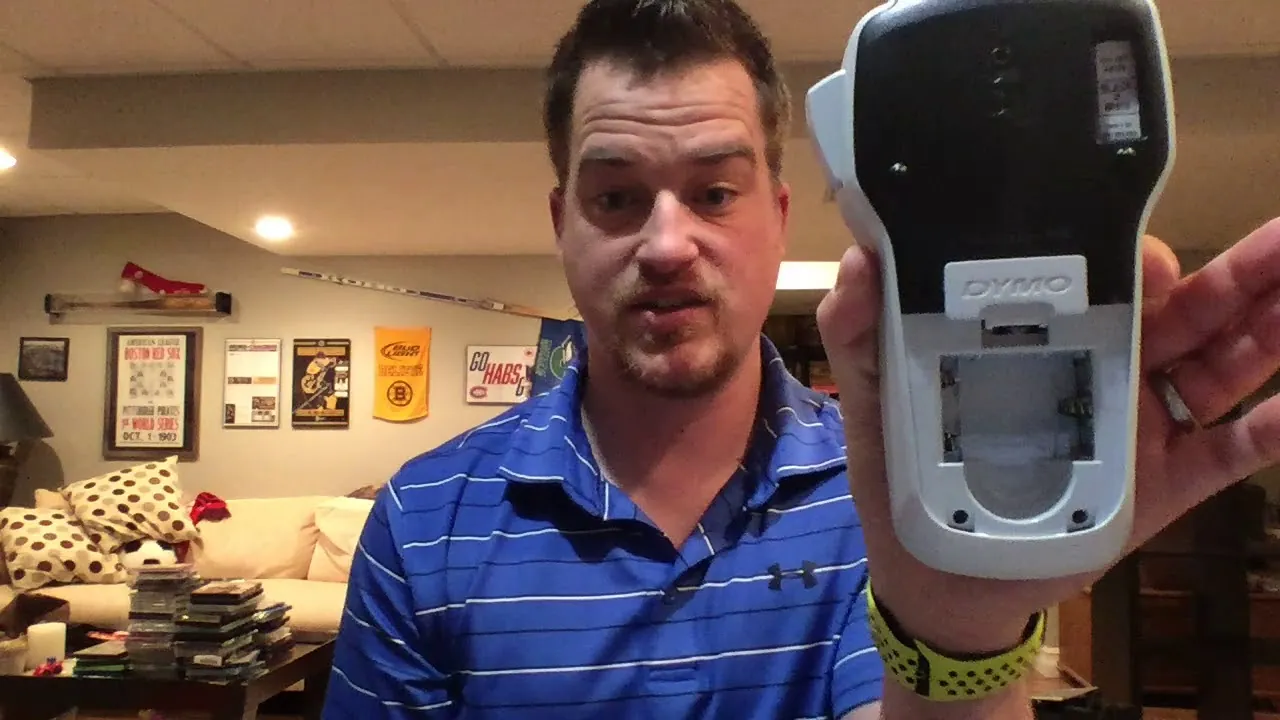
If your unit refuses to power on, the first step is to remove all six AAA batteries. Inspect the metal contact springs inside the battery compartment for any signs of white, powdery residue. If you see buildup, use a dry cotton swab to gently wipe it away. Never use water or liquid cleaners, as moisture will damage the internal circuit board.
Insert six fresh, high-quality alkaline batteries, ensuring the polarities match the diagrams embossed on the plastic casing. If you use rechargeable batteries, ensure they’re fully charged, as the device is designed to operate within the voltage range provided by standard alkaline cells.
After installing new batteries, press the power button once. If the screen flashes but quickly dies, the batteries may be faulty or mismatched in age. Always replace the entire set at once; mixing old and new batteries creates a voltage imbalance that causes the device to shut down during high-power tasks like printing. If the screen remains blank after these steps, the internal power controller may have failed, which is a hardware issue that requires professional repair or unit replacement.
Clear tape jams and clean the print head
When the device displays a “Tape Jam” error or the print appears faint and streaky, you must clear the path. Open the tape compartment cover and remove the label cassette. Look for any loose pieces of tape wrapped around the rubber drive roller or the small thermal print head. Use a pair of plastic tweezers to gently pull away any remnants.
Never use metal tools or sharp objects to scrape the print head, as this will permanently scratch the surface and ruin the print quality. If the print head looks dirty or has a thin layer of adhesive on it, wipe it carefully with a soft, lint-free cloth dampened with a tiny amount of isopropyl alcohol. Allow the area to dry completely for at least two minutes before reinserting the cassette.
Once clean, insert the cassette firmly until you hear a click. Press the “Feed” button to ensure the tape moves smoothly through the exit slot. If the motor still groans or the tape doesn’t advance, the internal gear assembly might be stripped. At this stage, the cost of professional disassembly and repair often exceeds the value of the unit, making a replacement the more practical choice for most home users.
Reset the device settings
If the screen is frozen or the text appears in a strange language, you can perform a soft reset to restore factory defaults. Remove the battery pack and hold down the “Power” button for ten seconds while the batteries are out. This drains the residual charge from the internal capacitors, forcing the software to reboot when you restore power.
After ten seconds, replace the batteries and turn the unit on. This process clears temporary memory errors that often occur if the device was turned off while in the middle of a complex print job.
Many users mistakenly attempt to force the power button while the batteries remain inside. This does nothing to clear the volatile memory, as the internal circuit remains energized. If the screen remains frozen or displays an error code, the firmware might be corrupted.
Check the battery contacts for corrosion before giving up. If you see white or blue oxidation, clean the terminals with a dry cloth. If the device still fails to respond to a hard power reset, the internal logic board has likely failed. Because there’s no user-accessible port for updating the firmware, a device in this state is typically at the end of its functional life.
Avoid common mistakes
Using off-brand tape: Generic labels often have thinner backings that tear easily, causing jams that are difficult to remove without damaging the gears. If a jam occurs, use plastic tweezers rather than metal tools to clear the path, as metal scratches the sensitive print head surface.
Forcing the tape cover: If the cover doesn’t click shut, don’t push hard. This usually means the tape isn’t seated properly or the label is caught. Forcing the latch often snaps the internal plastic hinges, which aren’t sold as replacement parts.
Cleaning with water: Liquid cleaners or damp cloths will cause corrosion on the battery contacts and the thermal print head. Use only 90% isopropyl alcohol on a cotton swab. If you see a white, crusty buildup on the terminals, the device is already compromised.
Leaving batteries inside: If you don’t plan to use the device for more than a month, remove the batteries. Battery acid leaks destroy the motherboard, which is a total loss for the unit.
Printing when low: Attempting to print when batteries are nearly dead causes a “brown out.” This voltage drop occasionally corrupts the saved label memory. If the screen flickers during a print job, stop immediately to save your custom templates.
Stop issues before they start
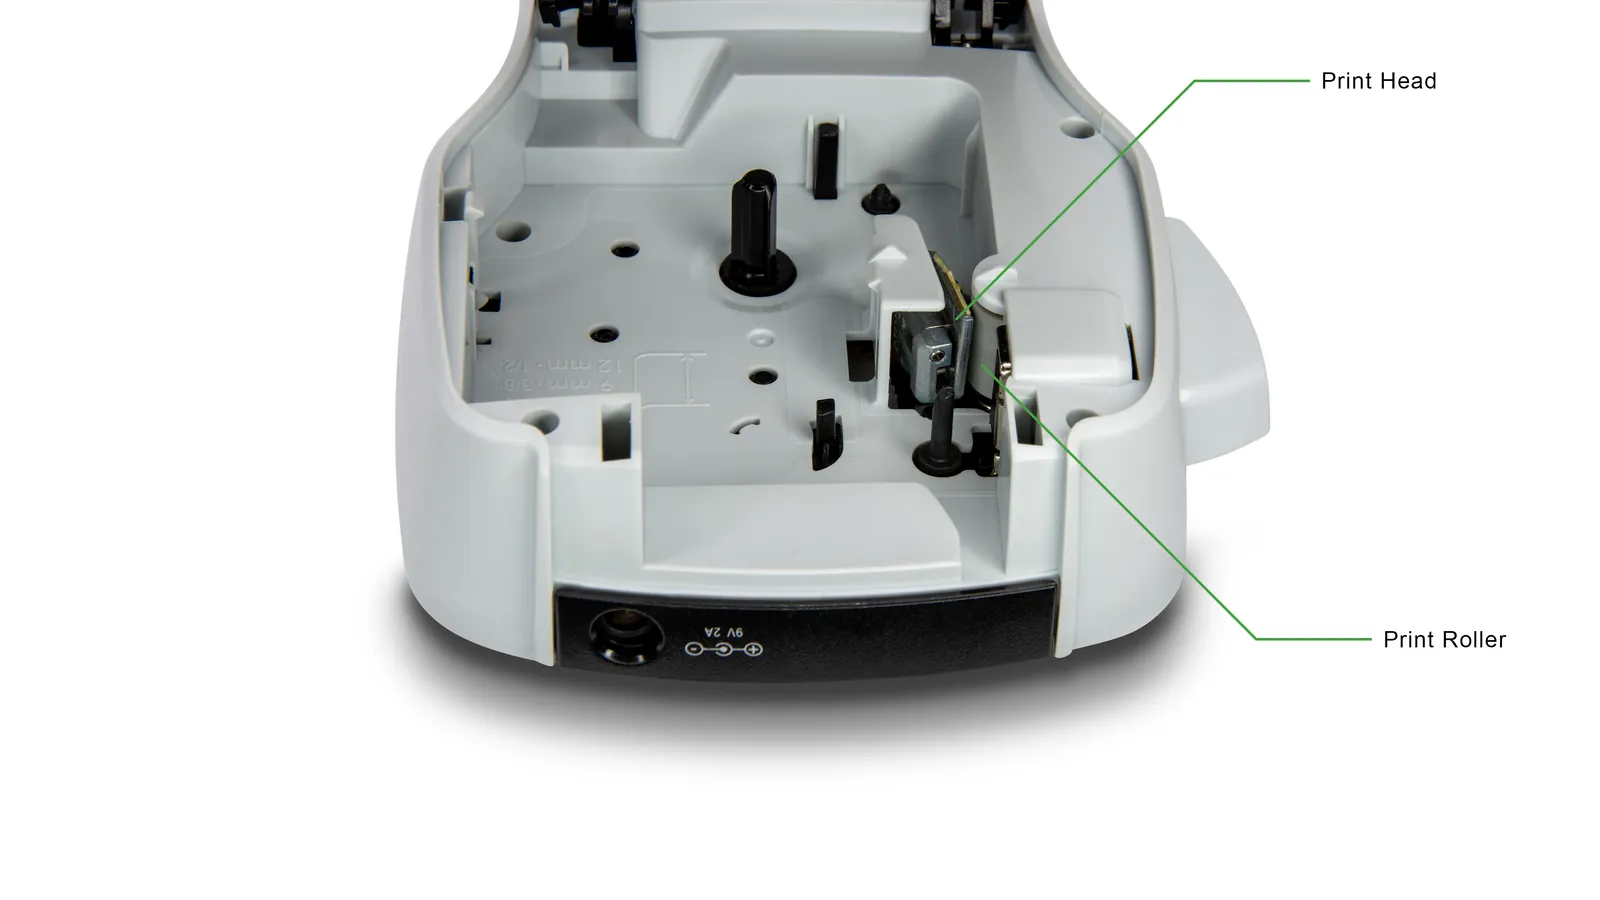
You can keep your label maker running longer by following a simple maintenance schedule. If you use the device daily, wipe the print head once a month; if you use it once a year, clean it only when you notice print quality dropping. Use a specialized cleaning pen or a lint-free swab dipped in 90% isopropyl alcohol to clear away adhesive residue.
| If you’re doing this | Do this instead | Why |
|---|---|---|
| Leaving batteries in | Remove them after use | Prevents leaks and terminal corrosion |
| Forcing the cassette | Align it gently | Avoids damaging the delicate plastic alignment pins |
| Printing long labels | Print in short bursts | Reduces strain on the motor and battery life |
Most users make the mistake of waiting for a total failure before cleaning. This neglect often leads to permanent ghosting on your labels. If your output shows vertical white lines, the print head is likely obstructed by debris. Stop immediately and clean the surface. If the lines persist after two cleanings, the heating element has likely burned out and requires a replacement part.
Frequently asked questions
Can I use a power adapter?
Yes, you can use an external power adapter if it matches the voltage and polarity requirements on the device label. Using an incorrect adapter will fry the internal circuit board, which isn’t covered by the warranty. Only use adapters officially recommended by the manufacturer to ensure stable power.
How long do the batteries last?
A fresh set of six high-quality alkaline AAA batteries will generally last for 500 to 800 standard labels. If the device shuts off during a print, the batteries are likely exhausted.
Why is my label blank?
A blank label usually means the tape cassette is installed upside down or the print head isn’t making contact. Ensure the tape is threaded through the guides with the ink side facing the print head. If the tape is positioned correctly and remains blank, the thermal element may be burnt out.
Is it safe to open the case?
No, it isn’t safe to open the housing because it exposes delicate components and voids your warranty. If you can’t solve your problem using the battery reset or cleaning the tape path, the device requires professional service. Don’t attempt to modify internal boards, as this poses electrical risks.
What happens if I drop it?
Dropping the unit often dislodges the internal gear assembly or cracks the LCD screen. If the screen shows garbled text, the ribbon cable connecting the display to the motherboard has likely been shaken loose. A device that has suffered significant impact damage is rarely cost-effective to repair professionally.
How do I clear a jam?
Open the tape compartment and gently remove the cassette to inspect the rollers for stuck material. Use plastic tweezers to pull out any jammed labels, being careful not to touch the metal heating element. If the tape is deeply tangled in the motor gears, the unit likely needs replacement.
Conclusion
If your device still isn’t working properly after these checks, don’t worry. It’s a good idea to reach out to the manufacturer’s support team for further help. They’ll be happy to assist you with a replacement or repair if your unit’s still under warranty. You’ll be back to organizing soon!