When your home heating or cooling system stops responding to the thermostat, the culprit is often found in the zone valve assembly. If you’re currently performing erie pop top actuator troubleshooting, you’re likely dealing with a motorized head that has failed to open or close the valve properly, leaving a room either freezing or sweltering. These units are designed to be user-serviceable, allowing homeowners to swap out the motor or the entire power head without needing to break the plumbing connections or drain the system.
Key Takeaways
- Confirm power is reaching the actuator terminals before assuming the motor has failed.
- The “pop top” design allows for tool-less removal by pressing the release tab.
- Manual operation is possible by moving the lever to the “manual” position.
- Replacement actuators are specific to the voltage, typically 24V for residential systems.
- Check for debris or physical obstructions in the valve body if the stem is stuck.
Safety: Inside a mains-powered machine, the parts behind the outer cover can hold a dangerous electrical charge even after it has been unplugged — that’s why they sit behind a cover. Opening the housing, or testing or replacing anything behind it, is a job for a qualified technician, never a home repair.
Understanding the Pop Top Mechanism
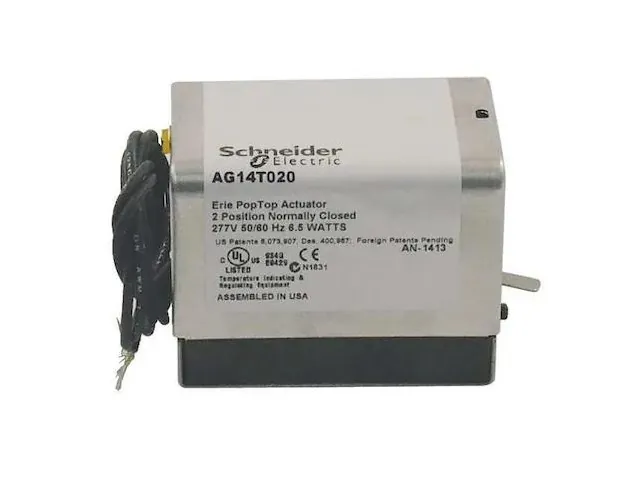
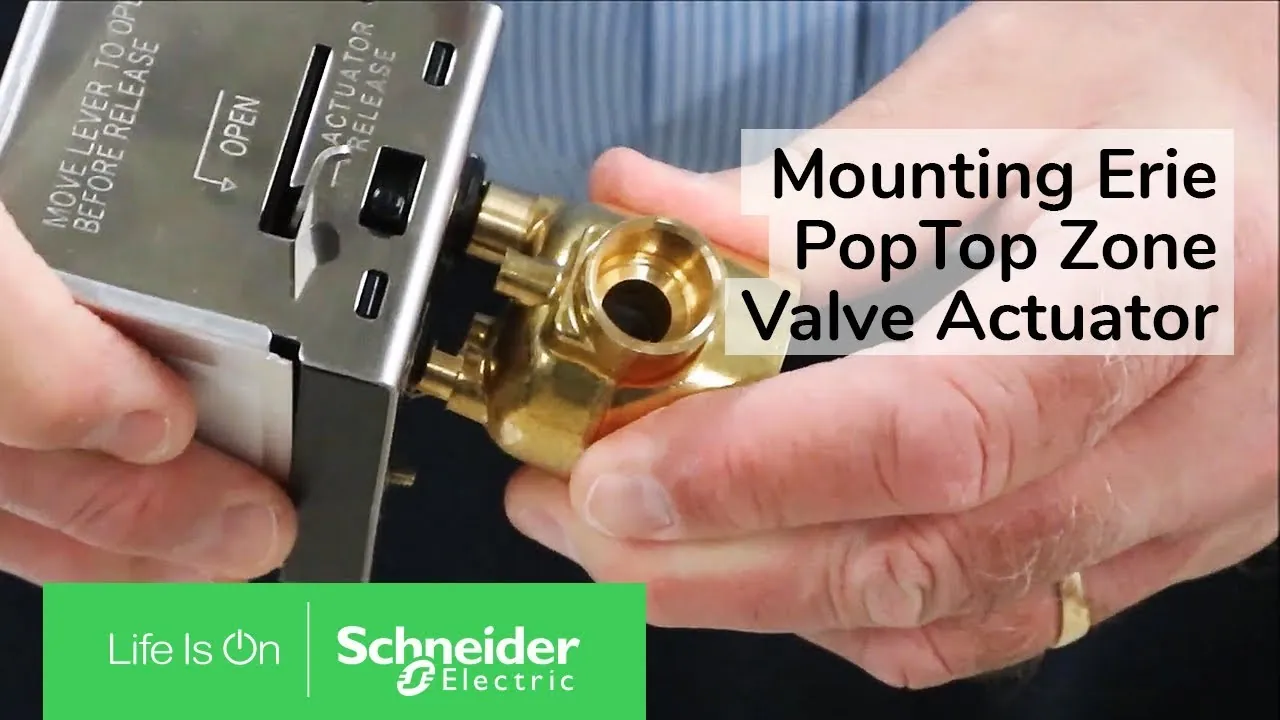
The Erie “pop top” series refers to the modular design of the zone valve actuator. Unlike older, hard-piped valves, these actuators are held in place by a simple clip or locking mechanism that allows the electrical head to be detached from the brass valve body.
The motorized head houses the gear train and the motor that physically depresses the valve stem to regulate water flow. When the thermostat calls for heat, the motor rotates, pushing the stem down against a spring return mechanism.
The Role of the Valve Stem
The valve stem is the mechanical interface between the electrical actuator and the hydronic system. If the valve stem doesn’t move freely when the actuator is removed, the issue isn’t electrical; it’s mechanical. You can test this by pressing down on the stem with a tool; it should spring back up readily. If it feels gritty or resists movement, the valve body may have mineral buildup or a damaged internal seal, which often requires a full valve body replacement.
Troubleshooting Your Erie Pop Top Actuator
| Test Step | Expected Result | Potential Issue |
|---|---|---|
| Measure 24V at Terminals | 24-28 Volts AC | Faulty actuator motor |
| Manual Lever Engagement | Valve opens fully | Broken internal gears |
| Inspect Wire Connections | Solid, non-corroded | Loose wiring or break |
| Check Continuity | Closed circuit path | Burnt-out internal coil |
Is the Motor Receiving Power?
If you have confirmed that the thermostat is sending a signal, the next step in erie pop top actuator troubleshooting is to inspect the wire connections at the base of the actuator. Over time, vibration or oxidation can cause these connections to loosen.
Ensure that the wire nuts are tight and that no stray copper strands are creating a short circuit. If you have a solid connection and proper voltage but the motor doesn’t engage, the internal motor assembly is likely burnt out.
Warning: Always turn off the power to the boiler or the zone valve transformer at the breaker panel before touching any exposed wiring to prevent electrical shock.
Common Signs of Mechanical Failure
Beyond electrical issues, mechanical wear is a frequent cause of system failure. The internal gears inside the pop top head are made of plastic or nylon, which can strip over years of frequent cycling. If you hear a grinding or clicking noise coming from the actuator, the gear train is likely damaged.
- Grinding noises during operation.
- Actuator gets stuck halfway through rotation.
- Manual lever feels loose or disconnected.
- Water leaks around the valve stem base.
Manual Operation and Overrides
Most Erie pop top models feature a manual override lever. This is a critical feature for emergency situations. By sliding the lever to the “manual” position, you can force the valve into the open position. This is an excellent way to determine if the heating loop is working independently of the actuator.
If the room warms up with the lever in the manual position, you have confirmed that the boiler and piping are functioning correctly, narrowing the fault down entirely to the electrical actuator.
Comparing Replacement Options
When the actuator is beyond repair, you’ll need to source a replacement. You must match the voltage, the wiring configuration (2-wire vs. 4-wire), and the connection type (normally open vs. normally closed).
| Feature | Low-End Option | High-End Option |
|---|---|---|
| Replacement Cost | $65 – $85 | $110 – $145 |
| Installation Time | 10 – 20 minutes | 15 – 30 minutes |
| Expected Lifespan | 5 – 7 years | 10 – 15 years |
| Compatibility | Universal 24V | Specific OEM Match |
Step-by-Step Replacement Guide
If you have determined that the actuator is broken, follow these steps to replace it. First, remove the power from the system. Depress the release button on the side of the housing and lift the actuator head off the valve body.
Disconnect the wires from your control board or thermostat leads. Install the new actuator by aligning the shaft and pressing it onto the valve body until the locking tab clicks into place. Reconnect the wires, restore power, and set your thermostat to test the operation.
Pro Tip: Take a photo of the wiring configuration before disconnecting any wires to ensure you reconnect the new unit exactly as the previous one was set up.
Why Does the Valve Stick?
Sometimes the actuator works perfectly, but the valve stem remains stuck. This is common in older systems where the water quality has caused lime scale or corrosion to build up inside the brass body.
If the stem is stuck in the “down” position, your heat won’t flow even if the actuator is trying to open it. You can try to gently work the stem up and down with pliers, but if it remains stubborn, you may need to replace the entire valve body assembly.
Is the End Switch Faulty?
Many Erie actuators include an end switch that tells the boiler to fire once the valve is fully open. If your valve opens, but the boiler never kicks on, the end switch may be the culprit. You can test this by checking for continuity across the end switch terminals when the valve is in the open position. If there’s no continuity, the end switch is faulty and needs replacement.
Identifying Your Specific Model
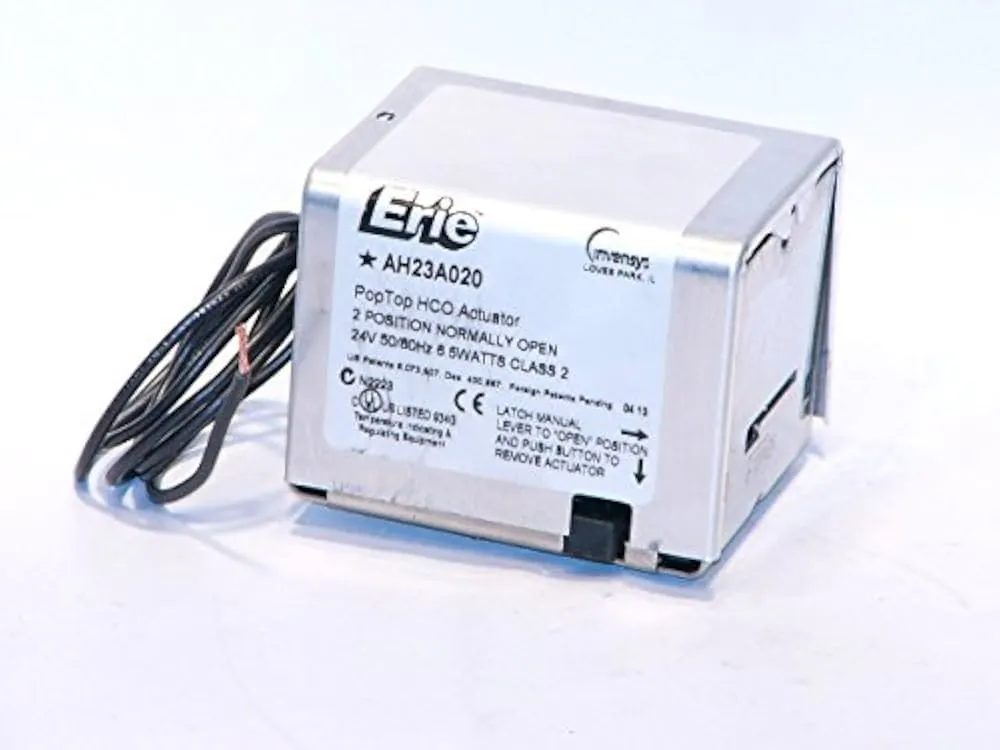
Not all pop tops are identical. Look for the label on the side of the actuator housing. It will list the model number, the voltage, and the timing specifications. Using the correct model is vital for ensuring the actuator interacts properly with your specific zone controller. Using an incompatible model can lead to premature failure of the motor or the control board.
Troubleshooting Power Supply Issues
Maintenance to Prevent Future Failures
To extend the life of your actuators, perform an annual inspection before the heating season begins. Cycle each valve manually to ensure the stem moves freely. Check for any signs of moisture around the base of the actuator, which could indicate a leaking O-ring on the valve stem. Keeping the area around the zone valves clean and dry will also help prevent corrosion on the electrical terminals.
Frequently Asked Questions
Why is my zone valve hot to the touch?
It’s normal for an Erie actuator to feel warm during operation because the motor is energized to hold the valve in the open position. However, if the unit is extremely hot or smells like burning plastic, remove power immediately. This indicates an internal short or a motor that’s stalled and drawing excessive current, which requires an immediate replacement of the actuator head.
Can I replace just the motor inside?
While the motor is technically a replaceable component, it’s rarely cost-effective or practical for the average homeowner. The gear train and housing are usually sold as a single, sealed unit. Attempting to disassemble the plastic casing often leads to broken tabs or misaligned gears. Replacing the entire “pop top” head is the industry-standard method for a reliable and quick repair.
What does the “End Switch” actually do?
The end switch is a safety feature that acts as a gatekeeper for your boiler. It prevents the boiler from firing if the zone valve hasn’t successfully opened. Without this signal, the boiler would fire into a closed loop, which could cause pressure buildup. Once the valve reaches the fully open position, the end switch closes the circuit and tells the boiler to provide heat.
How do I know if it is 2-wire or 4-wire?
Look at the wiring coming out of the actuator. A 2-wire actuator only provides power to the motor. A 4-wire actuator includes two wires for the motor and two additional wires for the end switch. You must replace your unit with the exact same wiring configuration to ensure your boiler receives the proper signal to start when the valve opens.
Should I drain the system to replace the head?
No, the beauty of the pop top design is that the electrical head is separate from the fluid-carrying valve body. You don’t need to drain the pipes or shut off the water to replace the actuator. Simply turn off the electrical power, detach the head, and swap it for a new one. This makes the repair process clean, fast, and suitable for a DIY project.
Conclusion
If your system still fails to heat after you have verified that the actuator is functioning and the wiring is secure, the next logical step is to check your zone control board for blown fuses or tripped breakers. Consult your boiler’s manual or contact a licensed HVAC technician to inspect the control board for internal damage, as this is often the final point of failure in complex hydronic heating networks.