To fix audio drops or connection issues, you should perform galaxy buds troubleshooting by resetting the earbuds through the official Galaxy Wearable app. The most common cause for these problems is a buildup of earwax or debris on the speaker mesh, which blocks sound output and affects the proximity sensors. If your earbuds aren’t charging or pairing, start by cleaning the contacts with a dry cotton swab and ensuring the case has enough battery.
Why your Galaxy Buds have connection issues
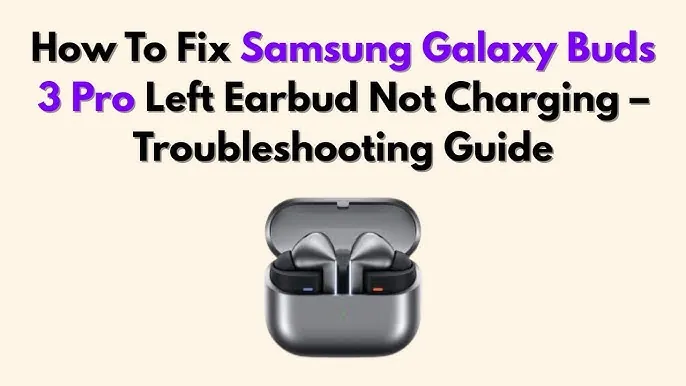
When your wireless earbuds fail to function, it’s usually because of a software sync error or a physical obstruction. The proximity sensors rely on a clear line of sight to detect when you’re wearing the buds.
If these sensors are dirty or covered by an ill-fitting ear tip, the audio will cut out intermittently. This is a common issue that mimics a hardware failure but is actually just a maintenance oversight. Use a dry cotton swab to gently clear debris from the sensor window.
Another frequent cause is interference from other Bluetooth devices in your immediate area. Bluetooth signals operate on a crowded 2.4GHz frequency. Having multiple active connections nearby can cause the signal to drop or stutter. If you notice the audio breaking up, try moving away from routers, microwaves, or other active wireless devices to see if the connection stabilizes.
A common mistake is leaving your phone in a bag or pocket with heavy metallic objects. Metal acts as a shield, blocking the signal path between your device and the buds. If your audio cuts out only when your phone is in a specific pocket, move the device to a more exposed location.
Finally, outdated firmware can lead to unexpected behavior. Samsung frequently releases updates to improve stability and fix known bugs in the communication between the buds and your phone. If you haven’t updated your software in a long time, the earbuds may struggle to maintain a stable handshake with newer operating systems. If the device disconnects during a call but works fine for music, the issue is likely a firmware mismatch rather than a hardware defect.
Reset your connection via the app
If your earbuds are paired but sound erratic, you should perform a full reset to clear the internal cache. Open the Galaxy Wearable app on your connected device and tap on the Earbuds settings menu. Look for the “Reset” option located at the bottom of the list. This action will erase all custom touch controls and restore the device to its factory state, which often fixes deep software glitches.
Before you reset, ensure that both earbuds are inside the charging case with the lid open. If you only have one earbud in the case, the reset process won’t initialize correctly. After the reset finishes, you must go into your phone’s Bluetooth settings, “forget” the device, and then perform the initial pairing process again as if the product were brand new.
This step is for users who have tried basic volume adjustments and still experience uneven sound. If the reset doesn’t resolve the imbalance, you should inspect the metal mesh for blockages. Use a soft, dry brush to gently remove any debris. Never use liquid cleaners or sharp metal tools, as these can puncture the delicate speaker membrane. If you see visible damage to the mesh or internal components, stop using the device and contact an authorized repair service.
Clean the charging contacts and case
Charging failures are often caused by oxidized metal on the charging pins inside the case. Over time, skin oils and dust create a thin layer of grime that prevents the electrical current from reaching the battery. Use a clean, dry cotton swab to wipe down the gold-colored pins inside the case and the corresponding metal points on the bottom of the earbuds.
If the earbuds are still not charging, check the interior of the case for small debris like lint or paper fragments. Even a tiny piece of material can prevent the magnetic connection from pulling the earbud into the correct position. If the light on the case doesn’t blink when you insert the buds, try plugging the case into a different wall outlet or using a different USB-C cable to rule out a power source issue.
This fix is ideal for users who notice one earbud charging while the other remains dead. If you have cleaned the contacts and tested a different cable, but the LED indicator still shows no life, the internal battery of the earbud may have reached the end of its cycle. If the device is still under warranty, contact the manufacturer to discuss a replacement, as opening the plastic housing will void your coverage and risk internal damage.
Update the device firmware
When your earbuds experience persistent connectivity drops, you should check for a firmware update. Open the Galaxy Wearable app and select “Earbuds software update.” If an update is available, keep the earbuds in the case with the lid open and ensure your phone has at least 50% battery life. Don’t close the lid or move more than a few feet away until the progress bar reaches 100%.
This process is for users whose earbuds are otherwise clean and fully charged but still struggle to stay synced. If the app shows that your firmware is already up to date, you may need to uninstall and reinstall the Galaxy Wearable app entirely. Removing the app clears old configuration files that might be causing conflicts with your specific phone model.
Be aware that firmware updates can sometimes take up to 10 minutes to complete. If the update fails, move to a different room to ensure you aren’t experiencing signal interference during the transfer.
The most common mistake is interrupting the transfer by switching apps or locking your phone screen. This often results in a “corrupted update” error. If you see this, keep the app in the foreground and disable your phone’s auto-lock feature until the process finishes.
If the update repeatedly fails even after a fresh app installation, it may indicate a hardware fault in the Bluetooth antenna. At this point, you should reach out to an official support center rather than attempting further software adjustments. If your device is under warranty, prioritize this step immediately to avoid paying for out-of-pocket repairs.
Avoid harmful maintenance habits
Using liquid cleaners: Never use alcohol, soap, or water on the speaker mesh. Moisture seeps through the acoustic fabric in seconds, permanently destroying the driver and voiding your warranty. If you see buildup, use only a dry, soft-bristled brush to gently sweep the surface.
Inserting sharp objects: Don’t use needles or pins to clear debris. You’ll likely push the blockage deeper into the mesh or tear the delicate protective fabric. If debris remains stuck, use a piece of blue painter’s tape to lift it out safely.
Forcing the case shut: If the buds don’t sit flat, don’t press the lid down hard. This often snaps the hinge or bends the internal charging pins. Instead, check for earwax buildup in the charging port. If the pins are clean and the buds still protrude, stop forcing them to avoid permanent housing damage.
Ignoring heat warnings: If your case feels hot while charging, stop immediately. This indicates a battery fault that can’t be fixed by the user. Continuing to charge creates a fire risk.
Maintain your device for better performance
| If you’re doing this | Do this instead | Why |
|---|---|---|
| Wiping with a wet cloth | Wipe with a dry, soft brush | Moisture ruins internal electronics |
| Charging with a damaged cable | Use a high-quality, certified USB-C cable | Poor cables cause unstable power flow |
| Storing in a pocket | Store in the provided charging case | This protects against dust and loss |
| Turning volume to max | Use the app to balance levels | Max volume can cause driver distortion |
Most users mistake a damp cloth for a safe cleaner, but even a single drop entering the charging port triggers irreversible corrosion. If you see debris inside the mesh, use a soft-bristled brush to sweep it out rather than blowing air, which pushes particles deeper into the drivers.
When buying replacement cables, look for the “USB-IF” certification logo on the packaging. Generic cords often lack the necessary voltage regulators, leading to battery swelling over time. If your device feels excessively hot while charging, unplug it and allow it to cool.
Finally, avoid keeping your device loose in a bag. Friction from keys or coins scratches the casing and clogs the internal microphones. If you must carry it daily, use a dedicated, hard-shell case to prevent pressure damage to the delicate internal components.
Frequently asked questions
How long does a full reset take?
A full reset takes about 30 seconds after you initiate the command in the app. You must keep the earbuds in the open case during this time to ensure the command reaches both sides. If the app hangs on the reset screen for more than two minutes, close and reopen it to try again.
Is it safe to use compressed air?
No, you should never use compressed air on your earbuds. The high pressure can force dust and earwax deeper into the speaker housing, causing permanent damage to the drivers. It can also dislodge the internal components or tear the protective mesh. Stick to gentle brushing with a soft, dry toothbrush to keep the mesh clear and the audio quality crisp.
What happens if I lose one earbud?
If you lose one earbud, you can’t simply pair a random replacement to your existing case. You’ll need to purchase a replacement bud and go through a specific synchronization process to pair the new unit with your original one. This usually requires a visit to a service center, as the internal security keys must be matched by a technician to ensure the two buds function as a single pair.
Can I fix a broken charging case?
No, you can’t fix a broken charging case yourself because the electronics are sealed at the factory. If the case fails to hold a charge or no longer recognizes your earbuds, it usually points to a failed battery or a broken internal sensor. Attempting to pry the case open will likely break the plastic tabs, and there are no user-replaceable parts inside for a home repair.
Why do my earbuds keep disconnecting?
Your earbuds likely keep disconnecting because of signal congestion from other nearby Bluetooth devices or a low battery state. If you’re in a crowded area like a subway or an office, interference is common. Try turning off Bluetooth on other nearby devices to see if the connection improves. If the problem persists in every location, the issue is likely a software conflict that requires a factory reset.
Conclusion
If these simple fixes don’t restore your audio, don’t worry. You can reach out to Samsung’s support team through their website to check if your device is still under warranty. They’ll help you determine if it’s time for a professional repair or a replacement so you can get back to your music.