You can solve most issues with your machine by performing simple gbc laminator troubleshooting steps like checking the temperature setting and ensuring the pouch isn’t jammed. When the device stops working, the most common cause is a pouch misfeed or a temperature mismatch between the setting and the pouch thickness. If the machine feels hot or smells like burning plastic, turn it off immediately and unplug it from the wall.
Common reasons for laminator failure
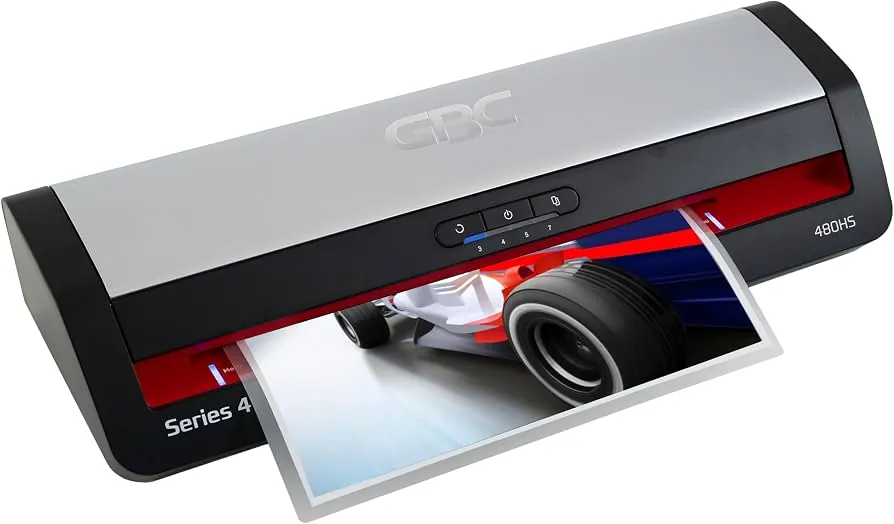
Most problems occur because the internal rollers are dirty or the plastic pouch isn’t aligned correctly during entry. Laminators use heated rollers to melt the adhesive inside the pouch; if these rollers get bits of adhesive on them, the pouch will stick or wrap around the mechanism. This buildup creates a cycle where the machine can’t pull the paper through evenly, leading to jams or wrinkled results.
Another frequent cause is using the wrong heat setting for your specific pouch thickness. Laminators are rated by mil thickness, such as 3 mil or 5 mil pouches. If you set the machine to a lower temperature than the pouch requires, the adhesive won’t melt fully, resulting in cloudy or loose lamination. Conversely, setting the heat too high can cause the plastic to melt into the rollers or warp the document inside.
Finally, some failures are due to the age of the heating element or a faulty thermostat. If your machine doesn’t heat up at all, the internal circuit may have tripped or the heating element has reached the end of its functional life. You can check your GBC product support page to see if your specific model has a reset button or needs a professional inspection for internal electrical faults.
Clear a jammed pouch safely
If your document is stuck, you must never force it out by pulling on the visible end. Pulling can damage the internal gears or cause the rollers to shift out of alignment, which is often a permanent mechanical failure. Instead, use the reverse button found on many models to back the document out gently. If your model lacks a reverse button, turn the power off and look for a release lever on the back or side of the unit.
This release lever separates the rollers, allowing you to slide the pouch out without resistance. Once the pouch is free, inspect the rollers for any leftover plastic or adhesive residue.
If you see debris, wait for the unit to cool down completely before wiping the rollers with a soft, lint-free cloth dampened with a tiny amount of isopropyl alcohol. Don’t use sharp tools or metal scrapers, as these will scratch the roller surface and ruin the machine for all future use.
This fix is for users who have a physical jam. It isn’t for internal electrical repairs or units that show signs of smoke or sparking. If you smell burning electronics or see melted plastic flowing from the casing, unplug the device and stop using it. These symptoms indicate a failure in the thermal safety components, which requires a qualified technician to repair safely.
Adjust heat settings for pouch thickness
Correct temperature management is the secret to clear, professional lamination. Most machines have a switch or dial that corresponds to the mil thickness of the pouch you’re using. If you’re using a 3 mil pouch, set the machine to the 3 mil setting; if you switch to a 5 mil pouch, you must increase the heat to ensure full adhesion. If the output is wavy or cloudy, the temperature is likely too low for the thickness of the plastic.
If you’re laminating thick cardstock or photos, allow the machine to warm up for the full time stated in your manual, usually between 3 to 10 minutes. Inserting items before the “ready” light turns on often results in poor sealing at the edges of the document. If you notice the edges are peeling after it cools, run the document through the machine a second time, but only after ensuring the heat setting is correct for the pouch type.
This adjustment is simple for most users, but remember that ambient room temperature can affect how long it takes to reach the target heat. If your room is very cold, it may take an extra minute or two for the rollers to stabilize. If the machine continues to produce loose seals even at the highest setting, the internal thermostat may be failing to calibrate correctly to the environment.
Clean the heating rollers thoroughly
Accumulated adhesive is the primary enemy of smooth lamination. Over time, small amounts of glue transfer from the pouches to the rollers, creating a sticky surface that catches subsequent documents. If you notice streaks or spots on your finished projects, it’s time for a deep cleaning. Always perform this when the machine is cool and unplugged, as cleaning hot rollers can cause burns and damage the cleaning cloth.
Use a carrier sheet, which is a heavy paper envelope designed for laminators, to help pick up loose debris. Feed the empty carrier sheet through the machine several times while it’s hot. The heat will soften the stuck adhesive, and the carrier sheet will act like a sponge to pull the residue off the rollers. If this doesn’t solve the problem, you may need to use a dedicated cleaning sheet provided by the manufacturer.
This cleaning method is safe for most standard office laminators. If your machine has a complex internal feed system, avoid inserting anything other than the manufacturer-recommended cleaning sheets. If you find that the rollers are physically damaged or have deep grooves, cleaning won’t fix the issue, and the rollers will need a professional replacement.
Avoid common mistakes
Forcing a jam: Never pull on a stuck pouch. Yanking the plastic snaps the internal gear teeth, which renders the machine permanently irreparable. If a jam occurs, immediately power down the unit and use the “reverse” function to back the document out slowly.
Using thin paper: Avoid laminating items thinner than 80 microns. These fragile sheets often fold or wrap around the heated rollers, creating a catastrophic jam that requires professional disassembly. If you must process thin paper, place it inside a rigid cardstock carrier first.
Skipping the warm-up: Always wait for the “ready” light. Starting too early results in a weak bond that will peel apart within days.
Using damaged pouches: Never use a pouch that’s already creased or bent. These imperfections catch on the internal rollers, causing the plastic to melt onto the mechanism and ruining future projects.
Prevent future laminating issues
If you’re doing this, stop and do this instead to keep your machine in top condition.
| If you’re doing this | Do this instead | Why |
|---|---|---|
| Feeding pouches sideways | Feed the sealed edge first | Prevents air pockets and jams |
| Laminating multiple items | Use a larger pouch | Keeps items from shifting inside |
| Turning it off immediately | Let it cool for 15 minutes | Prevents heat damage to rollers |
| Using cheap thin pouches | Use high-quality thick ones | Reduces risk of internal melting |
Most users make the mistake of forcing a jammed pouch out by pulling it manually. This ruins the internal rollers, which are often made of soft silicone. If a jam occurs, use the reverse button immediately. If your machine lacks one, turn the power off and use the release lever located on the side or back of the unit.
You can tell if your heat setting is too high by looking for wavy, distorted edges on the finished product. If you see these ripples, drop your temperature by one setting. Conversely, cloudy patches indicate the machine is too cold. Always wait for the “ready” light to illuminate before feeding, as premature use causes uneven sealing and trapped moisture.
Frequently asked questions
How long does a laminator take to warm up?
Most standard laminators take 3 to 10 minutes to reach the correct operating temperature. Always wait for the “ready” light before inserting any document. If the room is cold, it may take an additional 2 minutes for the heating element to stabilize.
Can I laminate items smaller than the pouch?
Yes, you can laminate smaller items, but you must trim the pouch down before laminating. If you feed a large, empty pouch into the machine, the exposed adhesive will stick to the rollers and cause a jam. Always trim the pouch so it’s slightly larger than your document.
Why is my lamination cloudy or hazy?
Cloudy lamination is almost always caused by a temperature that’s too low for your pouch thickness. The adhesive requires specific heat to turn clear and bond to the paper. If the temperature is too low, the glue stays partially solid, creating a hazy look.
Is it safe to leave a laminator on all day?
No, it isn’t safe to leave a laminator on for long periods without supervision. If your machine has an auto-shutoff feature, it will turn itself off after a set time, but you should still manually unplug it when you’re finished. Overheating can damage the internal plastic housing and the motor components.
What happens if I use the wrong pouch thickness?
Using a pouch thicker than your machine is designed for will result in an incomplete seal or a jam. A machine can’t generate enough heat to fully melt a pouch that exceeds its maximum mil rating. Always match your pouch mil rating to the machine’s specific setting.
How do I know if the rollers are damaged?
You can identify roller damage by looking for repeating marks, scratches, or holes on every document you laminate. If you notice the same line in the exact same spot on every project, the roller surface is likely scratched or has debris stuck to it.
Conclusion
If your machine still doesn’t run smoothly after these checks, don’t worry. It’s often best to reach out to the manufacturer’s support team for a professional opinion. They’ll help you decide if it’s time for a repair or if you’re ready to upgrade to a newer model that’s better for your projects.
Related guides