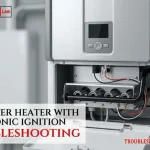
If your system has no hot water, the most common fix is to reset the unit by turning its power switch off for 30 seconds and back on again, as this often clears a temporary error in the control board. You can perform basic gas water heater with electronic ignition troubleshooting by checking if the pilot light is out or if the gas supply valve is closed. If the burner doesn’t fire after a reset, check your circuit breaker first. If you still have no heat, contact a licensed professional for internal repairs.
Troubleshooting electronic ignition failures
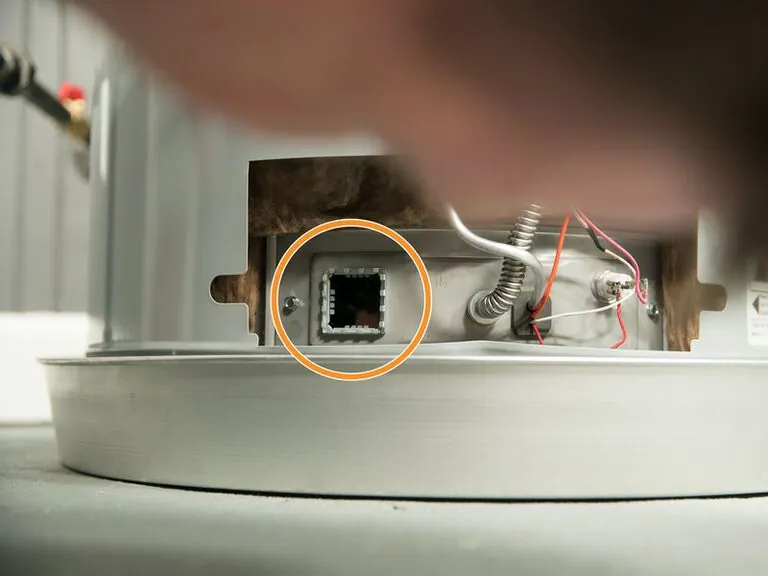
Most modern gas water heaters use an electronic ignition system instead of a standing pilot flame. These units rely on a control module to spark an igniter and open the gas valve. When this sequence fails, the unit enters a lockout mode for safety. This usually happens because of a lack of gas flow, a dirty flame sensor, or a tripped thermal switch.
The most common cause is a flame sensor that has developed a layer of oxidation or carbon buildup. This sensor tells the control board that a flame is present. If it can’t detect heat, the board shuts off the gas supply within seconds to prevent a leak. You can often fix this by gently cleaning the sensor rod with fine-grit sandpaper or steel wool.
A secondary cause is low gas pressure or a closed shut-off valve. If your stove burners ignite but the water heater does not, the gas supply is likely fine. If the stove also fails to light, check the main gas meter valve outside your home.
Finally, the thermal fuse or rollout switch may have tripped. These safety devices monitor for overheating or fire outside the combustion chamber. If the switch has a visible button, you may be able to reset it manually.
If the unit remains cold after a reset, the issue is likely a failed control board or a faulty gas valve solenoid. Never attempt to bypass these safety switches, as they prevent catastrophic fire risks. If the unit remains cold, it’s time to call a professional.
Check the gas and power supply
Before you assume a part is broken, ensure the basic requirements for combustion are met. A gas water heater needs both a steady flow of fuel and a consistent power source to operate the electronic ignition module. If the gas valve is closed or the circuit breaker has tripped, the system won’t function even if all internal components are healthy.
Check the gas line leading to the heater. Look for a shut-off valve; the handle should be parallel to the pipe. If it’s perpendicular, the gas is off. If you live in a region prone to seismic activity, check if the automatic earthquake shut-off valve has triggered. These valves feature a small sight glass or a reset button that pops up when tripped.
Next, inspect your electrical panel. Even though these heaters run on gas, the electronic ignition requires 120V power to spark the igniter. If the breaker is off, flip it back on. A common mistake is assuming a tripped breaker will look visibly “off.” Always toggle the switch to the full “off” position before resetting it to “on” to ensure the internal mechanism engages.
If you have gas and power but the unit still doesn’t click or spark, verify that the vent pipe is clear. Improper venting can cause the system to shut down to prevent carbon monoxide buildup. If you smell gas, leave the house immediately and call your utility company from outside. Never attempt to light a gas appliance if you suspect a leak.
Clean the flame sensor carefully
If your heater clicks but won’t stay lit, a dirty flame sensor is likely the culprit. This small metal rod sits in the path of the flame and sends a tiny electrical signal back to the control board. Over time, heat and moisture create a thin film on the rod that blocks this signal. Cleaning it’s a simple task that restores the connection.
To clean it, first turn off the power to the unit and wait for it to cool completely. Locate the sensor, which is usually held in place by a single screw near the burner assembly. Gently remove it and use a piece of fine-grit sandpaper or a non-metallic scouring pad to lightly rub the metal tip. Don’t use steel wool, as it can leave behind particles that cause future issues.
Wipe the sensor clean with a dry cloth and reinstall it. Ensure the connection is snug before restoring power. If the burner lights and stays on, you have solved the problem. If the unit continues to cycle on and off, the sensor might be damaged or the control board itself may be failing. This is a common point where a DIY repair ends and a professional technician becomes necessary.
Reset the thermal safety switch
When a water heater overheats, a thermal switch acts as a circuit breaker to stop the unit from running. This is a vital safety feature that protects your home from fire. If your unit has stopped completely and won’t show any lights, the thermal switch may have tripped due to a vent blockage or a faulty thermostat.
Locate the reset button, which is often found on the side of the control box or near the top of the tank. It’s usually a small, recessed red button that requires a pen or a small screwdriver to press. If it clicks when you press it, the switch has reset. Turn the power back on and listen for the fan or the ignition sequence to begin.
If the button trips again shortly after, don’t force it to stay on. Repeated tripping indicates that the heater is genuinely overheating, which is a significant safety risk. In this case, you must stop using the unit and call a professional to inspect the thermostat and the venting system. Never tamper with the internal wiring or remove the cover of the control box, as this can lead to electric shock or a gas leak.
Common mistakes to avoid
Bypassing safety switches: Never tape down or remove thermal fuses. These components act as a final defense against house fires when a unit malfunctions. If your fuse blows, it’s a symptom of a deeper failure, not the problem itself.
Using abrasive cleaners: Never use harsh chemicals or steel wool on sensors. These tools strip the protective factory coating, which accelerates soot and grime buildup.
Ignoring gas odors: If you smell rotten eggs, don’t troubleshoot. Evacuate immediately and call your gas provider from a safe distance.
Over-tightening fittings: Forcing gas connections creates microscopic cracks in brass fittings that lead to slow, undetectable leaks. If you can’t stop a leak with a quarter-turn past hand-tight, stop. Call a professional to inspect the line.
Working on live circuits: Always cut the power at the breaker before touching electrical components. Test the line with a non-contact voltage tester to confirm the power is truly dead.
Preventing future ignition failures
Regular maintenance prevents the buildup of carbon and debris that causes most electronic ignition problems. By keeping the area around your heater clear of dust and debris, you ensure the burner gets enough air to stay lit.
Most homeowners make the mistake of waiting for a total system lockout before inspecting the igniter. This reactive approach often leads to a failed flame sensor, which costs significantly more to replace than a simple cleaning. If your heater cycles on and off rapidly, the sensor is likely coated in soot. You can fix this by gently cleaning it with a fine-grit emery cloth.
Use this table to track your maintenance habits.
| If you’re doing this | Do this instead | Why |
|---|---|---|
| Ignoring dusty burners | Vacuum the burner area | Dust blocks the air intake |
| Leaving vents blocked | Clear debris from vents | Allows safe exhaust flow |
| Waiting for a failure | Test the reset once yearly | Finds stuck switches early |
| Using high-heat settings | Set to 120 degrees F | Reduces scale and stress |
Frequently asked questions
Can I replace the igniter myself?
Replacing an igniter is dangerous due to the risk of fire or explosion from mishandled gas components. The process requires precise alignment to ensure the spark hits the gas stream correctly. It’s safer to hire a licensed professional who can verify gas pressure and safety settings after installation.
Why does my heater click but never light?
A clicking heater that fails to light indicates the control board is sparking, but the gas valve isn’t opening or the flame sensor is failing. This usually points to a faulty valve, a dirty sensor, or a lack of gas supply. Ensure your gas shut-off valve is fully open.
Is it safe to smell a little gas?
No, you should never smell gas near your water heater or anywhere in your home. If you notice a sulfur or rotten egg smell, leave the building immediately and don’t touch any light switches or electrical devices on your way out. Once you’re a safe distance away, call your gas company or emergency services. A gas leak is an immediate life-safety hazard that requires professional equipment to detect and seal.
How long does an electronic ignition last?
The electronic ignition module has a limited operational life depending on the environment and power supply quality. Factors like high humidity, frequent power surges, and dust accumulation can shorten this duration significantly. If your unit is aging and keeps failing, it may be more cost-effective to replace the entire water heater.
What happens if I ignore a clicking heater?
Ignoring a clicking heater will eventually force the control board into a permanent lockout mode to prevent gas buildup. The unit will stop attempting to light, leaving you without hot water until it’s repaired. Ignoring the noise may also mask a failing gas valve that could leak.
Conclusion
Proper care for your gas water heater with electronic ignition troubleshooting involves keeping the area clean, checking your gas supply, and knowing when to call a professional. By performing these simple visual checks, you can maintain a safe and reliable hot water supply for your home.
Related guides