To fix a machine that has stopped making ice, start ge opal troubleshooting by checking the water reservoir level and the alignment of the ice bin. Most performance issues occur because the water supply is low or the ice sensor is blocked by mineral buildup. If your unit isn’t producing ice as expected, ensure the water tank is filled to the fill line and that no ice is stuck in the chute.
Why the unit stops working
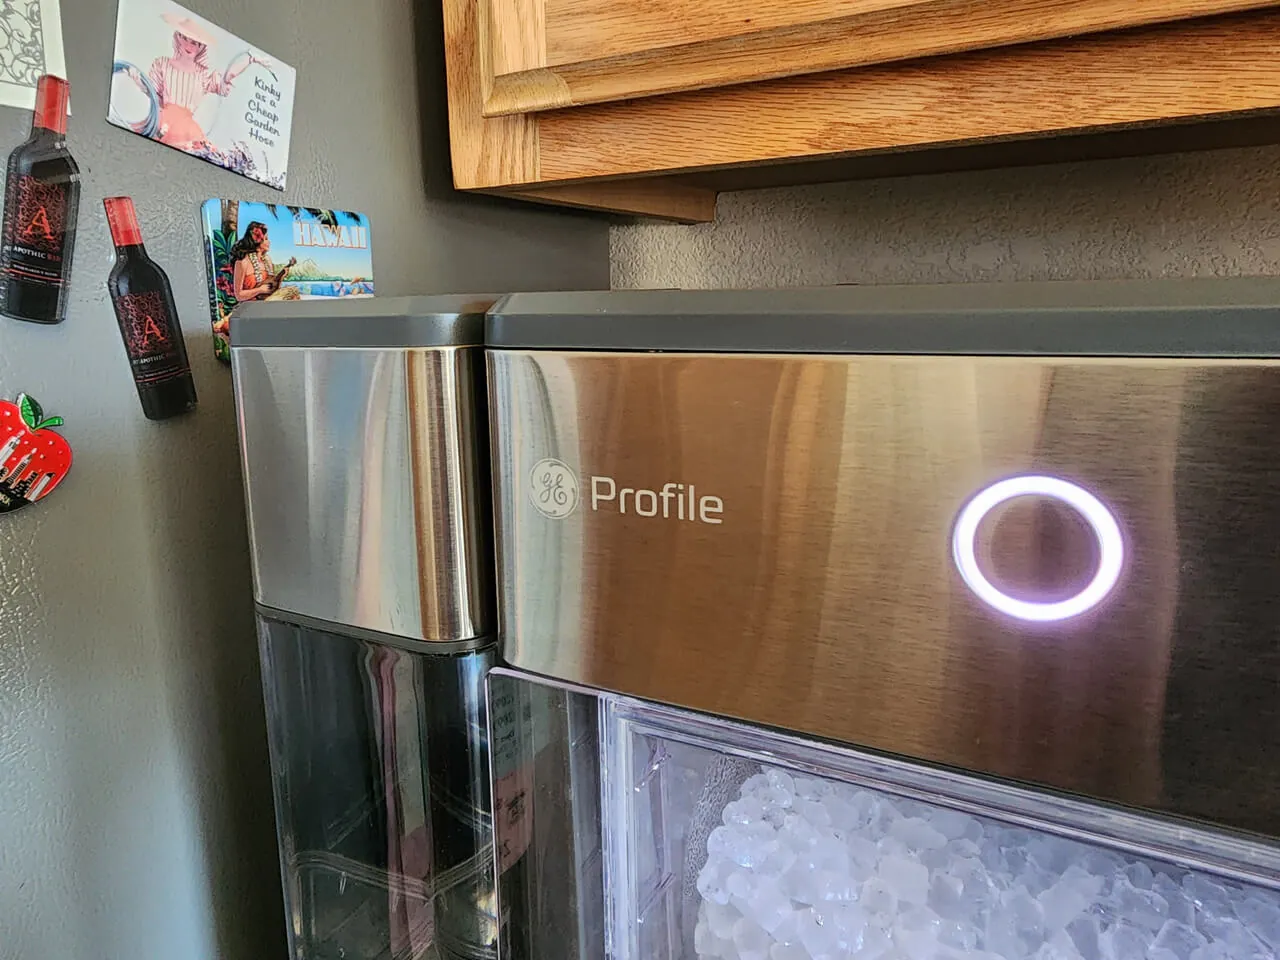
Most users find that their ice maker stops functioning due to scale buildup from hard water. Over time, calcium and magnesium deposits gather inside the internal tubes and on the ice-making mechanism. This slows down the water flow and prevents the machine from sensing when the bin is empty or full. You can check the water quality in your area through the United States Geological Survey water hardness map to see if you need to perform more frequent cleanings.
Another frequent cause is poor ventilation. The machine needs to pull in cool air and release heat through the side vents to create ice properly. If you place the unit against a wall or in a tight cupboard, the heat stays trapped. This causes the internal temperature to rise, which forces the cooling system to shut down to prevent damage. Always keep at least 6 inches of space around all sides of the device for proper airflow.
Finally, sensor errors often lead to a “stop” light that won’t turn off. If the ice bin isn’t sitting perfectly flat, the sensor can’t see that the bin is empty. Even a small piece of ice trapped in the sensor eye will trick the machine into thinking the bin is full. Check that the bin is pushed all the way back into the slot and clear any debris from the sensor area.
Clean the internal components
If your machine isn’t producing ice, perform a deep cleaning cycle to remove mineral scale. This fix is for owners who notice slow ice production or a flashing “clean” light. You must use a solution of one part white vinegar to three parts water. Never use harsh chemicals or bleach, as these can ruin the internal water pump and seals.
To start the process, pour the vinegar solution into the reservoir until it reaches the fill line. Press and hold the “clean” button for 3 seconds to begin the cycle. The machine will run water through the system to break down mineral deposits. If the water comes out cloudy, the cleaning is working. Once the cycle finishes, drain the reservoir completely.
Common mistakes include failing to empty the ice basket before cleaning or using concentrated vinegar, which corrodes the internal nickel plating. If you see black flakes in the water, you have used a solution that’s too acidic. Stop immediately and flush the system with double the recommended water volume.
Run at least two more cycles using only fresh, clean water to rinse away any remaining vinegar. If the taste remains poor, repeat the fresh water rinse one more time. If the machine still fails to produce ice after three full cleaning cycles, the internal pump may have failed.
This is the point where you should stop trying to fix it yourself and contact the manufacturer for a repair under warranty. If the unit is out of warranty, check the pump’s intake screen for physical blockages before seeking a professional technician.
Check the environment and airflow
You should move your unit to a cooler, open area if it runs constantly but produces very little ice. This fix is for units that feel hot to the touch or make loud, straining noises. High ambient temperatures force the compressor to work much harder, which shortens the life of the cooling system. If your kitchen temperature is above 80 degrees Fahrenheit, the machine will struggle to reach the freezing point.
Ensure the unit sits on a level surface. If the machine is tilted, the water won’t flow evenly over the cooling plate. Check the vents on the side and back for dust or pet hair. Use a soft brush or a vacuum hose to gently clear these vents. Don’t use compressed air, as this can push dust deeper into the delicate cooling fins.
If the machine is still running hot after you clear the vents and move it to a cooler spot, the cooling fan may be broken. You can verify this by listening for the sound of the fan spinning. If the unit is silent but hot, the fan isn’t moving air. Don’t attempt to open the case to reach the fan, as this risks electric shock and voids your warranty.
Reset the sensor and bin
A common mistake is assuming the machine is broken when it simply needs a sensor reset. This fix is for units that show a full bin light even when the bin is empty. First, pull the ice bin completely out of the unit. Wipe the sensor windows on the inside of the machine with a soft, dry cloth. These windows are located on the left and right sides of the bin area.
Dust or mineral buildup often triggers false readings. If the cloth doesn’t clear the debris, use a cotton swab dipped in a tiny amount of isopropyl alcohol. Ensure the lens is completely dry before proceeding.
Place the bin back into the unit and ensure it clicks into position. If the light remains on, unplug the power cord from the wall for 60 seconds. This forces the internal computer to reboot and clear any temporary error codes. Plug the unit back in and wait for it to cycle. If the light turns off, the unit should begin making ice within 15 minutes.
If the light stays on, look for an obstruction in the infrared beam path. If the beam is clear but the light persists, the sensor board may be faulty. This fix isn’t for those who are uncomfortable with electronics. If the sensor remains stuck, you must contact a qualified service technician. Never try to bypass the sensor or bridge the connections, as this is a fire hazard. A faulty board typically requires a professional replacement to restore safe functionality.
What not to do
Don’t add ice or frozen water to the reservoir to speed up the process. This thermal shock often cracks the internal water pump housing, leading to permanent leaks that require a full unit replacement.
Never use a metal tool to chip away ice from the cooling plate. Even a shallow scratch disrupts the freezing cycle by creating a jagged surface where ice clings unevenly.
Don’t leave the machine in a garage or shed where the temperature drops below 50 degrees Fahrenheit. Water trapped in the supply lines will expand as it freezes, splitting the plastic tubing and destroying the internal circulation system entirely.
Stop the problems from returning
To keep your machine running well, you must match your maintenance to your water quality. If you live in an area with hard water, you need to clean the unit more often to prevent scale buildup. Most users mistake hard water for a minor inconvenience, but ignoring it significantly shortens the pump’s lifespan.
| If you’re doing this | Do this instead | Why |
|---|---|---|
| Using hard tap water | Use filtered or bottled water | Reduces mineral buildup |
| Cleaning once a year | Clean every 3-4 months | Prevents pump clogs |
| Keeping it in a cupboard | Keep on an open counter | Allows heat to escape |
| Ignoring the clean light | Run a cleaning cycle | Clears sensor errors |
Use this simple decision rule: if your kettle develops white flakes within a week, you have hard water. In that case, you must descale monthly. If your water is soft, quarterly cleaning remains sufficient. Always check the drain valve for residue before you store the unit for the season.
Frequently asked questions
How long does it take to make a full bin of ice?
It takes about 3 to 4 hours to fill the bin completely if the unit is in a room at 70 degrees Fahrenheit. The speed depends on the ambient air temperature and the temperature of the water you put in the reservoir. If the room is hotter, the process will take significantly longer. You can help the machine by using cold, filtered water in the reservoir rather than room-temperature water.
Can I use soap to clean the reservoir?
No, never use soap or dish detergent to clean the machine’s internal parts. Soap leaves a residue that’s difficult to rinse out and ruins the taste of your ice for weeks. If you accidentally use soap, run at least five cycles of plain water to flush the system.
Why is my ice maker making a loud grinding noise?
A loud grinding noise often means the ice bin isn’t seated correctly or there’s a piece of ice stuck in the mechanism. Turn the machine off immediately and check the area where the ice drops. If you see a piece of ice wedged in the chute, gently remove it with a plastic utensil. If the noise continues after the bin is clear, the internal gear assembly may be damaged.
Is it safe to leave the unit plugged in all the time?
Yes, the machine is designed to be left plugged in and running as long as there’s water in the reservoir. If you’re going to be away for more than a few days, it’s best to empty the reservoir and the bin to prevent algae growth. Always unplug the unit if you plan to move it or if you’ll be away from home for more than one week.
What happens if I don’t clean the unit?
If you don’t clean the unit, mineral scale will eventually block the water tubes and the pump will burn out. This process happens faster in areas with hard water, where minerals are more concentrated. Once the pump fails, the machine will stop moving water and will no longer make ice. Keeping the machine clean is the single most important step for ensuring it lasts for several years.
How much water does the reservoir hold?
The reservoir holds approximately 3 liters of water when filled to the maximum line. This volume is enough to produce about 2 to 3 pounds of ice before you need to add more water. If you notice the water level dropping faster than expected, check the drain plug at the bottom of the unit to ensure it’s pushed in tightly. A loose plug will cause a slow leak.
Conclusion
If your machine still isn’t working after these checks, don’t hesitate to reach out to the manufacturer’s support team for further guidance. They’ll help you determine if a part needs replacing or if your warranty covers a repair. It’s better to get professional help early so you’re back to enjoying fresh ice soon.