When your engine fails to start after multiple attempts, performing generator overcrank troubleshooting is the first step to identifying why the unit isn’t firing. The most common cause for this error is a lack of fuel or a battery that’s too weak to turn the engine over at the required speed. Before you assume the worst, check your fuel levels and ensure the battery connections are tight and free of corrosion. If the battery is old, it may struggle to provide the cold cranking amps needed for a reliable start.
Diagnosing generator overcrank issues
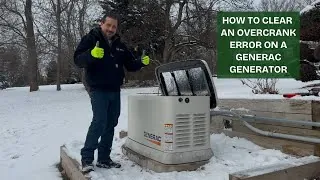
When an engine displays an overcrank fault, it means the controller has reached its maximum limit for start attempts without the engine reaching a self-sustaining speed. This is usually a safety feature designed to prevent the starter motor from burning out or the battery from draining completely during a failed event. If the system isn’t getting the right spark, fuel, or air mixture, it will keep cranking until it triggers the alarm.
The primary mechanical reasons for this failure relate to fuel delivery and electrical power. If the fuel shut-off valve is closed, or if the fuel lines have air trapped inside them, the engine can’t ignite. Similarly, if the start signal from the controller is interrupted by a loose wire or a blown fuse, the engine will spin but never actually catch.
You must also consider the state of your spark plugs. If they’re fouled with carbon or wet from unburned fuel, they can’t create the hot spark necessary for combustion.
According to the U.S. Consumer Product Safety Commission, you should always follow the manufacturer’s maintenance schedule to prevent these common mechanical failures from occurring during an emergency. If you’re uncertain about the age of your plugs or the quality of your fuel, check your owner’s manual for the specific service intervals recommended for your model.
Safety: Inside a mains-powered machine, the parts behind the outer cover can hold a dangerous electrical charge even after it has been unplugged — that’s why they sit behind a cover. Opening the housing, or testing or replacing anything behind it, is a job for a qualified technician, never a home repair.
Check fuel lines and supply valves
The most common reason for a failed start is a simple lack of fuel reaching the combustion chamber. If your generator has been sitting idle for a long time, the fuel in the line may have degraded or evaporated. Start by verifying that the fuel tank is full and that any manual shut-off valves are in the open position.
If the fuel tank is full but the engine still cranks, check the fuel filter for signs of clogging or debris. A blocked filter prevents the engine from getting the pressure it needs to start. If you notice a strong smell of raw gas, you may have flooded the engine by over-priming it. In this case, wait at least 15 minutes to let the excess fuel evaporate before you attempt to restart the system.
This fix is for users who have confirmed that the fuel system is pressurized and free of leaks. If you see signs of a cracked fuel line or a leaking tank, don’t attempt to start the generator. Contact a certified service technician immediately to handle these repairs, as fuel leaks pose a significant fire hazard. If you aren’t comfortable inspecting these components, it’s safer to have a professional perform the check.
Inspect battery health and connections
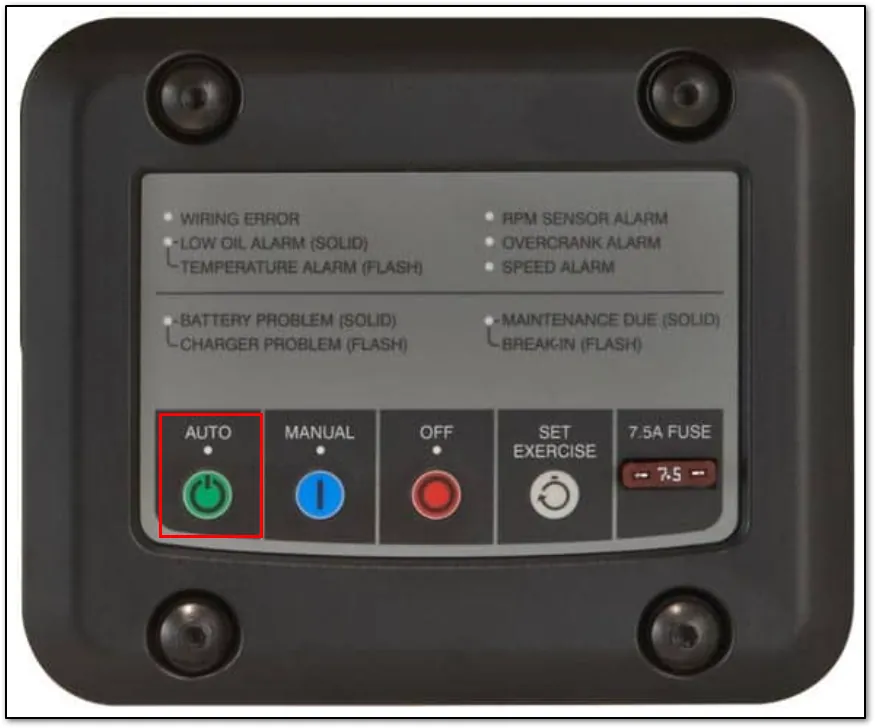
A weak battery often causes the engine to crank slowly, which prevents it from reaching the necessary ignition speed. Even if the lights on the control panel turn on, the battery might not have enough power to engage the starter motor effectively. Inspect the battery terminals to ensure they’re clean, tight, and free of white, powdery corrosion.
If the terminals are dirty, disconnect them carefully and clean them with a wire brush or a baking soda and water solution. Once clean, reconnect them firmly, ensuring the positive and negative cables are on the correct posts. If the battery remains dead or shows a low voltage reading, it may need to be replaced. Always use the exact voltage and cold cranking amp rating specified in your owner’s manual.
This procedure is for users who have the tools to safely handle battery cables and perform basic inspections. If you see signs of a swollen battery casing or notice a sulfur-like smell, leave the unit alone and call a professional. These are signs of a failing battery that requires expert handling to avoid acid spills or electrical shorts. Never attempt to jump-start a generator unless the manual specifically permits it, as this can damage the sensitive controller board.
Test the ignition and air intake
If fuel and power aren’t the issues, the engine may be struggling with airflow or ignition timing. Check the air filter to ensure it isn’t clogged with dust, dirt, or debris. A starved engine can’t breathe properly, which often leads to poor ignition and a failed start cycle. If the air filter looks dark or feels heavy with dirt, replace it with a new one.
Next, look at the ignition system for any disconnected wires or loose sensor plugs. The ignition coil needs a clean connection to send a spark to the plug at the right moment. If you see any loose wires near the engine block, gently press them back into place. If the wires are frayed or burnt, don’t attempt a repair yourself, as this requires specific electrical knowledge and professional tools.
If you have performed these steps and the unit still fails to start, it’s time to call a certified technician. Attempting to disassemble the engine or the control housing can void your warranty and lead to further damage. A professional will have the diagnostic tools to test the starter solenoid and the control unit properly.
Common mistakes to avoid during troubleshooting
Using old, stale fuel: Gasoline can begin to degrade after several months, potentially leaving behind gummy deposits that clog carburetor jets. If the unit has sat idle, drain the tank completely or add a fuel stabilizer to prevent this chemical breakdown.
Over-priming the engine: Pumping the primer bulb more than three times often floods the combustion chamber. If you smell raw fuel, pull the starter cord with the choke open to clear the excess liquid before trying again.
Ignoring warning lights: If the panel displays an “oil pressure” or “temperature” alert, the controller triggers a hard lockout to prevent catastrophic internal damage. Check your oil levels immediately; if the fluid is full, the sensor itself may be faulty.
Neglecting terminal maintenance: Loose or corroded battery cables are the most common cause of intermittent starting issues. Before purchasing a new battery, scrub the terminals with a wire brush to ensure a clean, metal-to-metal connection. A voltage drop here often mimics a dead battery.
Preventative maintenance for reliable starts
To keep your generator running smoothly, you must monitor the health of your fuel and electrical systems regularly. Use the following guide to compare your current habits with the recommended maintenance tasks that ensure your unit starts on the first try.
| If you’re doing this | Do this instead | Why |
|---|---|---|
| Leaving fuel in the tank | Add a fuel stabilizer | Prevents gum and varnish buildup |
| Checking the battery yearly | Check connections every 3 months | Prevents vibration-induced looseness |
| Using old air filters | Ensures proper air-to-fuel ratio | |
| Storing outside uncovered | Use a weatherproof generator cover | Protects electronics from moisture |
Most owners wait until a storm warning to test their unit, which is a critical mistake. If the generator fails to turn over during a self-test, you have no time to source parts. Always perform a “dry run” under load at least once a month.
If your generator uses a carburetor, turn off the fuel valve and let the engine die before storage. This clears the line entirely. If you smell stale, sour fuel, don’t attempt to start the engine. Drain the tank immediately to avoid permanent damage to the fuel pump.
Frequently asked questions
How long should the engine crank before it stops?
Most generators attempt to start three or four times for 10 to 15 seconds each, with short rest periods between cycles. These settings are pre-programmed by the manufacturer to prevent motor damage. Check your manual if your unit stops earlier, as forcing the starter can overheat the motor.
Is it safe to use starting fluid to help it fire?
Never use starting fluid on a generator unless the manufacturer explicitly states it’s safe. Starting fluid is highly flammable and can cause internal engine damage. Relying on chemical aids often masks deeper issues like clogged fuel jets or failing pumps that require proper repair.
Why does the generator crank but not start?
A generator that cranks but fails to start typically suffers from fuel delivery issues, bad spark, or low compression. Confirm that your fuel valve is open and the spark plug is free of carbon buildup. If these are correct, the issue may involve a faulty ignition coil or sensor.
How do I know if the battery is truly dead?
You can identify a dead battery if the starter motor sounds sluggish or makes a rapid clicking sound. A healthy battery should provide consistent power without the control panel lights dimming significantly. If the voltage drops below 12 volts during cranking, the battery is likely too weak.
What happens if I try to start it too many times?
Repeatedly bypassing the overcrank alarm risks burning out the starter motor or damaging battery cells. The cranking process draws high current, which generates significant heat in the starter windings. Always follow the cooling periods listed in your manual to allow this heat to dissipate between each attempt.
Conclusion
If you aren’t the primary owner of the machine, check if there’s a manual override or a specific maintenance logbook that details the last time the fuel system was serviced. This log can tell you if the unit is due for a new fuel filter or spark plug. Knowing the service history is the most effective way to narrow down the cause without guessing.