To fix your broken system, you should clean the lenses and check the alignment of your genie garage door opener safety beam sensors troubleshooting the connection for loose wires or debris. The most common cause is a simple obstruction or a misalignment that prevents the infrared light from reaching the receiver. If the light on your sensor is blinking or off, the door won’t close because the system thinks something is in the way.
Why your garage door opener sensors fail
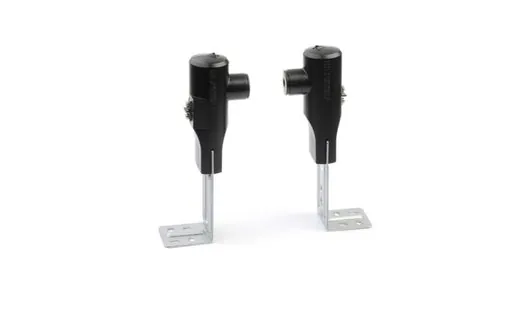
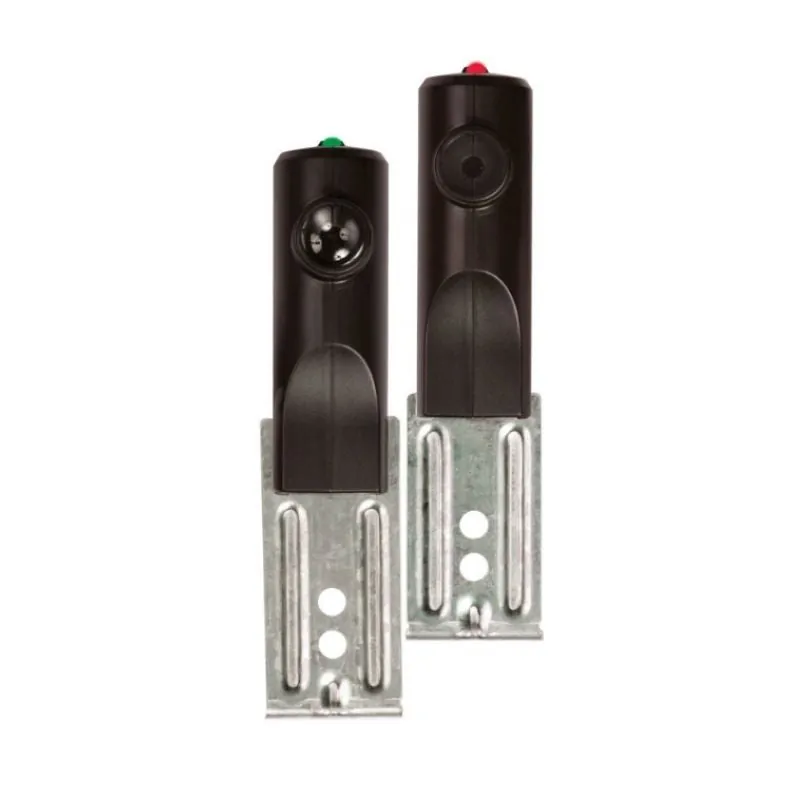
The primary reason these safety devices fail is a loss of communication between the sending and receiving units. Each side has a small light, usually red or green, that indicates when the system is active and the beam is solid. If the beam is broken, the opener will refuse to move the door downward as a standard safety precaution to prevent injury or property damage.
Environmental factors are the second most common cause. Over time, cobwebs, dust, or heavy rain can coat the lenses, blocking the signal. Additionally, accidental bumps from a lawnmower, a bicycle, or a car tire can shift the brackets just enough to break the connection. The sensors must be pointed directly at each other to function.
Finally, internal wiring issues can occur if the staples holding the wires to the wall have pierced the insulation or if the connections at the motor head have wiggled loose. This is a common point of failure for older installations where the wire has become brittle.
You can verify the safety requirements for these systems through the official Genie support resources which outline the expected status lights for a properly functioning installation. If the wiring is physically damaged, you can repair it using appropriate low-voltage wire connectors or replace the wire run entirely.
Clean the lenses and check alignment
This fix is for homeowners who notice the door will only close if they hold the wall button down. First, take a soft, dry microfiber cloth and gently wipe the glass lens on both the sending and receiving units. Don’t use chemical cleaners or abrasive soaps, as these can scratch the lens and make it harder for the infrared beam to travel.
Once the lenses are clear, look at the indicator lights on the sensors. If one light is dim, flickering, or completely off, the sensors are likely misaligned. Gently nudge the bracket of the unit with the weak light while watching the indicator. When the beam is perfectly aligned, the light will turn solid and stay bright.
If you have a helper, have them watch the lights while you adjust the brackets to make the process faster. Tighten the wing nut on the bracket once the light is solid to ensure it doesn’t move again.
If the light remains off regardless of how you move the sensor, there’s a possibility that the sensor itself has failed or the wire leading to it’s broken. If you can’t get a solid light after cleaning and physical adjustment, stop here and call a professional. Attempting to open the sensor housing can void your warranty and may lead to incorrect reassembly.
Inspect the wire connections
This step is for when the sensors seem physically fine but show no power at all. Check the wire connections at the back of the garage door opener motor unit, usually located on the ceiling. Ensure the wires are pushed firmly into the terminals and that there’s no fraying or bare metal touching the metal frame of the motor.
Follow the wire from the motor all the way down to the sensors along the wall. Look for any spots where the wire might be pinched by a shelving unit or cut by a sharp edge. If you see a break or a spot where the insulation is worn through, don’t try to fix this with electrical tape. A damaged wire can create an intermittent signal that causes the door to reverse randomly.
This fix isn’t for those who are uncomfortable working on a ladder or handling low-voltage wiring. If the wires are inside the wall or if you have to remove the cover of the motor unit to reach the terminals, stop immediately. You should hire a professional technician to handle internal wiring tasks to avoid the risk of electric shock or damaging the control board.
Test the safety reversal system
If you have restored the lights but are still worried, you must test the safety reversal feature. Place a solid object, such as a roll of paper towels or a wooden block, directly in the path of the door. Press the remote to close the door and watch it carefully. The door should hit the object, stop, and immediately reverse to the open position.
If the door hits the object and keeps pushing, your safety system isn’t working and the door is dangerous to use. This is a major safety failure. If the door doesn’t reverse, stop using the remote and the wall button immediately. Disconnect the door from the opener using the emergency release handle and call a professional to inspect the motor’s force settings and the safety beam logic.
This test is essential for your family’s safety. If the door fails, avoid adjusting the force settings yourself, as a professional should calibrate the system to meet safety standards.
Common mistakes to avoid
Using water to clean the lens: Never use tap water or household glass cleaners. These leave mineral deposits or chemical residues that cloud the optics. Use only a dry, lint-free microfiber cloth. If the lens remains hazy, use a tiny drop of isopropyl alcohol, but never spray it directly onto the glass.
Applying excessive force to brackets: Pushing too hard bends the mounting track. Once the metal warps by even a millimeter, the sensors lose their alignment, causing the system to trigger false stops. If the bracket resists, check for debris in the track rather than forcing the fit.
Splicing wires with tape: Electrical tape loses its adhesive grip in high-heat environments, leading to intermittent signal loss. If the insulation is frayed, repair the connection using proper wire nuts or butt splices to ensure a secure, permanent contact.
Ignoring the motor light: Always check the sensor connection before attempting a hard reset.
Prevent sensor issues
| If you’re doing this | Do this instead | Why |
|---|---|---|
| Leaving items near sensors | Keep the area clear | Prevents accidental beam blockage |
| Using tape on wires | Use proper wire nuts | Ensures a lasting, secure connection |
| Ignoring loose brackets | Tighten with a wrench | Prevents misalignment from vibration |
| Cleaning with wet cloths | Use a dry microfiber | Prevents water spots and lens damage |
Keep all shelving, curtains, and cables at least this far away to avoid ghost signals.
If your system triggers randomly during high winds, check the mounting bracket for play. A gap as small as two millimeters allows enough vibration to misalign the beam.
When you clean, avoid household glass sprays. These leave a microscopic residue that diffuses the infrared light, effectively blinding the sensor to distant movement. If you must remove stubborn grime, use a drop of isopropyl alcohol on a cotton swab.
If you see exposed copper or brittle insulation, replace the wire nut immediately. A loose connection here costs you hours of troubleshooting later when the system begins dropping signal intermittently.
Frequently asked questions
Can I bypass the safety sensors?
You can’t safely bypass these sensors because they’re a critical safety feature required by law. These sensors prevent the door from closing on people or pets. If your sensors are broken, replace them with the correct model for your opener.
How long should the sensors last?
Sensors typically last for the life of the garage door opener, often 10 to 15 years. They usually fail only if they sustain physical damage or suffer from extreme environmental conditions. Check your manufacturer’s manual for the expected lifespan of your specific model.
Is it safe to use the door if the beam is broken?
No, it isn’t safe to use the door if the safety beam is broken because the door won’t stop or reverse if it encounters an object. If the beam isn’t working, the door becomes a significant hazard. You should disconnect the opener from the door using the red emergency release cord and operate the door manually until a professional can repair or replace the safety sensor system.
Why do the sensors blink when it’s sunny?
Sensors may blink if direct sunlight hits the receiver lens and overwhelms the infrared signal. You can often fix this by installing a small cardboard hood to shield the sensor from the sun. If the blinking persists, the sensor may have a failing component.
How much does a new sensor kit cost?
A replacement sensor kit typically ranges from $30 to $60 depending on the brand. You can find the exact part number on the sticker located on your motor unit. Always purchase original manufacturer parts to ensure compatibility with your system’s safety protocols.
What happens if I move the sensors?
Moving the sensors will break their alignment and prevent the door from closing. The infrared beam is very narrow, requiring the sensors to be perfectly level and facing each other. You must realign them before the door will operate again.
Conclusion
If the door still won’t close after these checks, don’t worry. You might have a faulty wire or a damaged sensor that needs replacing. It’s a good idea to consult your manual or call a local technician if you’re unsure, as they’ll get your system running smoothly again in no time.
Related guides