If your garage door opener isn’t responding, you can perform basic genie powermax 1500 troubleshooting by checking the safety sensors, the remote control battery, and the wall-mounted control panel. The most frequent cause for a door that refuses to close is a misalignment of the safety beams. When these infrared beams are blocked or out of alignment, the system prevents the door from moving to avoid accidents. You can fix most common issues without professional tools by following simple alignment and reset steps.
Troubleshoot your Genie PowerMax 1500 failure
Most operational issues stem from environmental factors or simple power interruptions rather than complex mechanical failures. The primary cause is often a dirty or misaligned set of infrared safety eyes located at the bottom of your garage door tracks.
If these sensors cannot “see” each other because of dust, debris, or a bump from a storage box, the opener won’t allow the door to close. This is a deliberate safety feature designed to stop the door if a person or object is in its path.
Another common cause is a loss of synchronization between the remote control and the power head. If you have recently changed batteries or had a power surge, the rolling code security system may have lost its handshake with the remote. You can verify if this is the issue by attempting to operate the door from the wired wall console. If the wall console works but the remote does not, the problem is limited to the remote transmitter or its battery.
Finally, the system may be stuck in a thermal shutdown mode after repeated use. Garage door motors are rated for specific duty cycles, and if you run the motor continuously for several minutes, it may enter a cooling period. If your unit refuses to move but you hear a faint clicking sound, give the motor 15 to 20 minutes to cool down before trying again.
Align the safety sensors
If your door light flashes when you attempt to close it, the safety sensors are the first place to look. These two small sensors, one on each side of the door, must be perfectly aligned to send a constant signal across the opening. To fix this, look for the small LED light on each sensor unit. If one light is off or flickering, the sensor isn’t receiving a clear signal from its partner.
Loosen the wing nut on the side of the sensor that isn’t showing a solid light. Gently pivot the sensor until the light turns solid, indicating a clear connection. Tighten the wing nut firmly, but be careful not to overtighten it, as this can crack the plastic housing.
If the sensors are clean and aligned but the light still flashes, check the low-voltage wiring running along the wall. If you see a break or a frayed wire, you’ll need to replace that segment of wire to restore the connection.
This fix is for users who have a solid, stable wall to mount their sensors on. If your wall or the metal tracking is loose or bent, the sensors will vibrate out of alignment again. If you have tried these steps and the door still doesn’t close, you should check the Genie Company product support page for specific error code interpretations related to your model.
Sync your remote controls
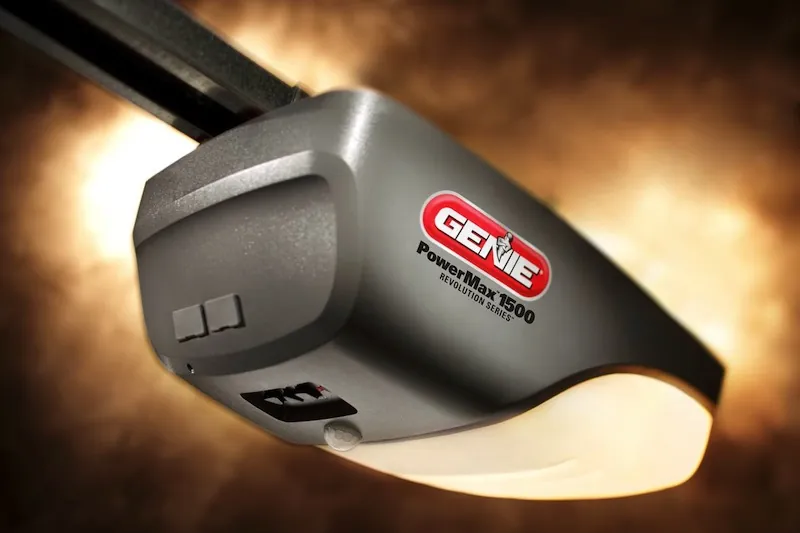
If your remote fails to operate the door while the wall button works, you should clear the memory and re-program your remotes. Start by locating the “Learn” button on the power head, which is usually found under the light cover. Press and hold the “Learn” button until the small LED indicator next to it begins to blink. This puts the unit into programming mode, where it’s ready to accept a new signal.
Once the light is blinking, press the button on your remote control once. The indicator light on the power head should stop blinking or flash to confirm the signal has been accepted. If you have multiple remotes, repeat this process for each one immediately. Don’t wait more than 30 seconds between programming each remote, or the system will exit the learn mode.
A common mistake is failing to clear the old memory before adding new remotes. If your opener has a history of phantom activations, hold the “Learn” button for a full 10 seconds until the LED goes dark. This wipes every previous code, preventing unauthorized access from lost or stolen remotes.
This process is for standard handheld remotes. If you’re using a built-in vehicle system, such as HomeLink, you must follow the specific programming sequence provided in your vehicle owner’s manual. If you have cleared the memory and the remote still doesn’t work, the internal circuit board may be damaged. In such cases, replacing the remote is often more cost-effective than attempting a repair. If you suspect an electrical fault, contact a qualified technician.
Check the power and wall console
When the entire unit appears completely dead, verify that the power outlet is active. Check your home’s main circuit breaker panel to ensure the breaker for the garage is in the “On” position. Sometimes a simple vibration from the motor can cause a plug to loosen in the socket, so inspect the power cord connection at the ceiling. If the light on the power head doesn’t turn on when you press the wall button, the unit isn’t receiving power.
If the wall console itself is unresponsive, check the wires connected to the back of it. Over time, these wires can corrode or pull loose from the terminals. Use a small screwdriver to ensure the wires are firmly seated under the screws. If the wall console lights are flickering or dim, this suggests a poor connection or a fault in the power head’s internal transformer.
A common mistake is assuming the wall button is broken when the fault actually lies in the wiring run along the ceiling. If you see visible nicks or staples driven too deep into the insulation, the signal wire is likely shorted. If you find a break, strip the wire ends and join them with wire nuts to test for a response.
This is the point where you should call a professional if the power is confirmed but the motor remains silent. If you have to open the motor housing to reach internal wiring, you risk voiding your warranty and exposing yourself to high-voltage components. A certified garage door technician has the tools to safely test the internal capacitor and the logic board.
Common mistakes to avoid
Applying grease to the tracks: The tracks must remain dry. Grease traps grit and dust, which acts like sandpaper against your rollers. If you see buildup, wipe it away with a clean, dry cloth immediately.
Forcing the door manually: If the door stalls, never yank the emergency release cord. Jerking the mechanism can snap the cable or damage the trolley carriage. If the door feels heavy, the spring tension is likely compromised; call a professional rather than risking a sudden collapse.
Adjusting the limit screws blindly: These screws dictate the motor’s stopping point. Turning them without testing can cause the door to slam into the floor or fail to seal. Always make quarter-turn adjustments, then test the cycle twice before turning again.
Ignoring odd grinding noises: Metal-on-metal screeching signals that rollers or hinges have worn through their protective coating. Lubrication won’t fix this. If you delay, you risk stripping the gears in your opener, turning a minor repair into a full system replacement.
Preventing future operational issues
You can keep your system running smoothly by performing simple maintenance checks every few months. The following table outlines standard habits that help prevent common errors.
| If you’re doing this | Do this instead | Why |
|---|---|---|
| Ignoring the door speed | Listen for grinding sounds | Early sounds signal failing parts |
| Leaving the tracks dirty | Wipe with a dry cloth | Dirt causes the motor to strain |
| Using remote for testing | Use the wall console | It isolates remote battery issues |
| Forcing a stuck door | Check the safety sensors | They stop the door for safety |
If your garage door is balanced properly, it should stay in place when you disconnect the motor and lift it halfway by hand. If the door falls or shoots up quickly, the spring tension is incorrect. Spring tension is a high-risk task that requires specialized training and heavy-duty tools; never attempt to adjust or replace garage door springs yourself. Contact a professional to perform a spring balance test if you suspect your door isn’t moving freely.
Frequently Asked Questions
Is it safe to use the garage door if the safety sensors are broken?
No, you should never operate the door if the safety sensors are malfunctioning or bypassed. These sensors are a critical safety requirement that prevents the heavy door from crushing objects or people. If the beams don’t work, the door won’t stop upon contact, which creates a significant risk of injury. You must fix the sensor alignment or replace the faulty units before using the automatic opener again.
How long does a typical garage door motor last?
Most residential garage door openers have a finite lifespan with regular maintenance. This duration varies based on the frequency of use and the weight of your garage door. If your door is heavy and not properly balanced, the motor will wear out much faster than a well-maintained system. You can extend the life of your motor by keeping the rollers clean and ensuring the door moves easily by hand.
Why does my garage door open back up after hitting the floor?
The opener detects excess resistance and assumes an object is in the way. This occurs when the downward force setting is too low or door tracks are obstructed by debris. Check the tracks for buildup, and if they’re clear, consult your manual to increase the downward force setting in small increments.
Can I fix a broken garage door spring myself?
No, you should never attempt to adjust or replace garage door springs because they’re under extreme tension. A spring that snaps or slips can cause severe injury or property damage. These components require specialized tools and specific training to handle safely. If you notice a break in the spring or the door feels very heavy, leave the door closed and call a professional technician to perform the repair.
What happens if the power goes out?
You can open your garage door manually by pulling the red emergency release cord hanging from the carriage. Once pulled, you can lift the door by hand. When power returns, re-engage the carriage by pulling the cord toward the door or pressing your wall console button until you hear a click.
Conclusion
If the door still won’t budge after these checks, don’t worry. Sometimes a simple power cycle by unplugging the unit for a minute does the trick. If you’re still having trouble, it’s best to call a local technician. They’ll help you get things running smoothly so you aren’t stuck outside again.