You can fix a blinking indicator by checking the alignment of the sensors or clearing obstructions from the path. Most garage door issues linked to genie safe-t-beam troubleshooting start with a simple physical blockage or a loose wire connection. If your system is failing, look for a red or green light on the sensors; a steady light means they’re working, while a blinking light means they aren’t communicating. If you can’t see a light at all, the power source is the first thing to check.
Why the sensor beams fail
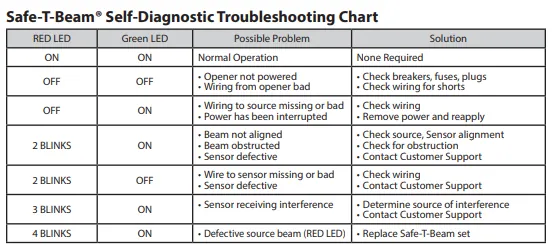
The most common reason for a system failure is a simple lack of alignment between the two sensors. These units rely on an invisible infrared beam to detect objects in the door path. If the beam is broken by debris or if the transmitter and receiver are even slightly pointed away from each other, the door won’t close. Dirt on the lenses often weakens the signal, causing the system to trigger a safety stop even when the path looks clear.
Another frequent cause involves the wiring connected to the garage door motor. Over time, vibrations from the door movement can loosen the small screw terminals on the back of the motor unit or at the sensor base. If the connection is weak, the sensor might lose power intermittently.
You should also check for physical damage to the wires, as pests or garden tools can easily fray or cut the thin insulation. According to the Genie Company support page, you must ensure the lenses are clean and the sensors are mounted securely to the wall or door track to maintain a consistent signal.
Finally, external light interference can sometimes trick the sensors. If direct sunlight hits the receiver lens at a specific angle, it may overpower the infrared signal. This is rare but happens during certain times of the day. If you rule out alignment, dirt, and wiring, consider if a bright light source is hitting the sensor directly. If this doesn’t solve it, the sensor unit itself may have failed.
Align the sensors manually
You should perform this fix if the system is powered but the indicator light remains off or blinks slowly. Start by loosening the wing nut on the bracket of the sensor that isn’t showing a steady light. Slowly rotate the sensor housing left or right while watching the status indicator. The goal is to get the light to turn solid, which indicates the infrared beam is perfectly hitting the other sensor.
This process is best done with two people, as one person can watch the indicator light while the other moves the sensor. If you’re working alone, move the sensor in tiny increments and check the status light after each adjustment. Once the light turns solid, tighten the wing nut firmly to lock it into place. Don’t overtighten, as the plastic brackets can crack under too much pressure.
If the light doesn’t turn solid regardless of the angle, check the lens for dust or spiderwebs. A soft, dry cloth is usually enough to wipe away any buildup. If you have tried these steps and the light remains off, the internal electronics of the sensor might be faulty. If you aren’t comfortable working with electrical components or the mounting hardware, contact a professional garage door technician to inspect the wiring.
Check the wiring connections
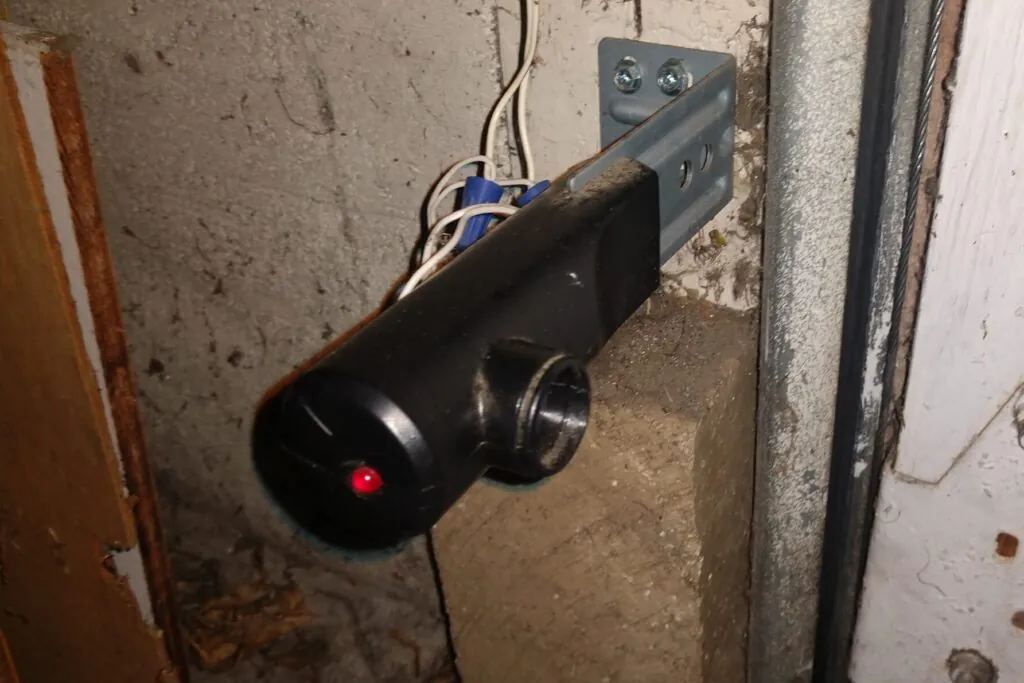
This fix is necessary if the indicator light is completely dark even after you have cleaned the lens and checked the alignment. Start by looking at the back of your garage door motor unit to see where the two sensor wires are attached. Ensure these wires are pushed fully into the terminal ports and that the metal tips aren’t bent or broken. A loose wire here is a common mistake that prevents the system from receiving any signal.
Follow the wires from the motor down to the sensors near the floor. Look for any spots where the wire might be pinched, stapled too tightly, or frayed. If you find a break, you’ll need to strip the wire ends and reconnect them properly.
If the wire is damaged beyond repair, you’ll need to replace the wire run entirely. This is a simple task if you have basic hand tools, but be careful not to damage the motor terminals while pulling the old wire out.
If you have verified that the wires are tight and undamaged but the light is still off, the internal fuse or the board on the motor itself might be the issue. This is the point where you should stop and call a professional. Never attempt to open the motor housing or touch the internal high-voltage capacitors, as this carries a risk of electrical shock. A qualified technician has the proper tools to test the board safely.
Replace the sensor units
When alignment, cleaning, and wiring checks fail to restore a solid light, the sensors may be defective. This fix is for cases where the hardware is physically broken or the internal electronics no longer emit a signal. Replacing the units is a straightforward process, but it requires buying the exact model compatible with your specific garage door opener.
To replace them, remove the old sensors from their brackets and disconnect the wires. Mount the new sensors in the same location, ensuring they’re at the same height as the originals. Reconnect the wires to the motor terminals exactly as the old ones were positioned. Once installed, perform the alignment process again to ensure the beam is clear.
If you’re unsure about the model number or the wiring compatibility, consult the manual that came with your garage door opener. Using the wrong sensor model will prevent the system from working correctly and could leave your door unable to close. If you aren’t comfortable with basic electrical work or mounting, a garage door service company can perform this replacement to ensure safety compliance.
Avoid these common mistakes
- Don’t use water to clean the lenses: Moisture can seep into the sensor housing and cause internal corrosion, which permanently kills the electronics.
- Don’t ignore the status light colors: People often confuse the power light with the signal light; a blinking green light usually means a signal failure, while no light at all means a power failure.
- Don’t overtighten the mounting screws: The plastic brackets are fragile, and cracking them will make it impossible to keep the sensors aligned, costing you a full bracket replacement.
- Don’t bypass the sensors: Never wire the sensors together or disable them to make the door close, as this removes a critical safety feature meant to prevent injury to people or damage to property.
Keep the sensors working
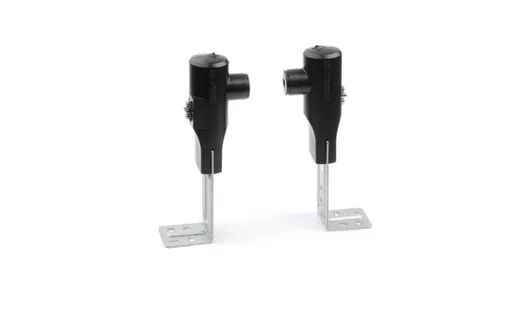
If you find yourself constantly adjusting the sensors, you may need to secure the mounting brackets more permanently. Vibrations from the door can slowly shift the sensors out of alignment over time. Check your current setup and compare it to the table below to see if you need a more stable mounting method.
| If you’re doing this | Do this instead | Why |
|---|---|---|
| Mounting on drywall | Mount on a wooden block | Wood provides a firmer grip for screws |
| Using loose zip ties | Use metal mounting brackets | Metal prevents the sensor from wobbling |
| Ignoring the floor gap | Keep sensors no higher than 6 inches from floor | Ensures the safety beam detects objects at the required height |
| Placing in direct sun | Use a small plastic shade | Prevents sunlight from blinding the receiver |
Frequently asked questions
Can I fix a garage door sensor without tools?
You can often fix a sensor without tools by realigning the bracket or cleaning the lens. Simply push the bracket until the light turns solid or wipe the lens with a soft cloth. If these steps fail, you may need professional inspection.
Why is my garage door light flashing 10 times?
A flashing light usually indicates that the safety sensors are misaligned or the beam is blocked. The number of flashes acts as a diagnostic code for your specific model. This interruption prevents the door from closing to ensure safe operation.
How long do garage door sensors last?
Most garage door sensors can last for a long time if they’re kept clean and free from physical damage. The lifespan depends heavily on the environment, as humidity and extreme temperatures can degrade internal components. If your system is aging and experiencing frequent signal drops, replacing the sensor pair is often more reliable.
Is it safe to leave the garage door open if sensors fail?
It isn’t safe to leave the door open if the sensors are malfunctioning, as this leaves your home vulnerable. While holding the wall button may close the door on some systems, this bypasses essential safety features. Treat sensor failure as an urgent repair.
What happens if I keep using a broken sensor?
If you continue to use a system with broken sensors, you risk the garage door closing on an object, a pet, or a person, which can cause significant damage or serious injury. Modern garage door openers are designed to stop and reverse if the beam is broken, but they can’t do this if the sensors are malfunctioning. Always prioritize fixing the safety system before relying on the door for daily use.
How often should I check sensor alignment?
Check your sensor alignment if the door hesitates or refuses to close. A quick visual check confirms the status light is steady while the door is idle. Perform a check immediately if the door hesitates or refuses to close.
Conclusion
Regular maintenance will keep your system running smoothly. If you have followed these steps and the sensors still won’t function, it’s time to contact a local garage door professional. They have the experience to diagnose hidden wiring faults or motor board issues that are beyond the scope of basic troubleshooting.