When your air conditioner stops performing at its peak, navigating emerson quiet kool troubleshooting steps can feel overwhelming, but most issues stem from common maintenance lapses or simple setting errors. Whether you’re dealing with a unit that refuses to power on, a compressor that cycles too frequently, or a lack of cold air, identifying the root cause systematically saves time and prevents unnecessary service calls. By understanding the mechanical and electrical components of your machine, you can often restore comfort to your home without professional assistance.
Key Takeaways
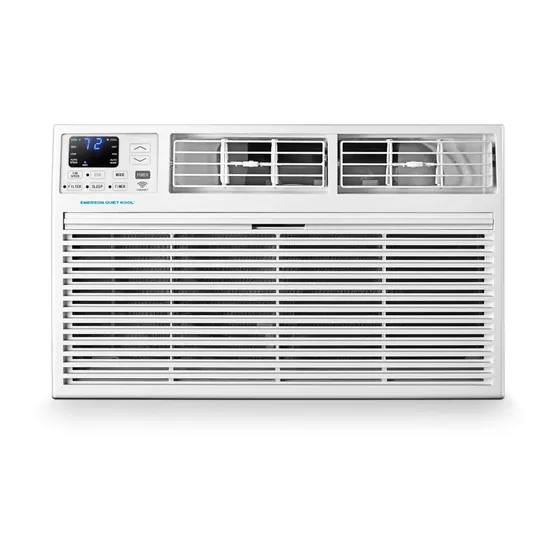
- Clean or replace air filters every 30 days during peak summer usage to ensure proper airflow.
- Verify that the power cord is securely plugged into a grounded wall outlet and not a damaged extension cord.
- Check the thermostat settings to ensure the target temperature is at least 5 degrees lower than the current room temperature.
- Inspect the exterior coils for debris, dust, or bent fins that may obstruct heat exchange.
- Reset the unit by unplugging it for 60 seconds to clear temporary electronic control board glitches.
Safety: Inside a mains-powered machine, the parts behind the outer cover can hold a dangerous electrical charge even after it has been unplugged — that’s why they sit behind a cover. Opening the housing, or testing or replacing anything behind it, is a job for a qualified technician, never a home repair.
Emerson Quiet Kool Power Troubleshooting
If your unit is completely unresponsive, the issue is usually related to the power supply or the internal control board. First, check your home’s circuit breaker panel to ensure the switch hasn’t tripped. If the breaker is fine, inspect the power cord for signs of fraying or damage. Electrical safety is paramount, so never attempt to repair a damaged plug yourself.
Is the unit receiving power?
If the display remains blank, check the reset button located on the plug itself. Many Emerson Quiet Kool models use an LCDI plug that features a built-in test and reset mechanism. If the light on the plug is off, press the reset button. If the light doesn’t turn on, the outlet may be faulty. Test the outlet with a small lamp to confirm it provides power.
| Problem | Potential Cause | Immediate Action |
|---|---|---|
| Blank Display | Tripped Breaker | Reset the circuit breaker in the panel |
| No Power | Faulty Wall Outlet | Test outlet with a different appliance |
| Unresponsive Controls | Frozen Logic Board | Unplug unit for one full minute |
| Plug Light Off | Tripped Safety Plug | Press the Reset button on the plug |
Addressing Cooling Performance Problems
When the unit runs but fails to cool the room, it’s often due to restricted airflow or an incorrect thermostat calibration. The air conditioner functions by moving heat from the inside to the outside. If that cycle is blocked, the room will remain warm. Start by examining the evaporator coils located behind the front grille.
Why is the air not cold?
Dust buildup on the coils acts as an insulator, preventing the refrigerant from absorbing heat effectively. Use a soft brush attachment on a vacuum to gently remove surface debris. Additionally, ensure that the air filter isn’t clogged. A dirty filter restricts the volume of air passing over the cooling coils, which can cause the internal components to ice up, further reducing cooling capacity.
Understanding Compressor Cycling
The compressor is the heart of your cooling system. If you hear it clicking on and off rapidly, a condition known as short cycling, the unit may be undersized for the space or experiencing an electrical fault. If the unit is too large for the room, it will cool the air near the thermostat too quickly, causing the system to shut down before the rest of the room reaches the desired temperature.
Is the thermostat sensor accurate?
The thermostat sensor is typically located near the intake vent. If it’s pushed against the cold coils, it will falsely sense that the room is cool and shut off the compressor prematurely. Carefully adjust the sensor so it sits in the path of the intake air without touching any metal parts. Proper placement is essential for maintaining a consistent, comfortable environment.
Troubleshooting Unusual Noises
Air conditioners naturally make noise, but rattling or grinding sounds indicate a mechanical issue. A loose front panel or a vibrating window frame is the most common cause of rattling. Check that all screws are tightened and that the unit is securely seated in the window or wall sleeve.
Dealing with mechanical vibrations
If you hear a high-pitched squeal, the fan motor bearings may be failing or the fan belt—if applicable—might be loose. For internal grinding, turn the unit off immediately and contact a professional. Attempting to repair a motor without proper training can void your warranty and lead to further damage. Regular cleaning of the fan blades can prevent buildup that creates an unbalanced, noisy operation.
| Noise Type | Likely Source | Recommended Solution |
|---|---|---|
| Rattling | Loose Cabinet Screws | Tighten all exterior panel fasteners |
| Humming | Fan Motor Bearing | Clean the fan and check for obstructions |
| Clicking | Relay or Compressor | Perform a hard reset of the unit |
| Squealing | Fan Belt/Motor | Inspect fan path for debris |
Managing Water Drainage Issues
Water dripping inside the home is a common concern during humid weather. Emerson Quiet Kool units are designed to sling condensate onto the outdoor coils to assist with cooling and evaporation. If the unit isn’t tilted slightly toward the outside, water will pool inside the chassis and leak into the room.
How to fix leaks?
Ensure the air conditioner is installed with a very slight downward pitch toward the exterior of the house. You can verify this using a level. Furthermore, check the drain plug at the bottom of the unit. If it’s clogged with debris or algae, water can’t escape through the rear, leading to internal overflow. Clear the drain hole to allow proper water flow.
Cleaning and Maintenance Schedules
Consistent maintenance is the best form of troubleshooting. By following a structured schedule, you prevent minor issues from becoming major repairs. The Environmental Protection Agency notes that regular maintenance of cooling equipment is essential for maintaining indoor air quality and efficiency. Keep a log of when you clean your filters and inspect the coils to ensure you stay on track.
Seasonal care checklist
- Monthly: Vacuum the filter and wipe down the intake grille.
- Bi-Annually: Inspect the outdoor coils for bent fins or blockage.
- Pre-Season: Check window seals for gaps that allow warm air infiltration.
- Post-Season: Cover the exterior unit to protect it from harsh winter weather.
Troubleshooting Remote Control Issues
If the remote control is unresponsive, the problem is rarely the unit itself. Begin by replacing the batteries with fresh, high-quality alkaline cells. Ensure there’s a clear line of sight between the remote and the infrared receiver on the front panel of the air conditioner.
Remote connectivity tips
- Check for battery corrosion inside the remote battery compartment.
- Ensure no physical obstructions are blocking the signal.
- Verify that the remote is set to the correct mode (Cool, Fan, or Auto).
- If the remote remains unresponsive, try to operate the unit using the manual control buttons on the front panel to confirm the air conditioner’s receiver is functional.
Addressing Error Codes
Modern Emerson Quiet Kool units feature digital displays that show error codes when a fault is detected. These codes are designed to pinpoint specific failures. Common codes often relate to temperature sensor errors or communication failures between the control board and the display.
Interpreting common display codes
- E1/E2: These usually indicate a failure of the indoor or outdoor temperature sensor.
- E4: Often signals a display board communication error.
- P1: Sometimes indicates that the internal condensate pan is full and needs drainage.
Warning: If you encounter an electrical error code, don’t attempt to bypass the safety controls. Unplug the unit and consult the user manual specific to your model number to see if a simple hard reset will clear the error. If the code persists after a reset, the internal thermistor sensor may require replacement by a qualified technician.
Frequently Asked Questions
Why does my unit smell musty?
A musty smell usually indicates mold or mildew growth on the internal cooling coils or in the condensate pan. This occurs when moisture remains trapped inside the unit after it turns off. To fix this, clean the coils with an approved anti-microbial cleaner and ensure the unit is tilted correctly to allow water to drain away from the internal components.
How often should I clean the filter?
You should clean your air filter at least once every 30 days during periods of heavy use. If you live in a dusty environment or have pets, you may need to clean it every two weeks. A clean filter is the most important factor in maintaining airflow and preventing the evaporator coils from freezing over during hot, humid days.
What causes the unit to ice up?
Icing is typically caused by restricted airflow, a dirty filter, or low refrigerant levels. If the filter is clean and the vents are unobstructed, you may have a refrigerant leak, which requires professional repair. Never scrape ice off the coils with a sharp tool, as this can puncture the tubing and cause a permanent leak of refrigerant gases.
Can I run the unit in the rain?
Yes, Emerson Quiet Kool units are designed for outdoor use and are built to withstand rain. However, ensure that the unit is installed securely and that no water is leaking into the interior of the home through the window frame. If you notice water pooling near electrical wires or outlets during a storm, turn off the unit immediately for your safety.
Why is the room temperature inconsistent?
Inconsistent cooling is often caused by the thermostat being affected by external heat sources, such as direct sunlight or nearby appliances like lamps or televisions. Ensure the unit isn’t located in a spot where the sensor picks up heat from these sources. Additionally, verify that your room size doesn’t exceed the BTU capacity specified for your model.
Conclusion
If you have performed these troubleshooting steps and the unit still fails to function, your next step should be to locate your original purchase receipt and contact the manufacturer’s customer support line for warranty verification. Having your model number and serial number ready will expedite the process and help them determine if a repair or replacement is covered.