Dealing with a vacuum sealer that refuses to pull a vacuum or seal properly is a common household frustration, but performing foodsaver vacuum sealer troubleshooting at home is often straightforward. Most issues stem from simple maintenance gaps, improper bag placement, or worn-out internal components. By methodically checking your machine’s seals, gaskets, and moisture levels, you can typically restore full functionality without needing professional repair services or a replacement unit.
Key Takeaways
- Inspect the rubber gaskets for debris, cracks, or misalignment before every use.
- Ensure bags are positioned correctly inside the vacuum channel to prevent air leaks.
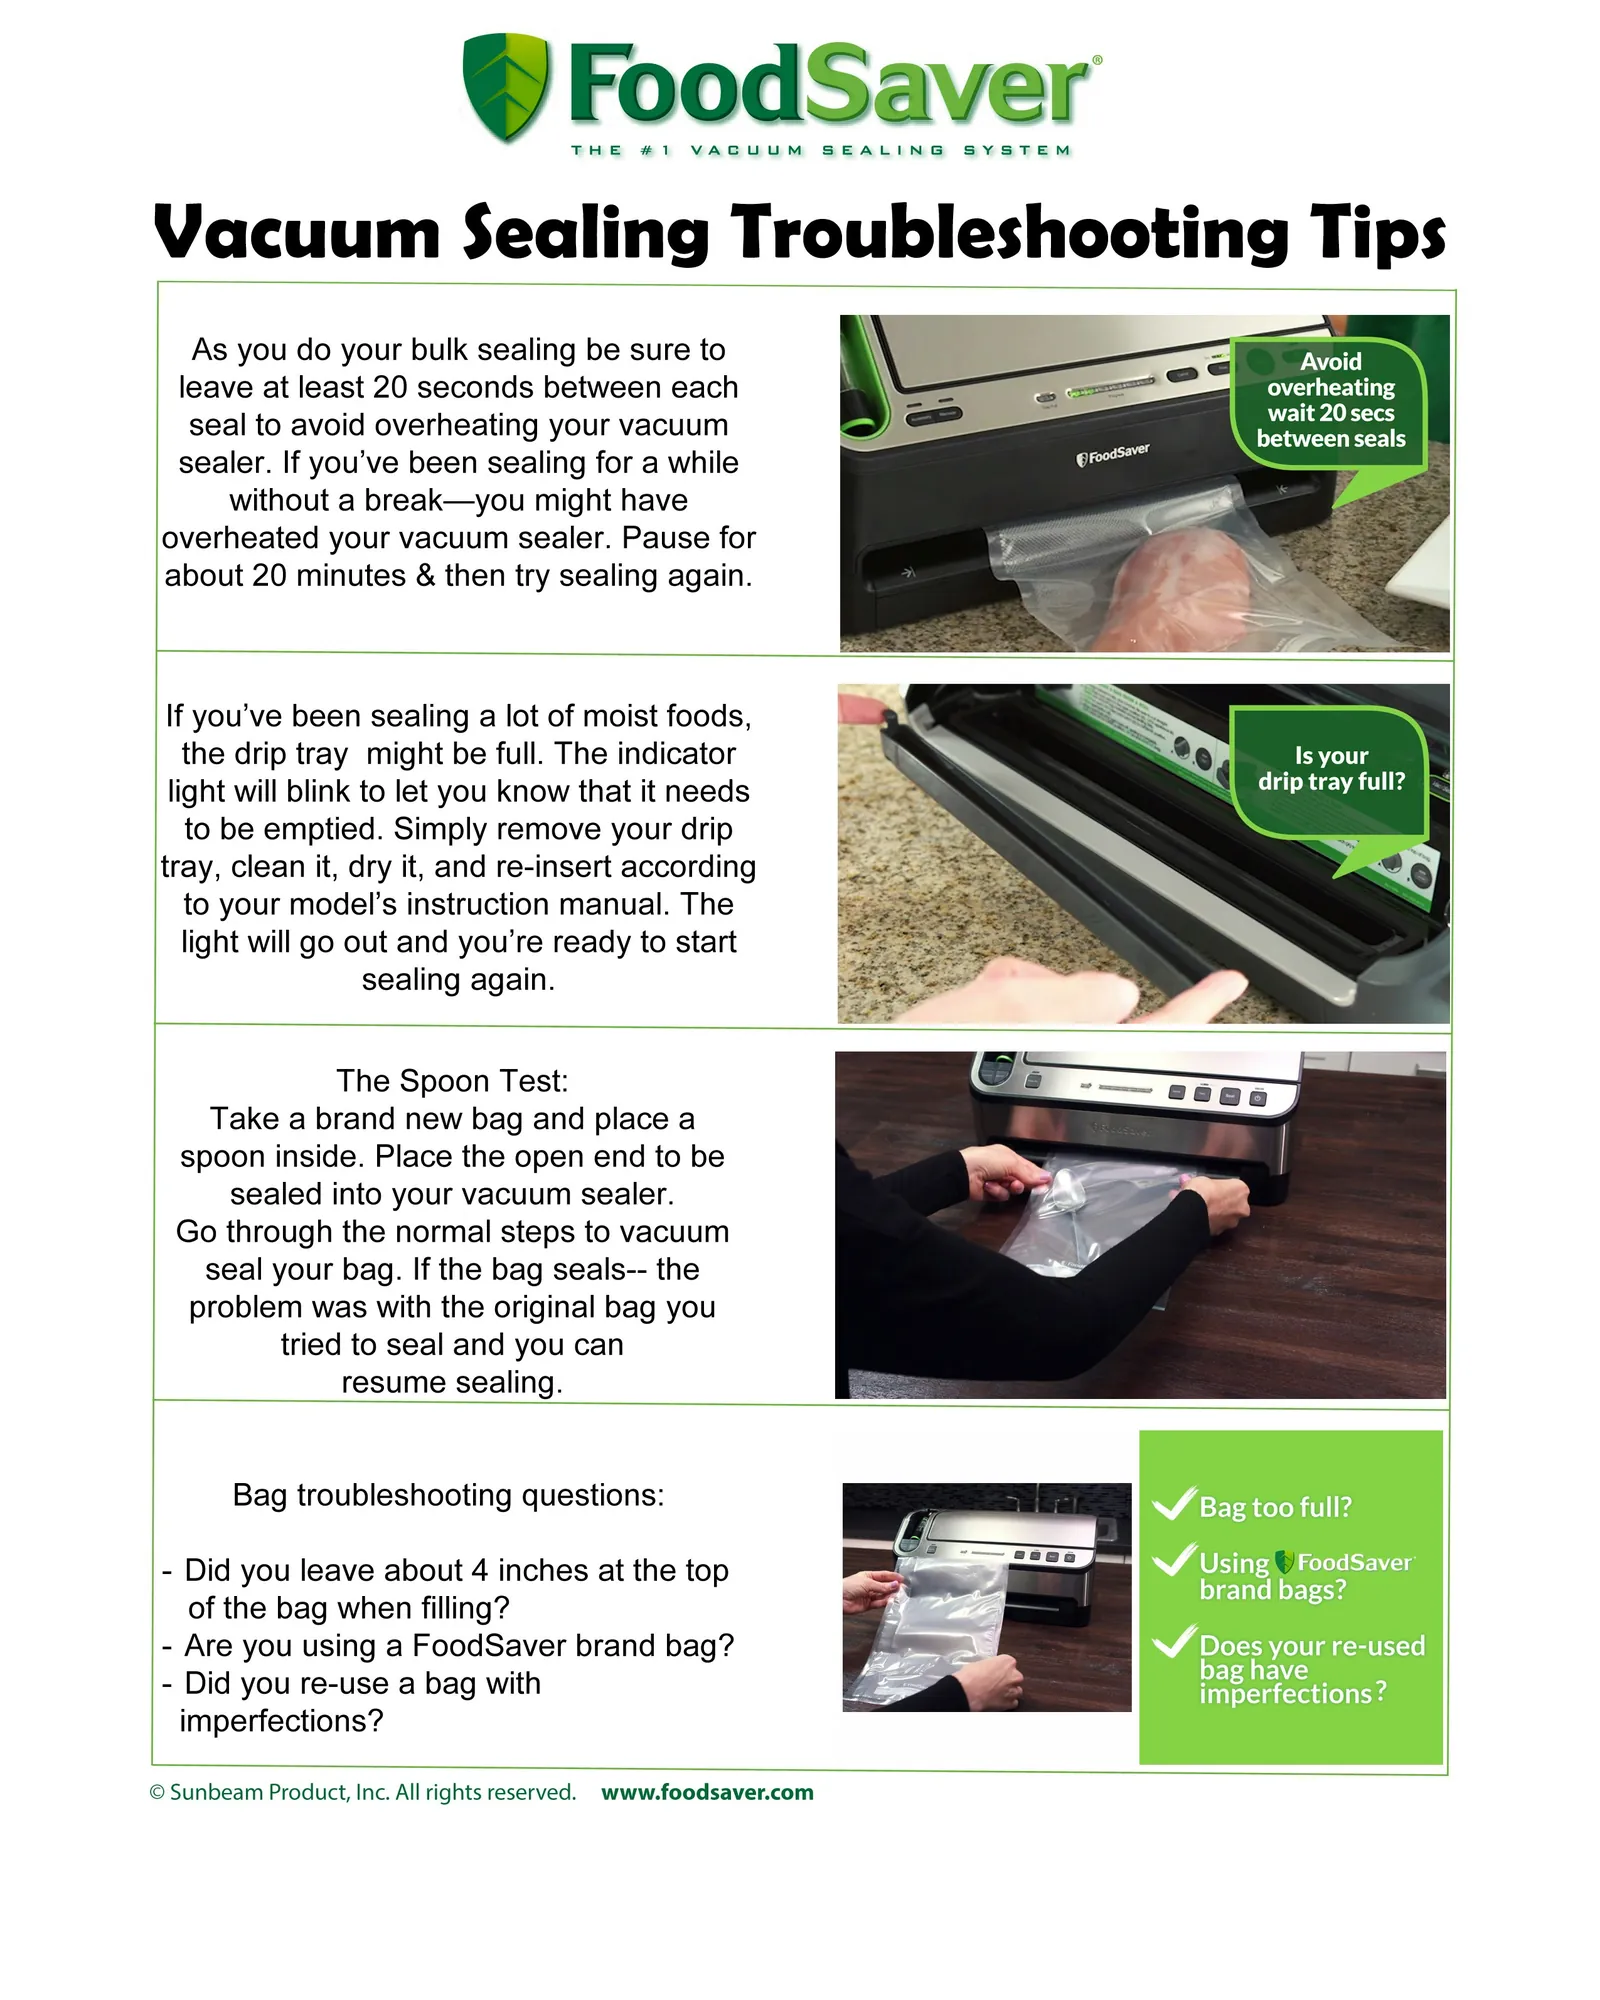
- Always allow the machine to cool down for 20-30 seconds between consecutive sealing cycles.
- Moisture or liquid in the bag is the most frequent cause of failed seals.
- Clean the removable drip tray regularly to avoid clogging internal sensors.
Why Is My Sealer Not Working?
When your unit fails to initiate the vacuum process, the culprit is usually the vacuum sensor or the door latch mechanism. If the machine doesn’t recognize that the lid is closed, it won’t engage the pump. Check the latch for any physical obstructions or debris that might prevent a firm, airtight lock. Additionally, if you’re using generic or non-compatible bags, the micro-textured surface may be too smooth or too thick for the vacuum pump to pull air effectively.
Troubleshooting Common FoodSaver Vacuum Sealer Issues
| Problem | Likely Cause | Solution |
|---|---|---|
| Pump runs but no vacuum | Air leak in bag | Check for punctures or holes |
| Lid won’t lock | Debris in latch | Clean with a soft brush |
| Sealer turns off abruptly | Overheating | Wait 20 minutes to reset |
| Bag melts during sealing | High heat setting | Reduce heat or use thicker bags |
Inspecting Your Rubber Gaskets
The rubber gaskets are the heart of your vacuum sealer’s performance. These strips create the airtight seal required to pull a vacuum. Over time, these gaskets can become brittle, lose their shape, or accumulate sticky food residue.
If the seal is compromised, air will continue to seep into the bag, preventing the machine from reaching the necessary pressure. Use a damp cloth to wipe the gaskets down after every use, and check for small tears that might necessitate a replacement part.
Is My Bag Positioned Correctly?
Even a high-end machine will fail if the bag isn’t inserted into the vacuum channel properly. The open end of the bag must lie flat, free of wrinkles, and positioned far enough into the channel to cover the vacuum intake port.
If the bag is folded or creased, air will leak through the channels, causing the pump to run indefinitely without ever removing the air. Ensure the bag is centered and that the textured side is facing down for most standard models.
Managing Moisture and Liquids
Excess liquid is the enemy of a perfect seal. When moisture is pulled into the vacuum channel, it can contaminate the sealing strip and prevent the plastic from melting together correctly. If you’re sealing items like raw meat or marinated vegetables, consider pre-freezing them for 1-2 hours until they’re firm. This process, known as flash freezing, prevents juices from being drawn toward the seal area.
Alternatively, use a paper towel inside the bag near the opening to catch any stray droplets. According to the USDA Food Safety and Inspection Service, maintaining proper storage conditions is essential for quality, and a failed seal can lead to freezer burn.
Does the Sealing Strip Need Care?
The sealing strip is the heating element that melts the plastic to create a permanent bond. If this strip is dirty, burnt, or damaged, the seal will be weak or inconsistent. If you notice the bag isn’t sealing at all, check the strip for any melted plastic residue.
You can gently clean the strip with a soft cloth dipped in rubbing alcohol. If the strip appears charred or has visible gaps, it may be time to source an official replacement from the manufacturer to ensure safety and performance.
Handling Overheating and Duty Cycles
Vacuum sealers aren’t designed for industrial, non-stop use. If you’re processing a large harvest or bulk-buying meat, you must respect the duty cycle. Most consumer-grade units require a rest period of at least 20 to 30 seconds between seals to allow the heating element to cool.
If the machine feels hot to the touch, stop immediately and leave the lid open for 15 minutes. Forcing the machine to work while overheated can trip the internal thermal fuse, which may render the unit permanently inoperable.
Troubleshooting the Vacuum Pump
If the pump is running but the air isn’t moving, check for internal blockages. Tiny food particles, crumbs, or dust can enter the intake port and obstruct the flow. Some models feature a removable drip tray that, when removed, provides access to the intake area.
Use a vacuum cleaner attachment or a blast of compressed air to clear the path. If you hear a grinding or high-pitched whining noise, the pump motor may be failing, which usually indicates the end of the unit’s lifespan.
Tips for Better Vacuum Results
- Double Seal: For items with sharp edges or liquid content, run the seal cycle twice to ensure a redundant barrier.
- Proper Length: Always leave at least 3 inches of space between the food and the bag opening to allow for a secure grip.
- Clean Surfaces: Wipe the counter and your hands before handling bags to keep the sealing area free of grease.
- Storage Matters: Store your unit with the lid unlocked to avoid compressing the sealing gaskets over long periods of inactivity.
Identifying Incompatible Bag Types
Not all bags are created equal. Vacuum sealers rely on the embossed texture of the bag to create air channels. If you use standard, smooth storage bags, the vacuum sealer will pull the two sides together instantly, sealing off the air before it can be removed.
Ensure you’re using bags specifically labeled for vacuum sealing systems. If you’re unsure, test a bag by manually creating a vacuum; if the sides collapse and seal the opening before the air is gone, the bag isn’t compatible with your device.
Advanced Maintenance Procedures
| Component | Maintenance Frequency | Action |
|---|---|---|
| Sealing Strip | Every 20 uses | Clean with alcohol |
| Rubber Gaskets | Monthly | Inspect for cracks |
| Drip Tray | After every use | Wash with warm water |
| External Housing | Quarterly | Wipe with damp cloth |
Preventing Future Vacuum Failures
To keep your machine running for years, treat it as a precision instrument. Avoid placing heavy items on top of the lid, as this can misalign the locking mechanism. If you frequently seal liquids, consider upgrading to a machine with a dedicated moist/wet mode, which adjusts the sealing time and pressure to compensate for moisture. Regularly checking for worn components like gaskets and sealing strips will prevent small problems from turning into total system failure.
Related guides
- Sebo vacuum troubleshooting
- Rainbow Vacuum Troubleshooting: Expert Tips
- Quantum X Vacuum Troubleshooting: Quick Fixes
Frequently Asked Questions
Why does the bag lose vacuum after a few days?
This usually indicates a “slow leak” caused by a weak seal or a puncture. Check the seal line for wrinkles or folds, which act as channels for air to re-enter. Also, inspect the bag for tiny pinpricks caused by sharp food items like bones or dry pasta. If the seal looks perfect, the bag material itself might be compromised or the vacuum wasn’t fully achieved.
Can I seal liquids like soups or sauces?
Standard vacuum sealers aren’t designed for liquids, as the pump will pull them into the motor. To seal soups, freeze them in a container first, then remove the frozen block and vacuum seal it. Alternatively, use a chamber-style sealer if you frequently need to seal liquids, as these are specifically engineered to handle moisture without damaging the pump or internal electronics.
How do I know if the sealing strip is broken?
If the machine completes the vacuum cycle but the bag doesn’t seal at all, the heating element is likely not reaching the required temperature. Unplug the unit and inspect the strip for obvious breaks, burns, or loose wires. If the strip looks undamaged but the bag remains open, the heating element has likely burned out and requires a professional component replacement.
Why is my machine making a loud grinding noise?
A loud, abnormal grinding sound typically points to a mechanical failure within the vacuum pump motor. This can be caused by debris lodged in the pump or simple wear and tear from years of use. If cleaning the intake area doesn’t resolve the noise, the motor assembly is likely failing, and it’s usually more cost-effective to replace the entire unit.
Is it safe to use generic vacuum bags?
Yes, it’s generally safe to use third-party bags, provided they’re designed for vacuum sealing and have the necessary embossed channels. However, ensure they’re made from food-grade, BPA-free plastic. If you experience frequent failures with generic bags, they may be too thin or lack the structural integrity required to hold a vacuum, suggesting you should switch back to the manufacturer’s recommended brand.
Conclusion
Effective maintenance is the best defense against a malfunctioning vacuum sealer. Start by clearing any debris from the vacuum channel and inspecting your gaskets for signs of wear. If these steps don’t restore the suction, verify that your bags are compatible and that you’re allowing the machine sufficient cool-down time between uses. Consistent care will ensure your sealer remains a reliable tool in your kitchen for many years to come.