To fix a leaking or running glacier bay dual flush toilet troubleshooting steps should start with checking the water level in the tank. If the water is too high, it flows into the overflow pipe and makes the unit run constantly. You can usually fix this by turning the adjustment screw on the fill valve to lower the float. If the water level is already correct, the issue is likely a worn flapper seal or a faulty flush button cable. These parts can wear down over time and stop creating a tight seal.
Why dual flush toilets leak
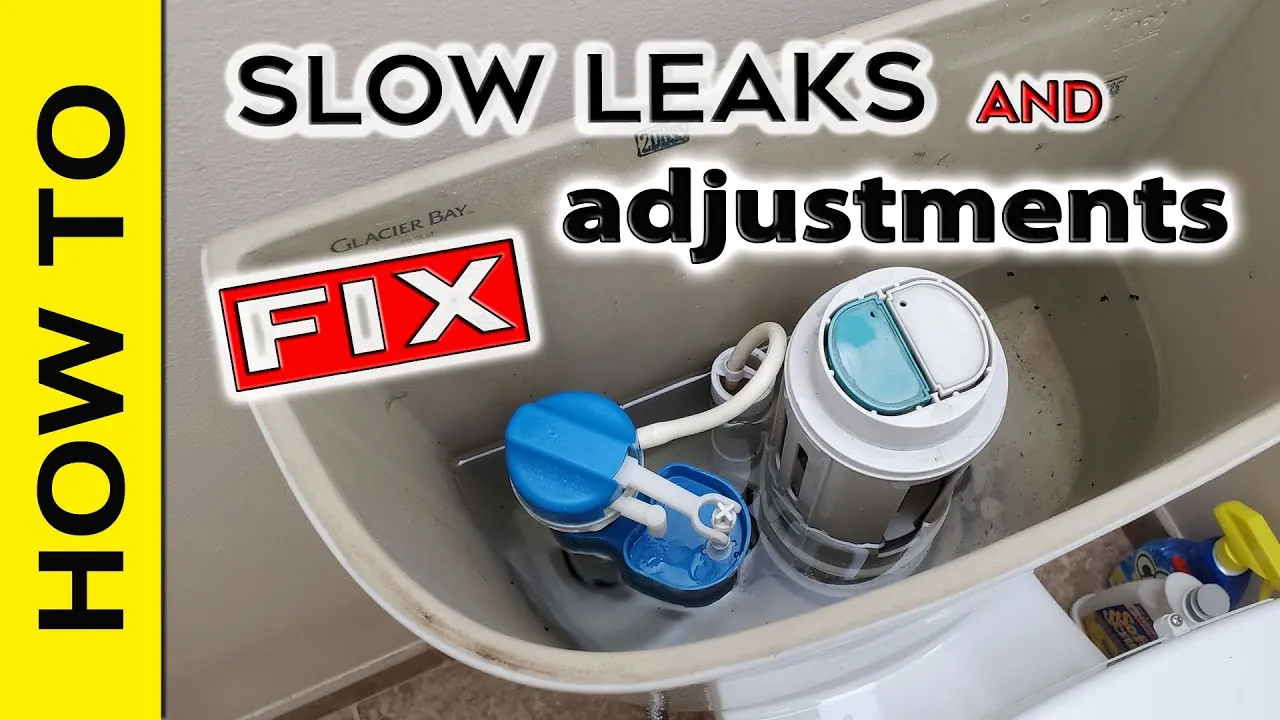
When your toilet runs non-stop, it’s usually because the fill valve can’t sense that the tank is full. The most common cause is a misaligned float that sits too high. When the water rises above the open top of the overflow pipe, it drains directly into the bowl.
This creates a cycle where the valve constantly adds fresh water to replace what is lost. You can check the manufacturer’s manual for your specific model to see the correct water level line, which is often marked on the inside of the tank.
Another frequent cause involves the flush mechanism itself. Dual flush systems use cables or rods to lift the flush valves when you press the buttons. If these cables are too tight, they prevent the seal from sitting flat at the bottom of the tank. If they’re too loose, the buttons will feel mushy or fail to trigger a flush at all.
Over time, the rubber gaskets at the base of the tank can also become brittle or collect mineral buildup. This buildup prevents the seal from closing perfectly, allowing water to seep out slowly. You can find detailed maintenance and care instructions on the official website to help you identify the specific part numbers for your unit.
Adjust the fill valve float
This fix is for you if the toilet makes a hissing sound even when no one has used it recently. Most models feature a plastic fill valve on the left side of the tank with a sliding float cup. To adjust it, locate the screw or the locking clip on the side of the valve body. Turn the screw clockwise to lower the float, which stops the water from filling as high.
Test the fix by flushing the toilet and watching the water level. It should stop filling about an inch below the top of the overflow pipe. If the water still rises too high, turn the screw another half-turn and try again.
The most common mistake is adjusting the float while the tank is full. You must flush first to let the system reset. If you adjust while the valve is already pressurized, you risk snapping the adjustment screw or stripping the plastic threads.
If the water level is perfect but the toilet still runs, the leak is likely at the bottom of the tank rather than the fill valve. Check the flapper seal. If the water level is below the overflow pipe but the valve keeps cycling, the flush valve seal at the bottom of the tank has failed and needs to be replaced.
Reset the dual flush cable tension
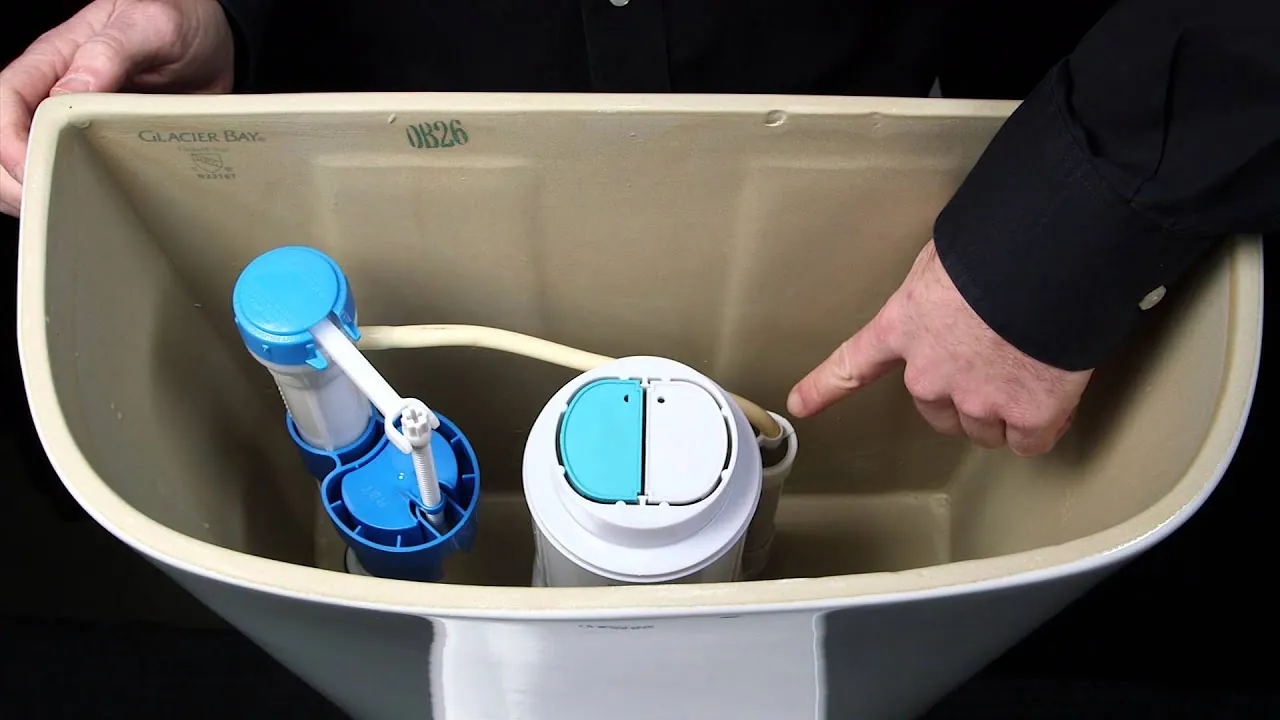
Use this method if the flush buttons feel stiff or if the toilet runs because the flush valve isn’t seating properly. The dual flush buttons are connected to the flush valves by short cables. If these cables have too much tension, they pull the valve up slightly, breaking the water seal. You’ll need to unscrew the flush button assembly from the tank lid to access the cable connectors.
Once the lid is off, look for the small plastic clips that hold the cables in place. If the cables are tight, move the clip to a lower notch to give the cable more slack. If the cables are too loose, move the clip to a higher notch.
A common mistake is adjusting both cables to the exact same length. Instead, test each button individually. If the half-flush button fails to trigger, that specific cable needs more tension. If the full-flush button stays depressed, it likely needs less.
After moving the clip, replace the lid and press both buttons to ensure they click firmly. If the buttons still feel stuck or don’t snap back into place, the internal spring mechanism may be damaged. In such cases, you should contact a professional plumber to replace the entire flush valve assembly, as this requires removing the tank from the bowl.
Replace the flush valve seal
If the toilet continues to leak after you have checked the water level and cable tension, the rubber seal at the base of the tank is likely worn out. This fix is for those who are comfortable turning off the water supply and draining the tank completely. You must first turn the shut-off valve behind the toilet clockwise until it stops. Flush the toilet to empty the tank, then use a sponge to remove the remaining water from the bottom.
Once the tank is dry, you can reach inside to twist and remove the flush valve canister. The rubber seal is usually located at the very bottom of this canister. Inspect the rubber for cracks, tears, or hard mineral deposits. If you see damage, replace the seal with an identical part from the manufacturer.
Before starting, check the condition of the mounting bolts beneath the tank. If the nuts are heavily corroded or fused to the bolts, don’t force them with a wrench. Applying too much torque to rusted hardware often cracks the porcelain base, turning an inexpensive seal replacement into a full toilet installation.
Troubleshooting common Glacier Bay dual flush toilet mistakes
Don’t use harsh chemical cleaners inside the tank. These chemicals eat away at rubber seals and plastic parts, causing them to fail years before their time. If you notice a buildup, use white vinegar instead of industrial-strength bleach.
Avoid over-tightening plastic nuts on the fill valve. These components are designed for hand-tightening only. Using a wrench often snaps the delicate threads or cracks the porcelain tank base. If the valve still leaks after a firm hand-tightening, the rubber gasket is likely misaligned or worn out and requires replacement rather than more force.
Don’t ignore a constant running sound. A leak the size of a pencil lead wastes over 200 gallons of water per month. This inflates your utility bill and forces your sewer system to process unnecessary volume.
Avoid using “drop-in” tank tablets. These tablets contain concentrated chlorine that sits against internal components. This leads to the rapid decay of the flapper and flush gaskets, turning a minor maintenance task into a full component replacement.
Prevent future toilet leaks
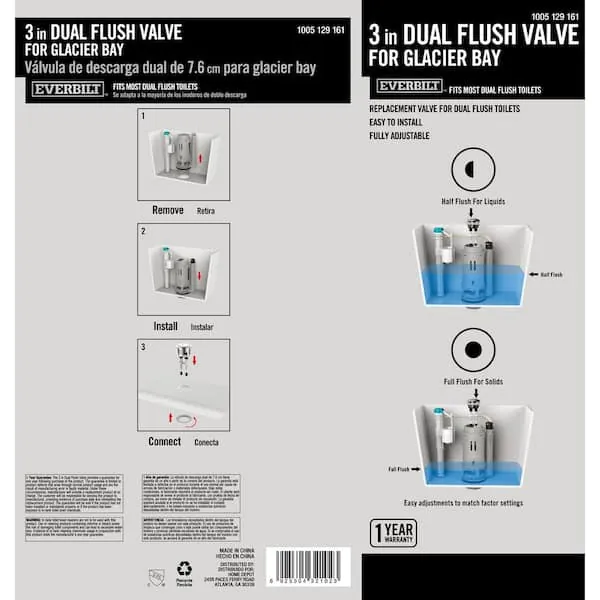
To keep your dual flush system working well, you should perform a basic inspection every six months. Compare your current habits with the recommended maintenance steps below to ensure your system stays in good condition.
| If you’re doing this | Do this instead | Why |
|---|---|---|
| Using bleach tablets | Use exterior bowl cleaners | Tablets damage internal rubber seals |
| Ignoring a slow leak | Tighten or replace the seal | Small leaks waste significant water |
| Forcing a stuck button | Check the cable tension | Force can snap the plastic linkage |
| Leaving hard water buildup | Clean seals with white vinegar | Mineral deposits prevent a tight seal |
Most leaks stem from the flapper or the flush valve gasket. If you hear a faint hissing sound or see ripples in the bowl, the seal has failed. A silent leak can waste over 200 gallons of water per month.
To test for a hidden leak, add six drops of food coloring to the tank. Wait 20 minutes without flushing. If color appears in the bowl, your flush valve gasket is compromised. Replace it immediately to save on your utility bill.
Frequently asked questions
How long should a dual flush valve last?
A standard flush valve seal typically lasts three to five years depending on your local water quality. Hard water creates mineral deposits that cause the rubber to become brittle and fail prematurely. If you notice a ghost flush, it’s time to replace the seal.
Is it safe to repair the toilet myself?
Yes, basic adjustments are safe if you turn off the water supply valve first. The primary risk is cracking the porcelain tank by applying too much force to the hardware. If you encounter rusted bolts or a wobbly tank, contact a professional plumber to avoid potential water damage.
Why do both buttons flush the same amount?
If both buttons trigger a full flush, the cable for the half-flush button is likely disconnected or snapped. Open the tank lid to check if the small cable is still attached to the mechanism. If the cable is broken, you must order a replacement assembly for your specific model.
How do I stop the toilet from making a humming sound?
A humming sound usually indicates the fill valve is struggling to close due to high water pressure or a blocked inlet screen. Try reducing the water pressure at the shut-off valve first. If the noise persists, clean the inlet screen or replace the fill valve diaphragm if it’s worn.
What happens if I use the wrong replacement parts?
Using parts not designed for your specific Glacier Bay model will likely lead to poor seals or malfunctioning buttons. Dual flush systems are highly sensitive to cable length and seal diameter. Always use the part numbers listed in your owner’s manual to ensure a perfect fit for your unit.
Conclusion
If these simple adjustments don’t stop the noise, you shouldn’t hesitate to replace the internal components. Most hardware stores carry universal kits that fit these models perfectly. Once you’ve swapped out the old parts, you’ll enjoy a quiet, efficient bathroom again. Don’t worry if it takes a little patience to get it right.